Melissa Validation: Dynamics 365 Quickstart#
Introduction#
Thousands of businesses trust Melissa’s address verification especially where accuracy, reliability, speed and dependability are concerned. And now Dynamics 365/CE and Power Apps users can enjoy the same awesome solution with Melissa Address Validation.
Fix invalid addresses with an USPS CASS and Canada Post SERP-Certified address matching engine for the most accurate results in the industry.
Convert addresses into the standardized, consistent format for the local postal authority. Handles addresses for 240+ countries and territories.
Speed up data entry with address autocompletion that suggest the proper address as you type.
Enrich address data by filling in missing data, convert addresses into precise latitude and longitude coordinates, and other georeferenced data about any validated street address.
Minimum Sytem Requirements#
Dynamics 365 (v9.1 and higher)
Power Platform (v9.1 and higher)
Activate a 30-day Trial#
This section describes the steps to activate a 30-day trial of Address Validation for Power Apps.
Navigate to the Address Validation for Power Apps application and select the
Product Licensemenu.
Create a new License.
Select
Trialin the License Type field.Fill out the record with the Company and Contact information.
Once you have filled out the required information, click on Save and then Validate License. This will validate the license information with our license servers (requires access to internet, please be patient as it can take up to a minute to complete).
The read-only fields will populate with data and your product key will be displayed in the Product Key field (please take note of your License Expiration Date).

Setup your Melissa API Key#
This section details the steps to obtain and setup your Melissa API key.
Obtain your Melissa API Key#
To use Melissa’s API with Sharp XRM, you need to get in touch Melissa’s sales team.
Once you have obtained the key from Melissa, move on to the next step.
- Keep in mind, only the following Melissa APIs integrated with Dataverse:
Express Entry
Global Address
Personator
Setup your Melissa API Key Application Parameter#
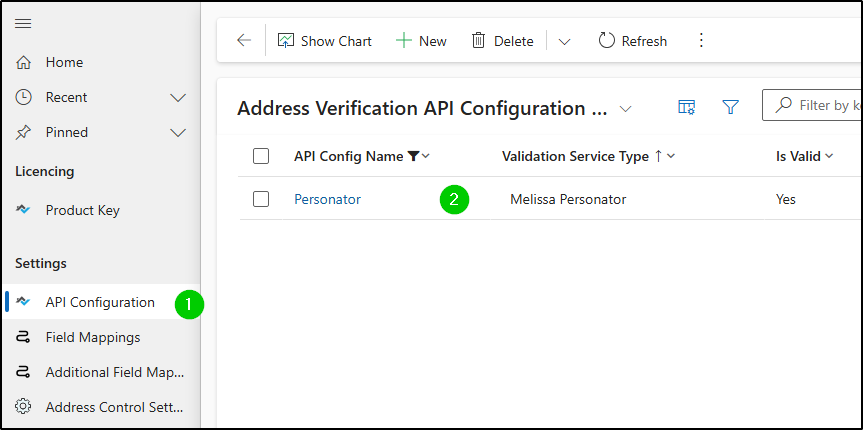
In the navigation bar, go to Address Validation ► Settings ► API Configuration.
Create a new record and enter the information as per your configuration.
Provide the information as follows:
API Configuration Name: A unique name for the configuration. This will be used as an input parameter for the Melissa Express Entry autocomplete control (to tell the control which API key to use).
Validation Service Type: Select the address verification API you want to use: Select the Melissa Express Entry.
Service License Key: Enter your corresponding API key.
Is Valid: after the API configuration is created, click the Validate API Key button in the command bar. This action will validate the API key in the background to confirm the key is functional. If the API Key is invalid, you will get an error message on the screen and the value will remain
No. If it worked, the value will be set toYes.Warning
Known Issue: In some cases, you might get an error message at this step.
Please visit this article regarding the issue, including a workaround to continue.

Configure Express Entry Autocomplete on Model Driven Forms#
In the Power Apps Maker Portal, find the solution containing the entities and forms for which you want to configure Express Entry Autocomplete control.
Open the Account table, and find the form you want to use Address Autocomplete on.
Open the form you want to edit and click on Switch to classic in the command bar.
In the classic configuration screen, add the
Address Street Line 1of the form and click on Change Properties in the ribbon to access the Field Properties screen.In the Display area, uncheck the Display label on form checkbox.
Next go the Controls Tab and add the control named
Melissa Data Express Entry Autocompleteand select the devices where you want the control to be displayed.
Once you have selected the control, you need to provide a value for required properties (identified with a
*in the table below); all the other properties are not mandatory.Property
Description
Field Type
API Configuration Name *
This refers to your API Configuration unique record name.
Static Text Value
Advanced Setting ID
If you are using Advanced Control Settings, you need to put the Identifier of your Advance Setting record here.
Static Text Value
Display Address Fields
The control can display the address fields under the address search control. Set the value to YES to display these fields. This is a legacy feature.
We recommend setting the value to
NOand displaying individual address fields yourself.Single Line of Text
Street *
Column where you want to store the street address.
Single Line of Text
Unit Number
Column where you want to store the Unit or Suite number.
Single Line of Text
City *
Column where you want to store the city.
Single Line of Text
State *
Column where you want to store the state or province name.
Single Line of Text
Zip / Postal Code
Column where you want to store the postal code.
Note: Melissa Express Entry returns the extended zip codes in the USA by default (commonly referred to as zip+4). See the Advanced Control Settings section if you need to disable this features.
Single Line of Text
Country *
Column where you want to store the country.
Note: the country is defaulted to its long name. If you want an ISO2 or ISO3 format, see the Advanced Control Settings section.
Single Line of Text
County
Column where you want to store the county.
Single Line of Text
Full address
Column where you want to store the fully formatted address as a single line of text. Leave empty is you do not need this.
Single Line of Text
Latitude
Column where you want to store the latitude.
Floating Point Number
Longitude
Column where you want to store the longitude.
Floating Point Number
Default Country
When the form is loaded, this country will be selected by default. Enter one country’s ISO 3166-1 alpha-2 code (i.e. US, CA, MX, etc.)
Static Text Value
Display Countries
List of countries that will be available in the user interface for selection.
Type the countries using their ISO 3166-1 alpha-2 code (i.e. US, CA, MX, etc.). To display more than one country, type them by separating them with a comma
,without blank spaces (i.e. US,CA,MX).Static Text Value
Top Countries
These countries will be pinned to the top of the list (most frequently used countries).
Type the countries using their ISO 3166-1 alpha-2 code (i.e. US, CA, MX, etc.). To display more than one country, type them by separating them with a comma “,” without blank spaces (i.e. US,CA,MX).

To set a
Default CountryorTop Country, it must first be added in the Display Countries property as well.If a country is saved on the address column (by a background process) and it is not configured in the Display Countries property, the data will be saved, but it will no appear in the address control.
Static Text Value
Click OK, save the form and publish it.
Open your account and test your control.
Working with Advanced Settings#
Advanced Control Settings allow administrators to configure additional parameters for the address autocomplete control. These parameters are useful for organizations that require their state or provinces to be captured in a specific format. For example, if ISO2 country codes are required, it can be specified in the advanced settings.
To get started, find the Advanced Settings by navigating to the Address Validation for Power Apps application and select the
Address Control Settingsmenu. Click+ Newto create a new record.
Set the required values:
Identifier: Unique Identifier of the Setting. This will be used in the control’s configuration on the form.
API Type: Select Melissa
List of parameters available for Melissa:
Parameter
Possible Values
Description
Return PO Boxes
Yes/NoUS Only. Enables autocomplete control to return PO Boxes along with addresses. By default, it is set to
Yes(i.e. if no setting is present, PO Boxes are returned by Express Entry).Include Extended Postal Code
Yes/NoAllows to add the +4 section of the zip code when available. By default, it is set to
Yes(i.e. if no setting is present, extended postal codes are returned by Express Entry).Country Display
Use ISO2 Country Code
Ex:
CAUse ISO3 Country Code
Ex:
CANUse Long Country Name
Ex:
CanadaAdvanced Setting Screenshot:

Visual Example in a Model Driven Form#

Assign the Required Security Privileges to Users#
Once the configuration is completed, you need to assign the required security roles to your end users to allow them to use the autocomplete controls. Refer to this article for details on how to achieve this.
Configure Melissa Personator#
Create a Melissa Personator API Configuration.
Navigate to the API Configuration.
Create a new API Configuration with Service Type set to
Melissa Personator.See the detailed steps below. Make sure the API key is successfully validated.
Create a Field Mapping.
A field mapping will map your table and fields to values returned by Personator.
Navigate to Field Mappings.
Create a new record.
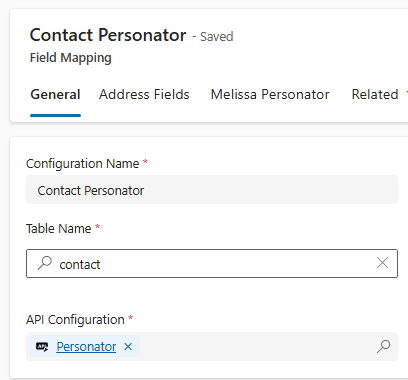
Under the General Tab:
Name the table that will contain your data (We use
Contactin the example.)Pick the API Configuration.
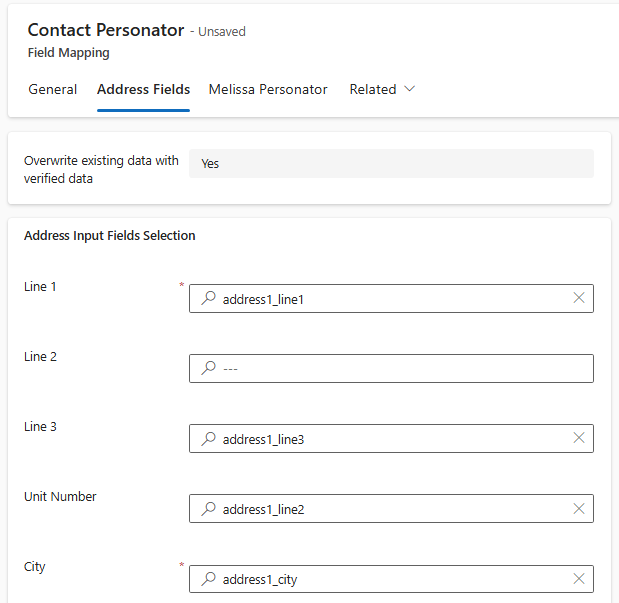
Under the Address Fields Tab:
Pick the fields (or columns) containing the address information.
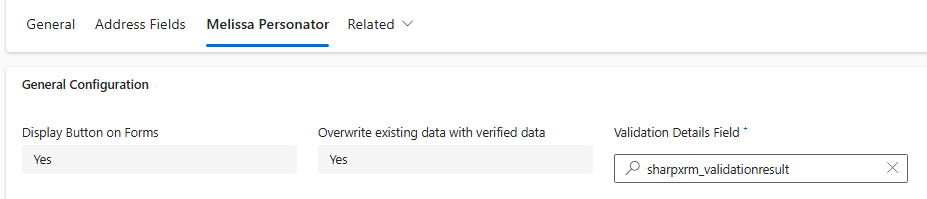
Under the Melissa Personator Tab:
General Configuration Section:
Display Button on Forms: Currently only available for Account and Contact. If set to
Yes, a Personator button will appear on Account or Contact forms.Overwrite existing data with verified data: Defaults to
Yes, it is recommended to NOT change as this is to support a legacy feature that is being deprecated.Validation Details fields: Choose a field name. This can match a field on your table where the results from Personator will be saved.
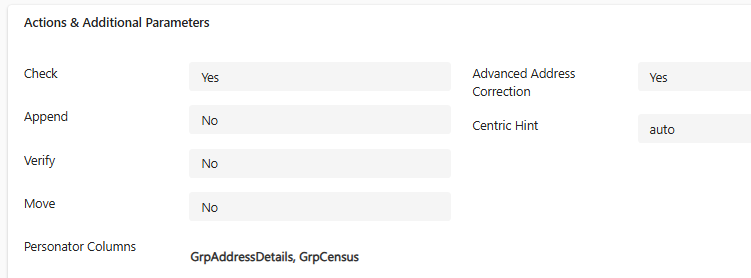
Actions & Additional Perameters Section
Check, Append, Verify, Move: Refers to Melissa Personator’s actions. Enable the ones that you want to use as part of your Personator API Call.
Personator Columns: Refers to the columns that are returned by Personator. To make the request faster, only select the set of columns that you need.
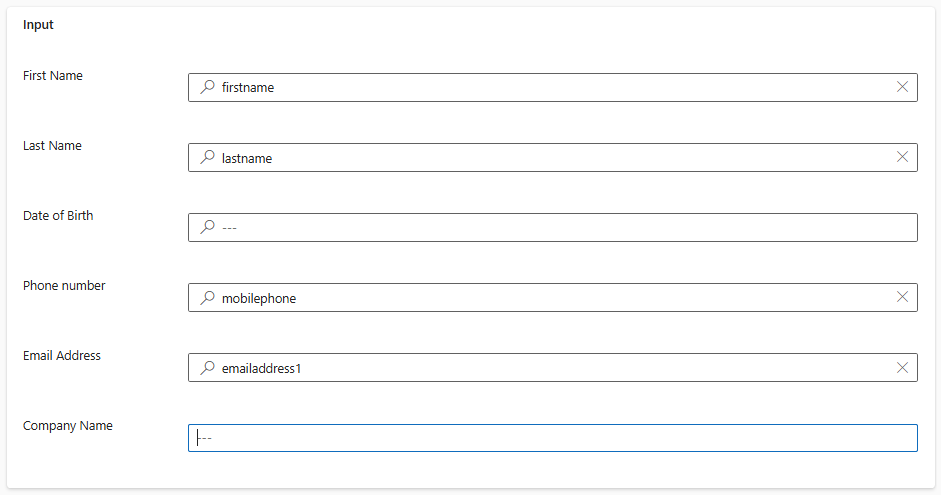
Input Section
Select the fields containing additional input for Personator (name, phone number etc.)
Personator Fields Mapping
If the subgrid is empty, you can click on the
Insert Columnsbutton to populate it. It will be populated will all columns that can possibly be returned by Personator (column API Output Name).Open the Personator output field you need and pick a Dataverse mapping using the
Destination fieldvalue.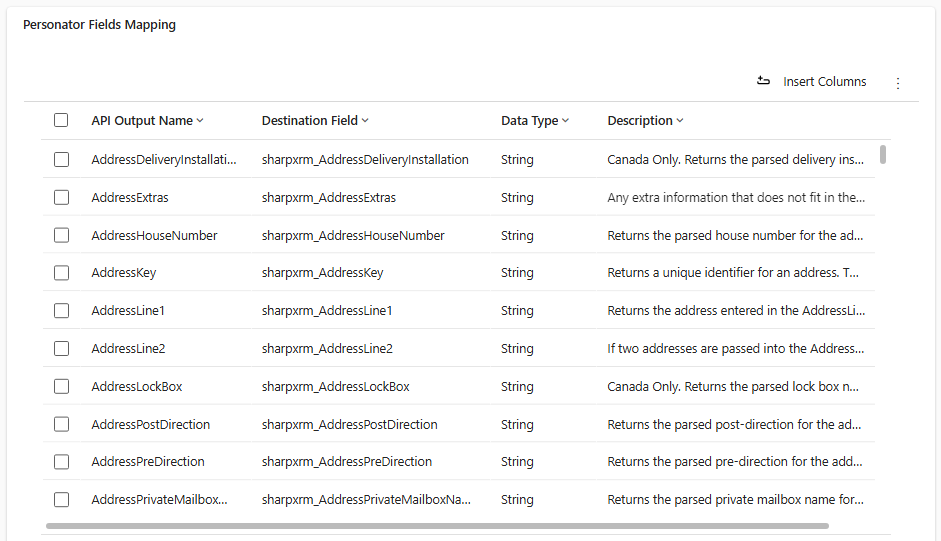
Using Personator
Working with Model Driven Forms
If you are working with the Contact or Account tables and have selected
Display Button on Forms, navigate to the form for the entity type.You will see the Personator button appear and should be able to use it right away.
Note
If you are working with other tables, refer to the section below on how to use Personator in a workflow and make the workflow available to your users from the entity form.
Working with Workflows
You can use the Personator Custom Workflow step to run this operation in a workflow.
Open the Maker Portal, navigate to the Solutions area and create a new solution.
Create a new Workflow.
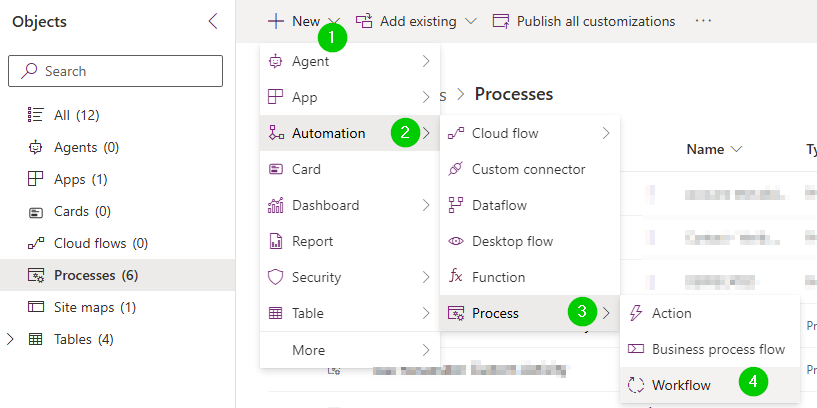
Enter the Name, the Table and if you want the workflow to run in the background (asynchronous) or not.
When the workflow editor open, click on Add Step and select Persontor Check under the Melissa Menu.
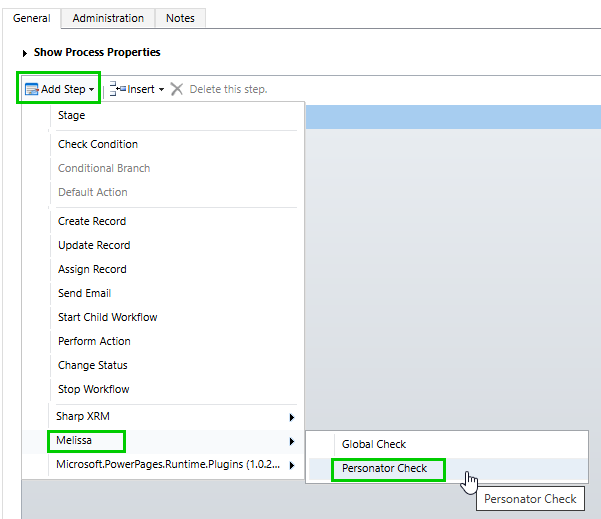
Pick the Field Mapping record in the step properties.

Save and activate the workflow to use it.