Native App Personator Consumer: Snowflake Quickstart#
Introduction#
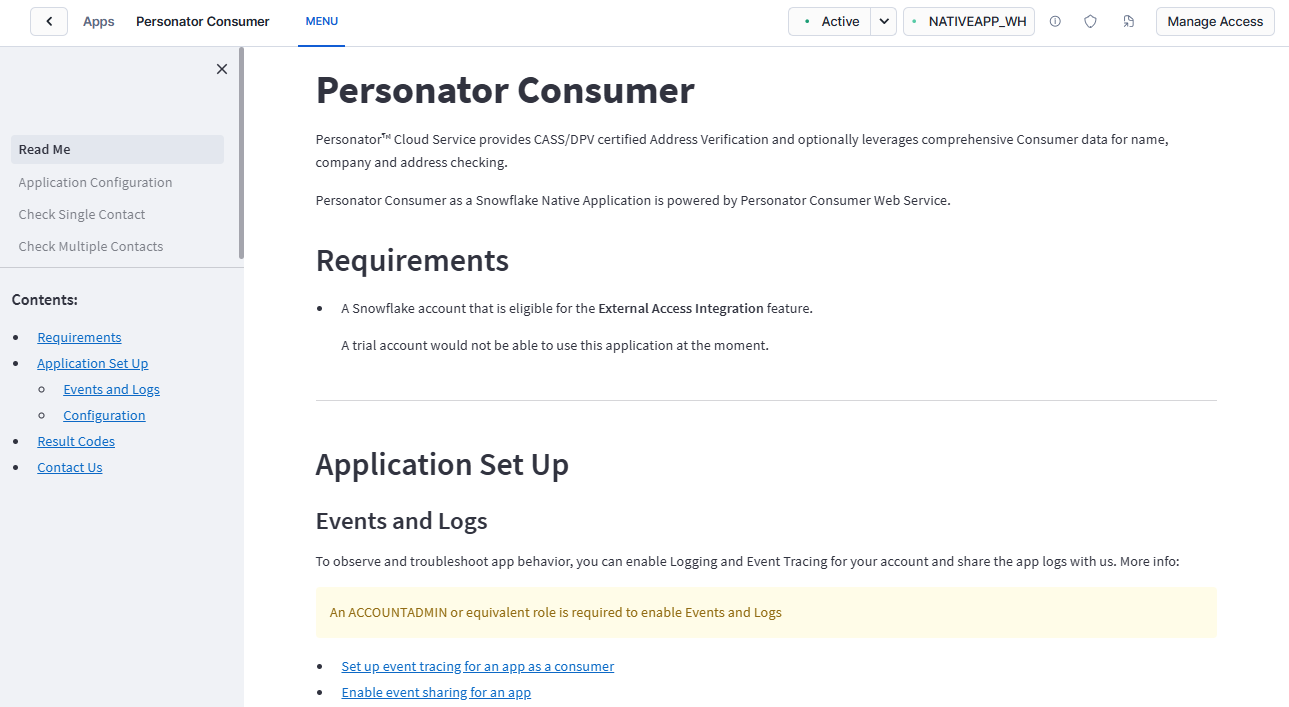
Personator™ Consumer: Snowflake powered by Personator Consumer Cloud API provides CASS/DPV certified address verification and optionally leverages comprehensive Consumer data for all-in-one email, phone, name checking, name to address verification, move update, and appending missing information, demographics, enrichments.
Personator Consumer can be used on Snowflake platform to:
Verify, Correct, & Standardize names, addresses, phones and emails
Retrieve move information
Append demographics
Append Geographic and Census data
Requirements#
A Snowflake account that is eligible for the External Access Integration feature.
Getting Started#
Licensing#
Please follow the instruction in Register for a Melissa Account Now to get your License Key with Credits.
You can also contact a sales representative at Snowflakemarketplace@Melissa.com or 800-MELISSA ext. 3 (800-635-4772 ext. 3) for any questions about your subscription.
Native App Installation#
Step-by-step to install Native App Personator Consumer for Snowflake:
Get the Native App from Snowflake Marketplace#
Login to your Snowflake account.
Get the Native App by using this direct link. or manually typing “Personator Consumer” in Snowflake Marketplace.

Select Get.
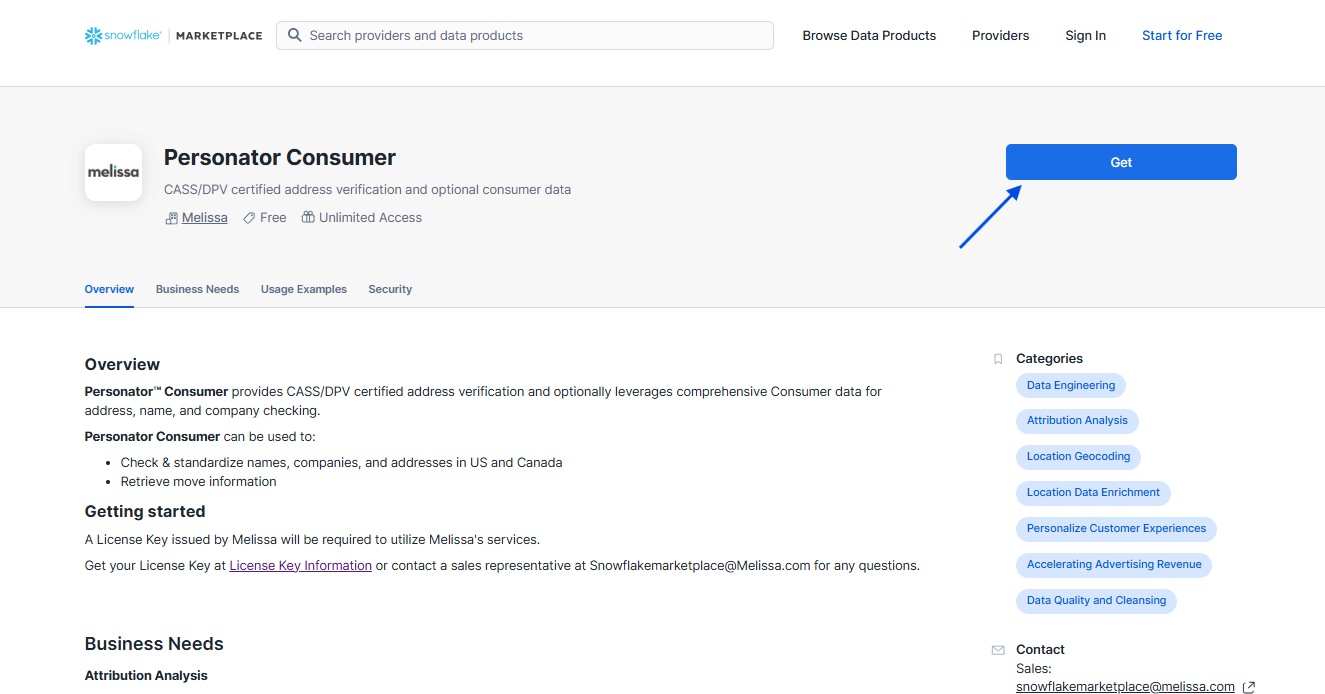
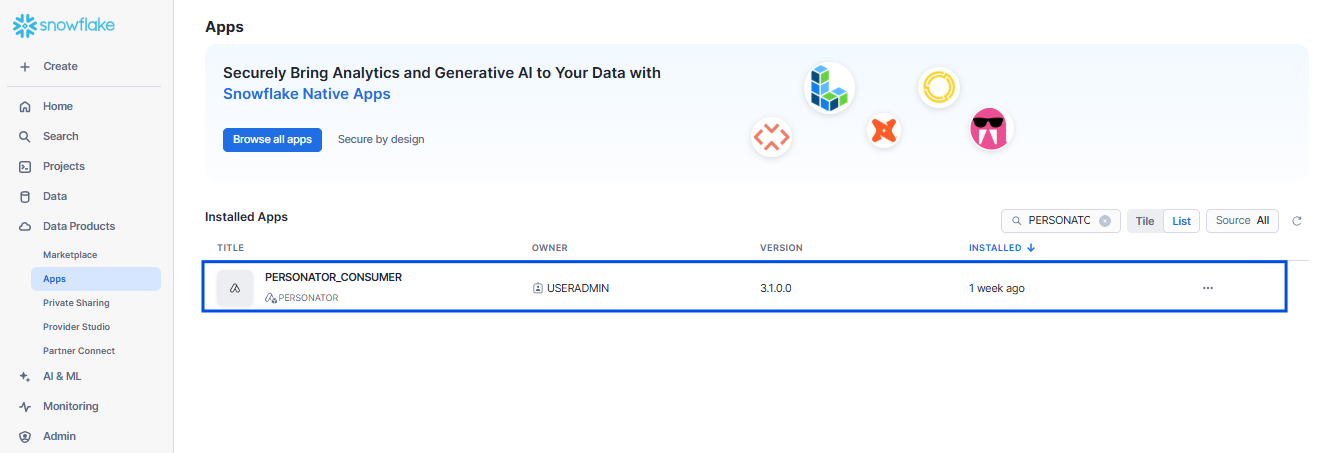
When the app is installed successfully, you can access the app from the left panel of your Snowflake account » Data Products » Apps.
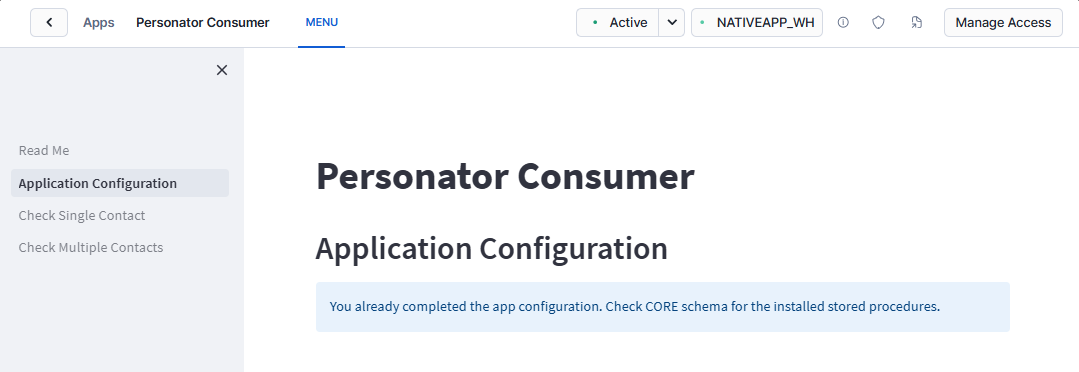
Application Configuration#
Upon the completion of the app installation, follow the steps below to approve the network access to Melissa API endpoint using Snowsight.
Sign in to Snowsight.
In the navigation menu, select Catalog » Apps.
Select the app.
Select the Settings icon in the toolbar.
Select Connections.
Next to the connection you want to approve, expand Review.
Snowsight displays the external access integrations, network rules, and requested endpoints for the app.
Approve or deny the requested endpoints:
To approve the endpoints, select
…, then select Approve.To deny the endpoints, select
…, then select Deny.
You also can view and approve the app specifications using SQL commands.
SHOW SPECIFICATIONS IN APPLICATION melissa_native_app;
ALTER APPLICATION melissa_native_app APPROVE SPECIFICATION
   EAI_APP_SPEC SEQUENCE_NUMBER = 1;
For more information, please refer to Snowflake | About app specifications.
2-Step Configuration
Step 1 - Melissa Connection Configuration
Click open the app.
In the toolbar, select Settings » Connections » Review.
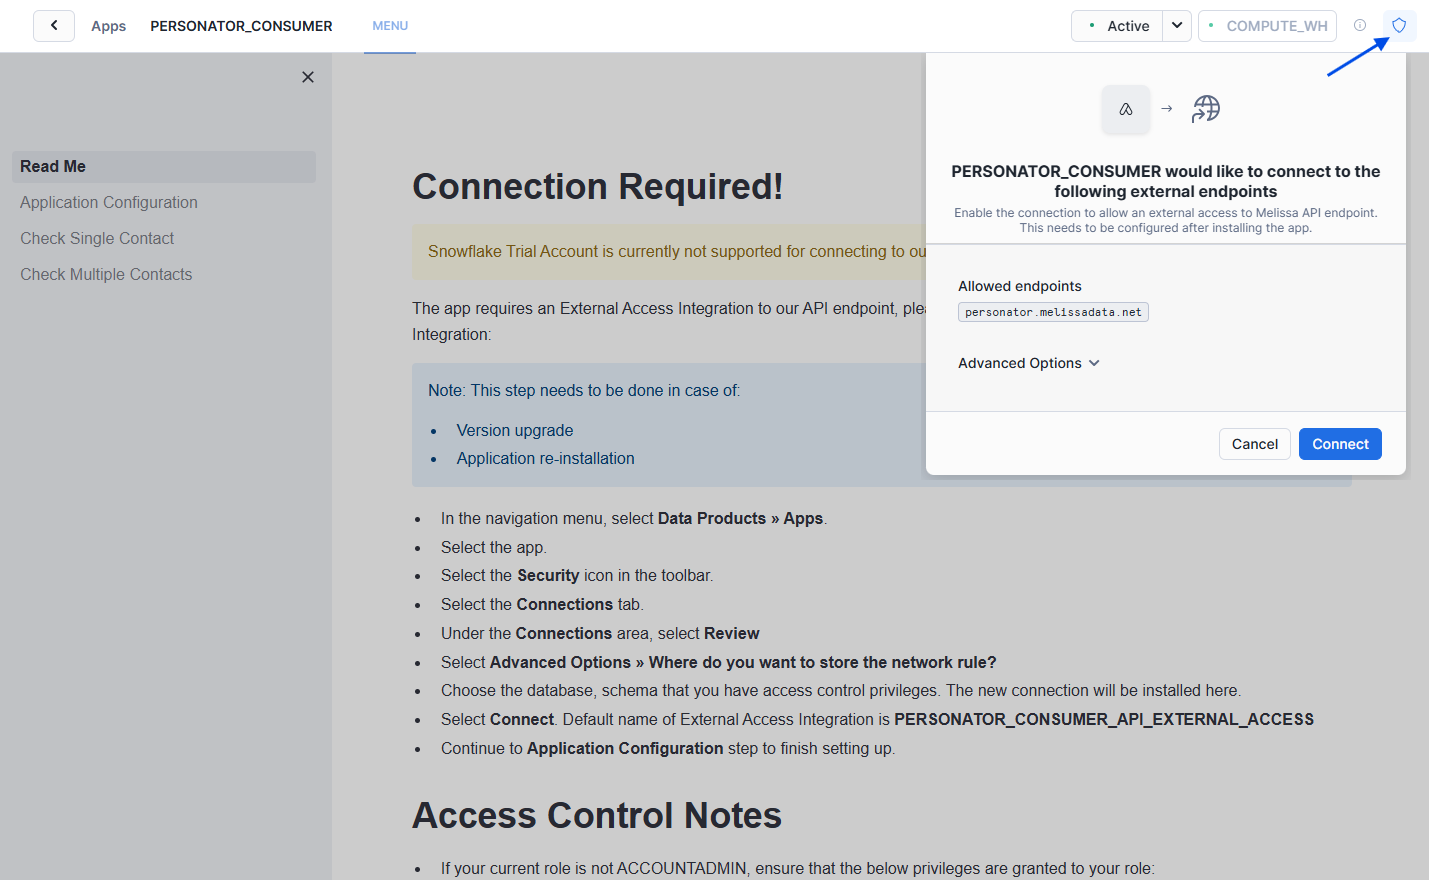
Select Advanced Options » Where do you want to store the network rule?.
Choose the database, schema that your role have access control privileges. The new connection will be installed here.
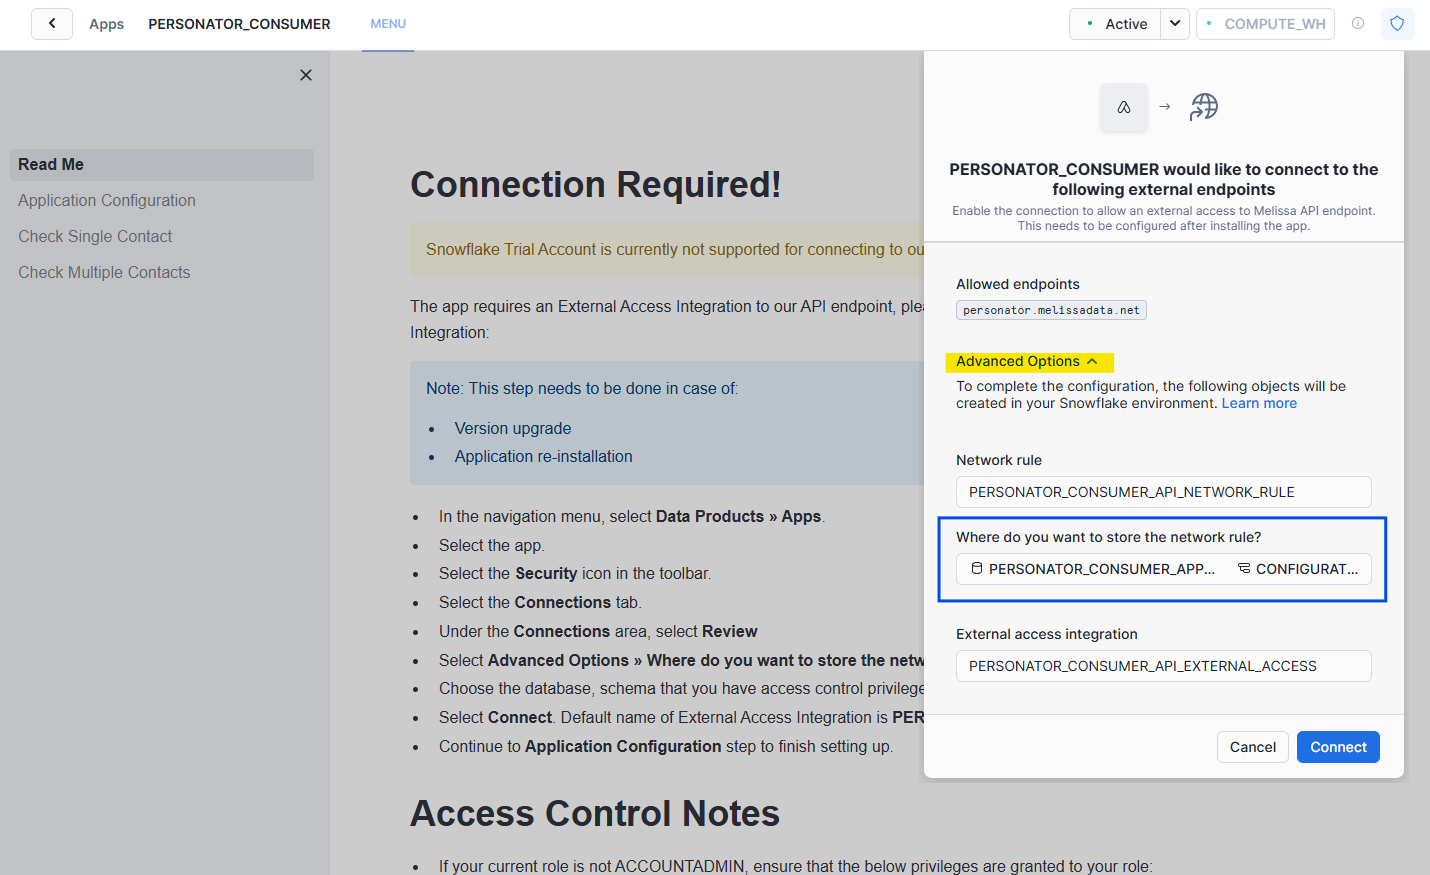
Select Connect.
When the connection is created successfully, “Connection Required!” warning will be replaced by our front page.
Alternatively, follow the instruction on Snowflake interface to connect to our API endpoints.
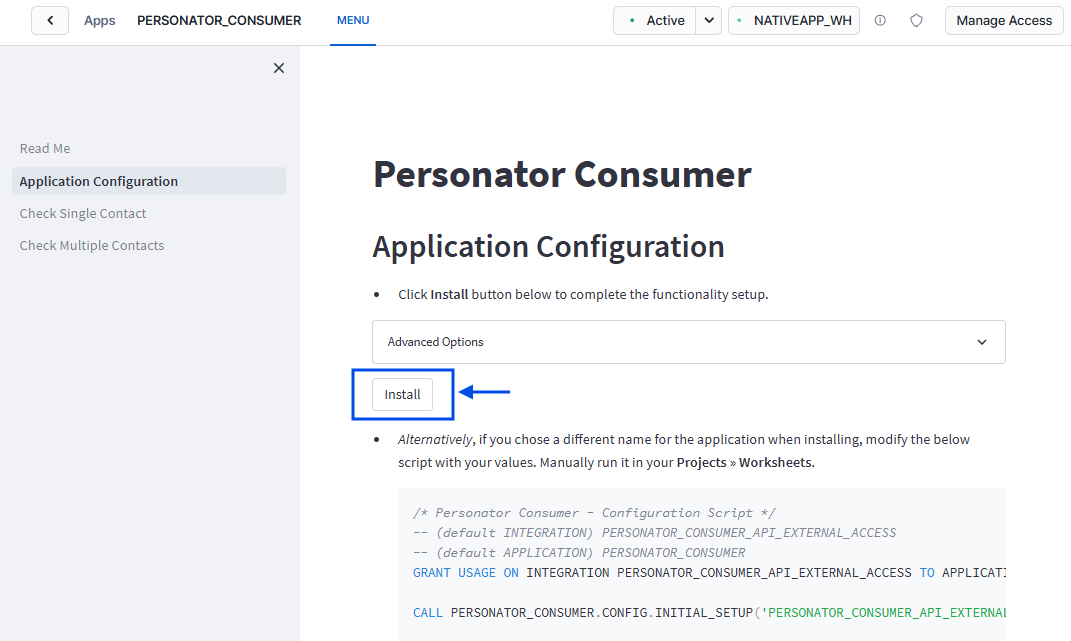
Step 2 - Application Configuration
Select Application Configuration on the left sidebar of the Menu.
Select Install. All the necessary stored procedures will be installed in the application.
A successful message will be on display “Complete initial setup successfully.”.
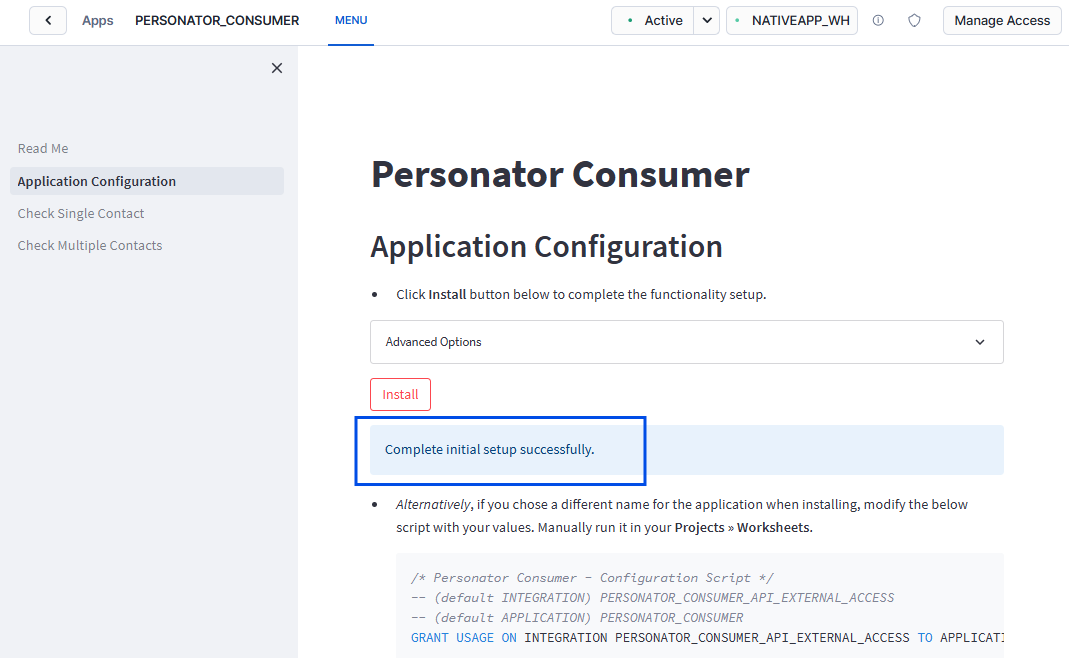
When the installation is complete, you can explore on the left sidebar for the app’s features we have to offer.
If you have already completed this step, the Application Configuration page will display a corresponding message.
Try It Now#
Checking Form#
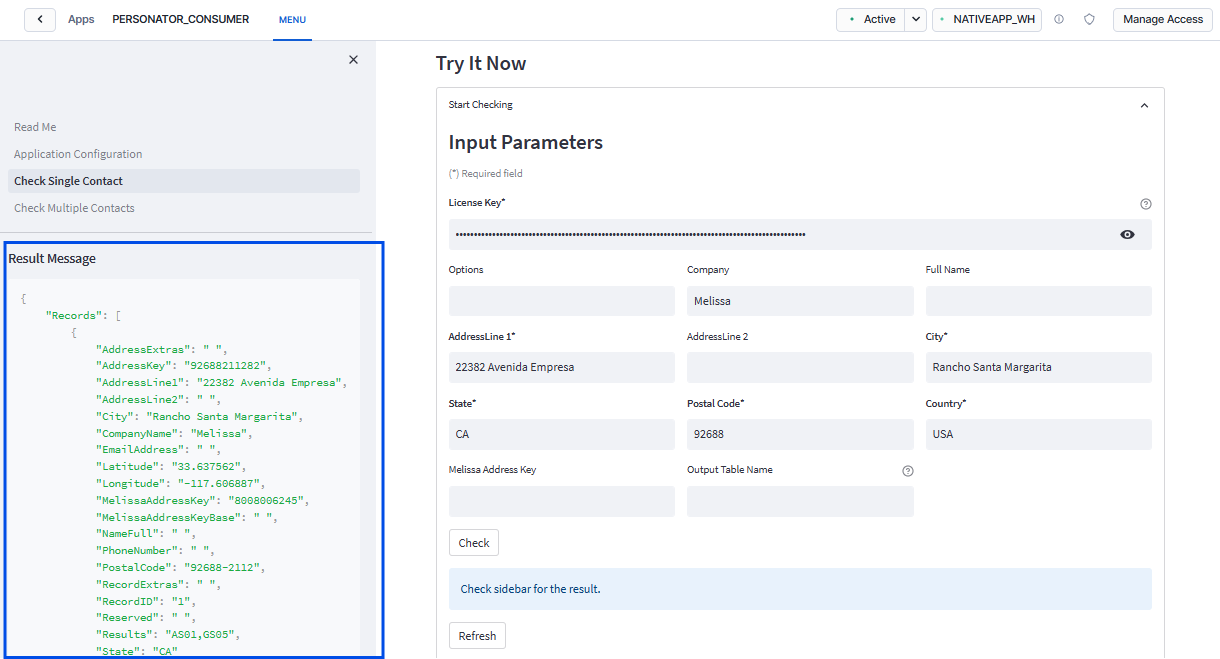
In the Native App, select Menu » Check Single Contact » Try It Now » Checking Form.
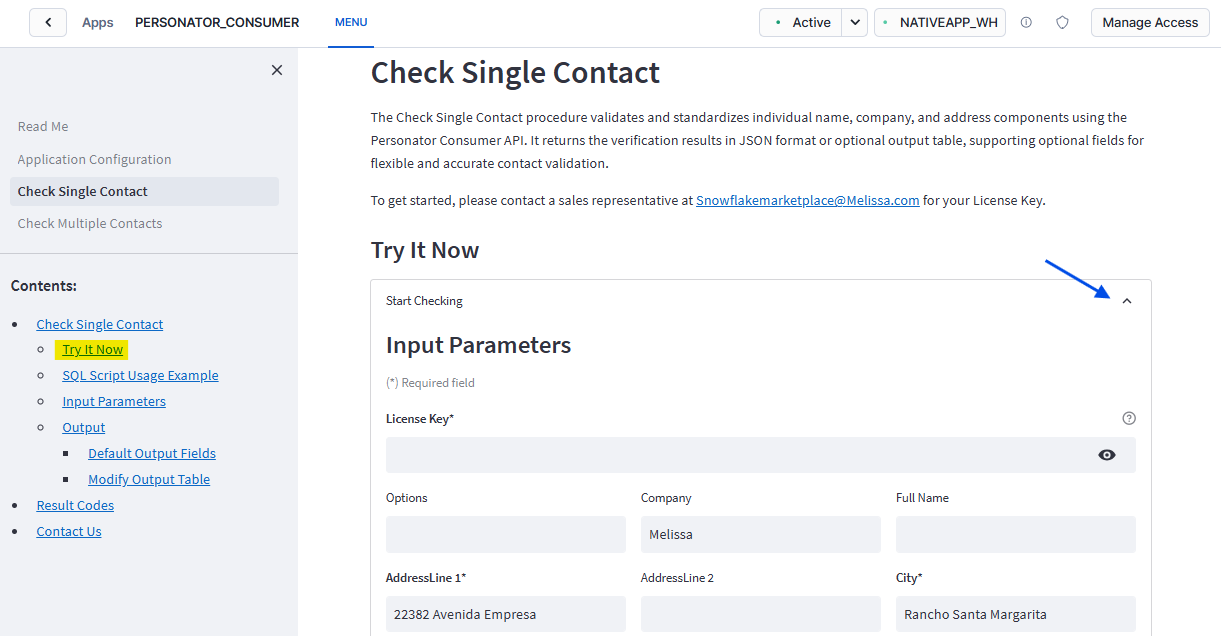
Enter the license key and contact information you want to check.
Select Check.
Result will be displayed on the left sidebar.
Output Example#