Personator Identity Portal Reference Guide#
Introduction#
Melissa’s PI Portal lets you validate and correct global contact data, verify individuals or businesses against authoritative sources, and screen for watchlist or sanction matches directly from your browser. Use the built-in dashboard to track your transaction history, and generate clear, well-formatted PDF reports to document your results.
Gaining Access#
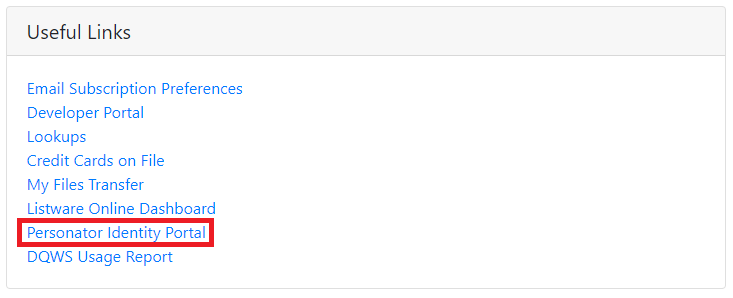
The Personator Identity Portal Pages will be available to all new and existing users of Personator Identity Cloud API. After registering and logging into their Melissa Account from the main Melissa page, users will be able to navigate to the Main Account page and find Personator Identity Portal under Useful Links.
If you are unable to see the Personator Identity Portal link and you are activated for Personator Identity, please contact your Sales Representative.
In addition, new sub users can be added to the main account to allow users to verify individuals with the new form entry page and generate a report. For more information on how to create sub users, see PI Portal Sub Users.
Single Verification Form#
The Single Verification Form will allow all Personator Identity users to verify individuals one at a time and get instant results.
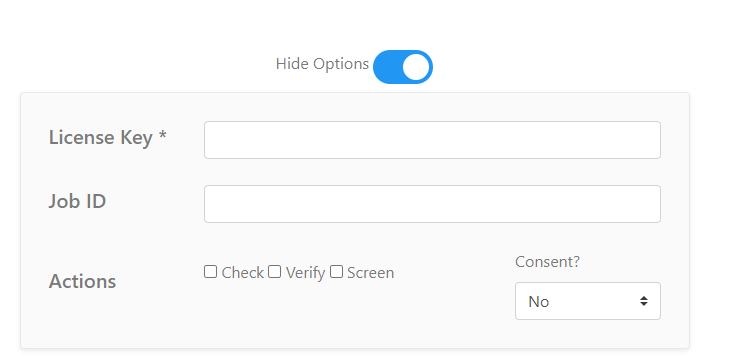
EU users will need to submit a valid license and modify the Actions to obtain verification results. For all other users, the license will be automatically detected with your login. The Actions will still need to be modified. Just click on the Show Options slider bar and submit your license and modify the Actions before verifying.
No additional integration or development is required to gain access to the Single Verification Form. Users that have a subscription to Personator Identity can immediately start verifying individuals by submitting all of the required contact data elements into their respective fields.
Each field marked with an asterisk * is required to verify an individual.
To proceed, you must provide either a combination of First Name and Last Name, or Full Name, along with a Country.
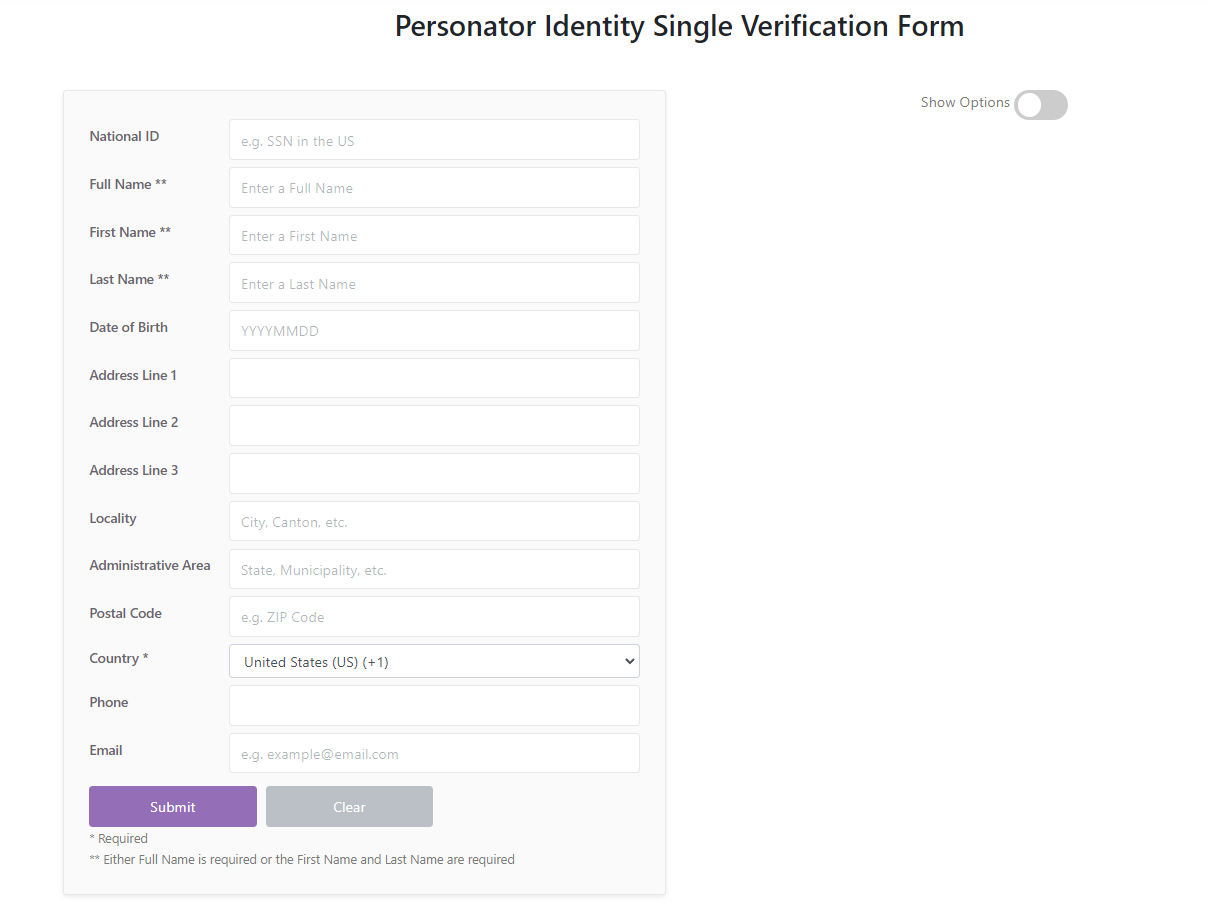
All contact data elements will also be cleansed, standardized, and validated within the results.
The results will then be displayed at the bottom of the page indicating if the individual was verified with High, Medium, or Low Confidence.
Sample Inputs#
Example input records from various countries are available in the dropdown within this section, showcasing the capabilities of Personator Identity. Submitting a record will display standardized and corrected output, along with Result Codes and a Confidence Score at the bottom of the page.
Note
Sample records are not charged to your account.
Advanced Configuration#
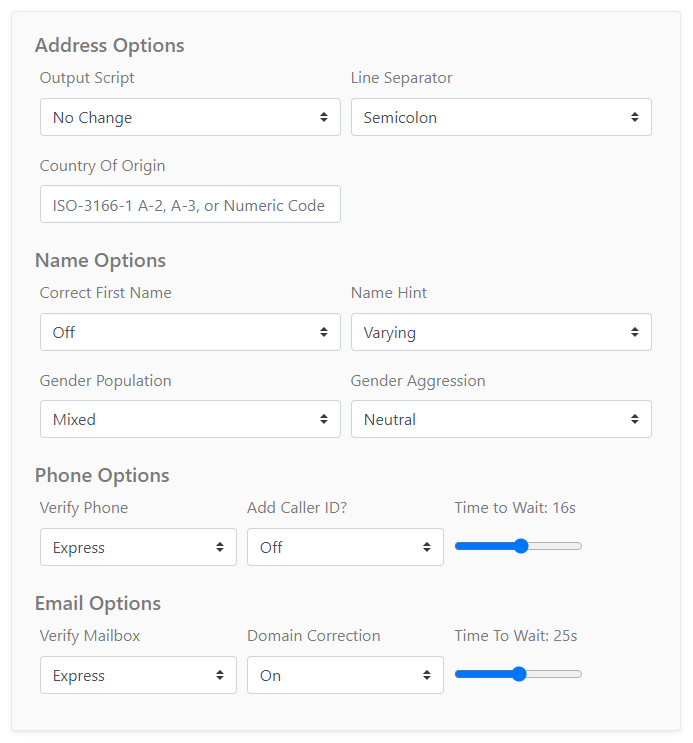
The advanced options can be changed for each request. For more information on what these options mean, please refer to the Personator Identity Request Options or schedule a demo with our engineering team.
Dashboard#
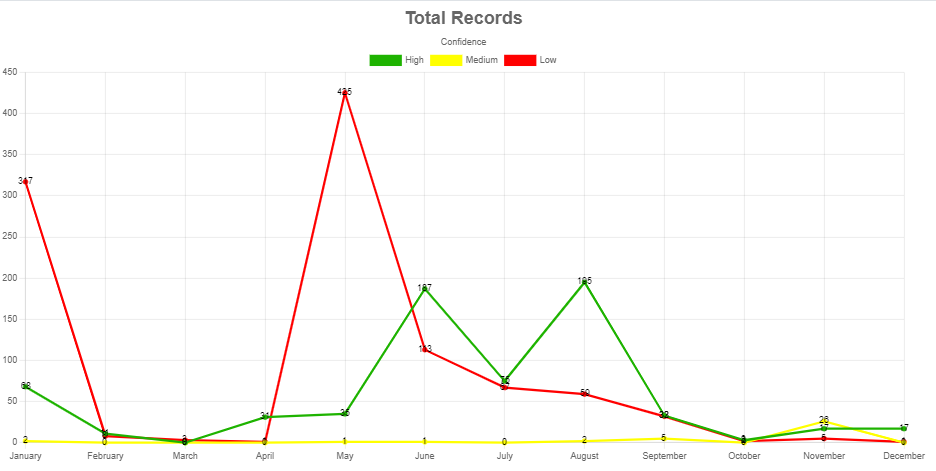
The Dashboard will display the total usage, match rates, and allow filtering based upon year and country. Administrators will be allowed to see the total High, Medium, or Low confidence matches for each month.
Report Generator#
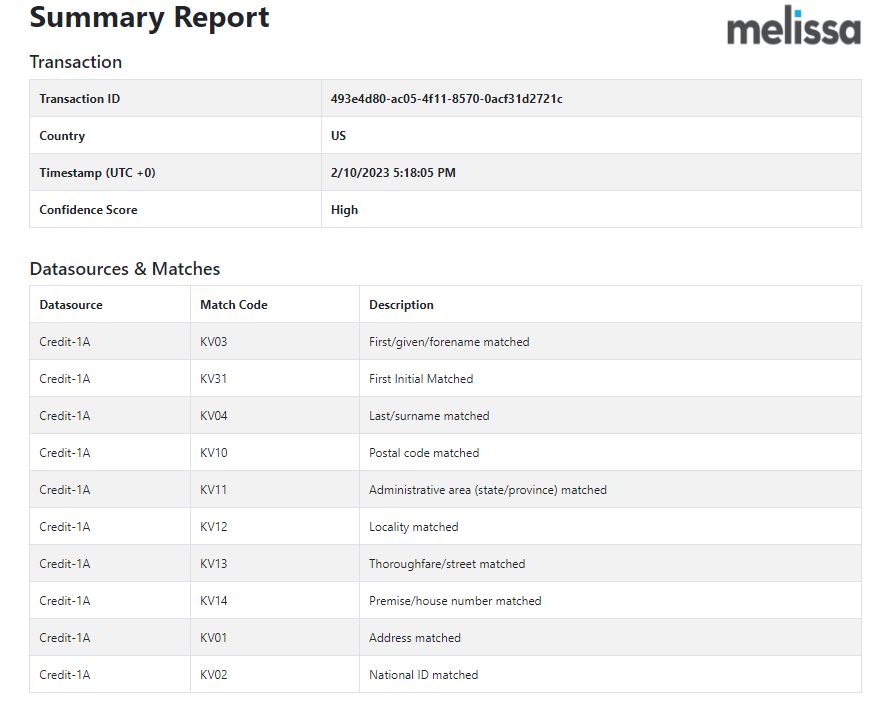
The Personator Identity Report Generator creates a report based upon the TransactionID returned from Personator Identity.
The report will be available for ID Verification clients including Cloud API users and PI Portal users.
To generate a report, use either the TransactionID from Personator Identity or the Single Verification Form page. Note, it may take 15 – 30 minutes for each TransactionID to be generated. We highly recommend that users keep track of each TransactionID after verification.
Each report can be exported as PDF and downloaded straight from the page. The report will include the TransactionID, Date Stamp, Confidence Score, Data Sources and Match Codes.
PI Portal Sub Users#
Sub Users will be able to gain access to the PI Portal pages without having to create a new Melissa account, and will adopt the same configurations as the main account.
Sub Users can access both the Report Generator page and Single Verification Form. If a Sub Users submits a record through the Single Verification Form, the transaction will be counted under the main Melissa account.
Requirements#
There are two requirements to start creating sub users.
You will need to have a Melissa account with a valid login.The main Melissa account will need to have Personator Identity Activated before use.
If the two requirements are satisfied, then you can contact your Sales Representative to create a new sub user!
Registration#
Send your Sales Representative the email, first name, and last name of the Sub User that would like to sign up. You can send a list if multiple users are required.
FirstName
LastName
Email
Melissa
Data
Subuser
One
Your Sales Representative will perform checks and initiate the registration process.
Each Sub User will receive an Email with the subject Melissa Account Sub-User Registration from Sales@Melissa.com.
Click on the Register as a Sub-User link on the email.
Enter the Access Code from the email on the Sub-User Registration form.
Fill out the following information on the form:
First Name
Last Name
Email
User Name
Password
After successful registration, navigate to the PI Portal pages.
Sign in as a Sub User.
On the top right, click on Sign In → Sub-User.
Fill in the main account email address found on the Melissa Account Sub-User Registration email.
Fill in username and password.
After successful login, you should be able to see your name on the top right of the page.