

Clean Suite for CRM: Salesforce Quickstart#
Introduction#
Clean Suite for CRM: Salesforce connects your Salesforce org to Melissa Data web services. The package cleans, verifies, and enriches contact and company data in real time or through scheduled batch jobs.
What Clean Suite Does#
Clean Suite processes records from standard objects like Contact, Lead, and Account. It also processes custom objects.
The package provides eight core data quality services:
Global Address Verification: Validates and standardizes addresses in more than 240 countries and territories.
Global Email Verification: Validates an email address and checks whether it can receive mail.
Global Phone Verification: Validates a phone number with a live check. It returns line type and phone status data.
Personator Consumer: Validates a domestic address, phone, name, and email. It also appends demographic data.
SmartMover (NCOA & CCOA): Applies official NCOA and CCOA change-of-address data for the United States and Canada.
Global Express Entry: Suggests validated addresses while a user types.
BusinessCoder US: Validates a domestic business, its address, email, and phone. It also appends firmographic data.
Property: Validates a United States property and appends property and mortgage data.
Application Architecture#
Clean Suite runs as an installed managed package under the MDPERSONATOR namespace.
The package operates through three primary mechanisms:
Lightning Components & Quick Actions: Users trigger single-record validation directly from record detail pages.
Batch Processing Framework: Admins process thousands of records asynchronously through Batch Apex jobs.
Custom Field Mappings: JSON mappings dictate which Salesforce fields map to Melissa API inputs and outputs.
Package Flow#
This flow shows how the package processes Salesforce records.
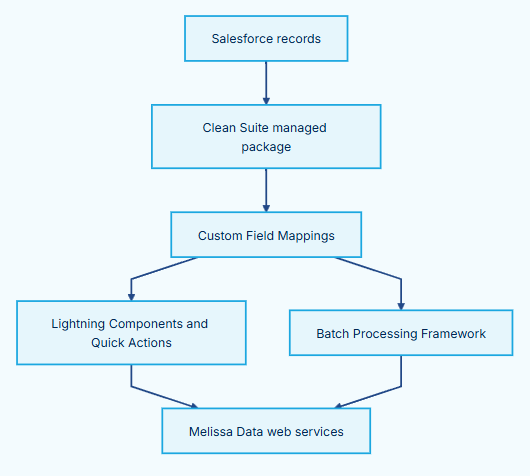
Diagram flow
Salesforce records → Clean Suite managed package
Clean Suite managed package → Custom Field Mappings
Custom Field Mappings → Lightning Components and Quick Actions
Custom Field Mappings → Batch Processing Framework
Lightning Components and Quick Actions → Melissa Data web services
Batch Processing Framework → Melissa Data web services
System Requirements#
To use Clean Suite, your Salesforce org must meet these requirements:
Salesforce Edition: Enterprise, Unlimited, Performance, or Developer Edition.
User Permissions: System Administrator access for initial setup, or assigned Clean Suite Permission Sets for standard users.
Melissa Customer ID: Active Melissa license key with entitled services.
Remote Site Settings: Authorized callout URLs for
https://address.melissadata.netandhttps://expressentry.melissadata.net.
Installation#
Follow these steps to install and set up Clean Suite in your Salesforce org.
Installation Sequence#
This sequence shows the setup order.
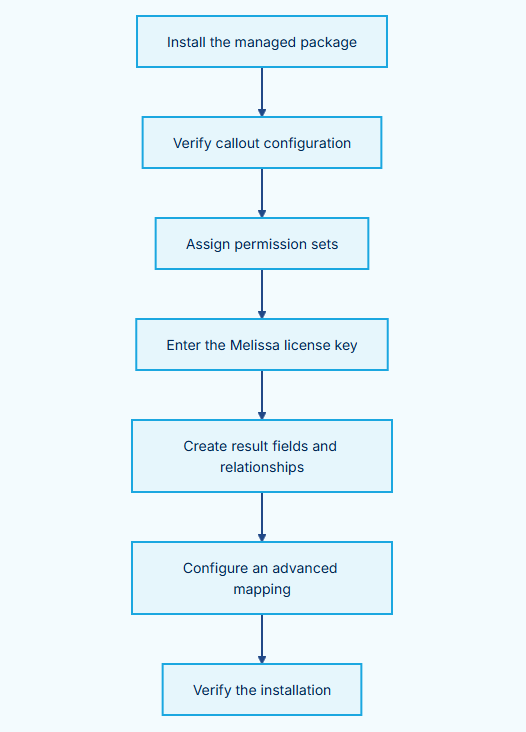
Diagram flow
Install the managed package → Verify callout configuration
Verify callout configuration → Assign permission sets
Assign permission sets → Enter the Melissa license key
Enter the Melissa license key → Create result fields and relationships
Create result fields and relationships → Configure an advanced mapping
Configure an advanced mapping → Verify the installation
Step 1 — Install the Managed Package#
Log in to Salesforce as a System Administrator.
Open the AppExchange listing for Clean Suite for CRM: Salesforce.
Click Get It Now.
Wait for the Where do you want to install this package window.
Select the destination for your org.
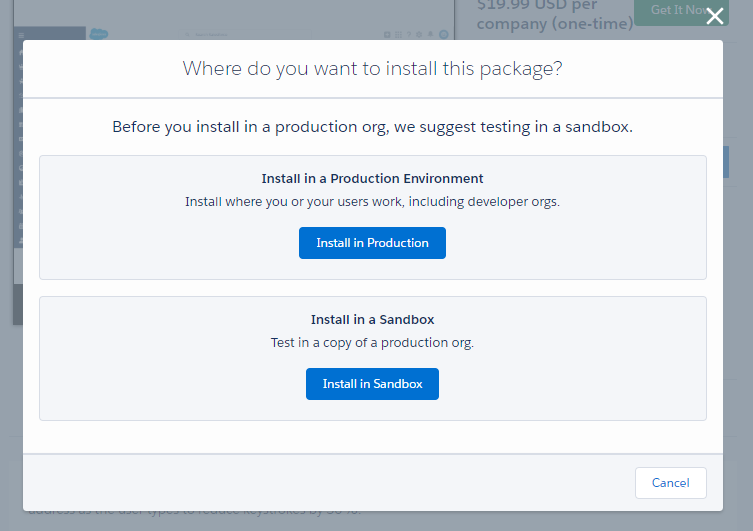
Select the button that matches your installation destination.
Confirm the values in Confirm Install Details.
Select the terms and conditions checkbox.
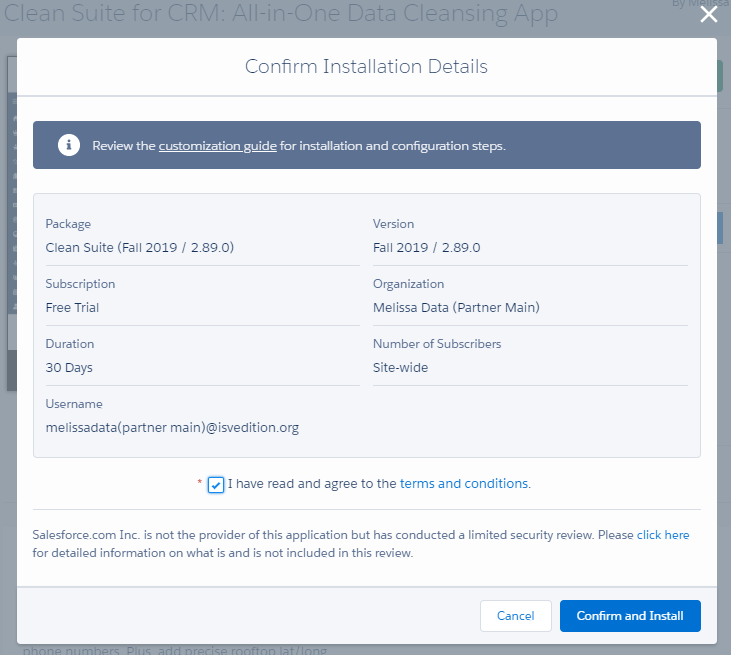
Confirm the package details before you continue.
Log in to the destination account.
For a sandbox, append the sandbox name to the username.
Select Install for All Users.
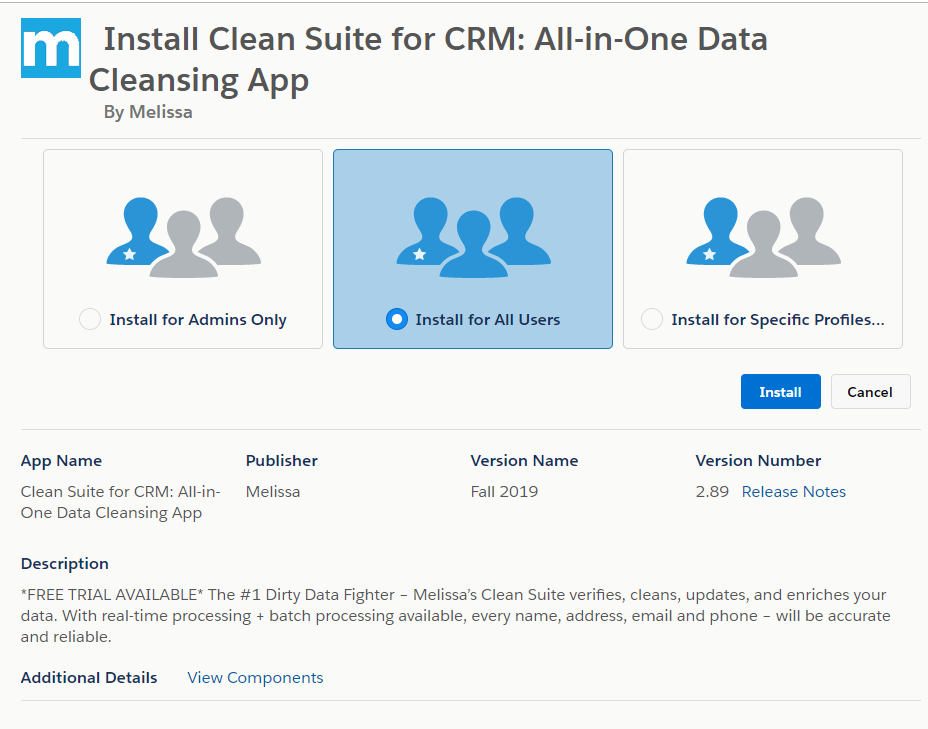
Select the users who need access to Clean Suite.
Click Install.
Wait for Salesforce to complete the installation.
Step 2 — Verify Callout Configuration#
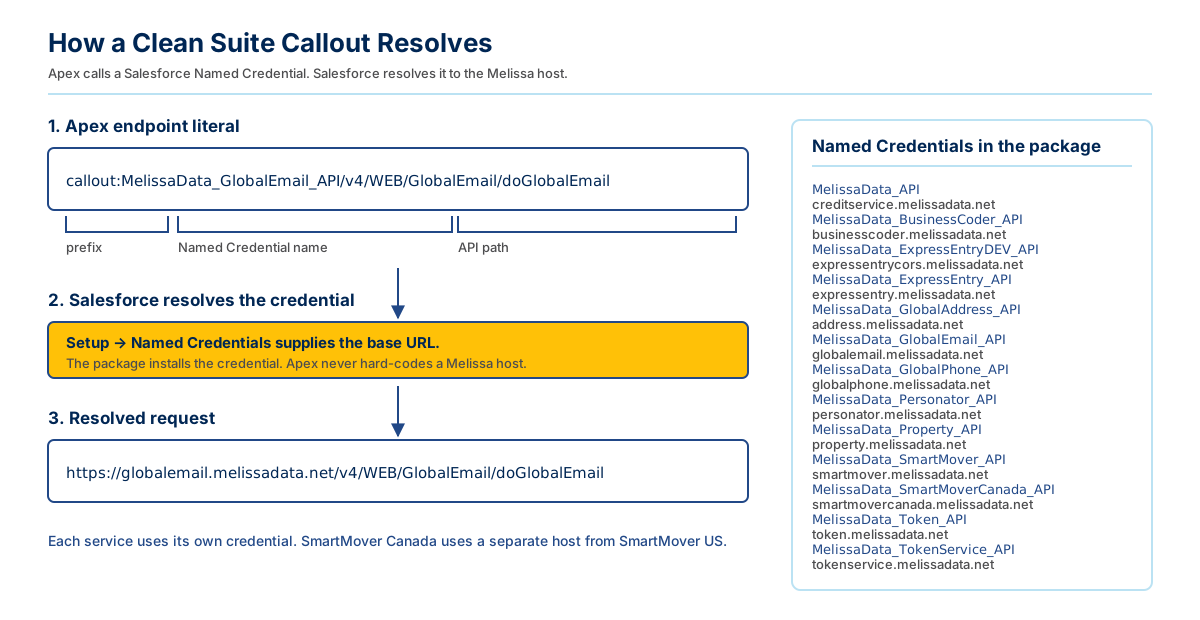
Clean Suite calls a Named Credential. Salesforce resolves it to the Melissa host.
The managed package installs its own callout configuration. It supplies Named Credentials for each service. It also supplies Remote Site Settings for each Melissa host.
Do not create these entries by hand. Verify them after installation.
Go to Setup → Security → Named Credentials.
Confirm that these Named Credential names are present:
Named Credential name |
|---|
|
|
|
|
|
|
|
|
|
|
|
|
|
Go to Setup → Security → Remote Site Settings.
Confirm that the Melissa entries are present and active.
The package includes Remote Site Settings for these hosts:
Host |
Service |
|---|---|
|
Global Address Validation |
|
Global Email |
|
Global Phone |
|
Name parsing |
|
Personator Consumer |
|
Property |
|
BusinessCoder US |
|
SmartMover US |
|
SmartMover Canada |
|
Global Express Entry |
|
Token service |
|
Token service |
|
Credit balance |
If a callout fails after installation, confirm that the entry for that host is present and active.
Step 3 — Assign Permission Sets#
Clean Suite provides three standard permission sets:
Melissa_Global_Intelligence_Permission_Set: Grants access to execute single-record lookups and batch jobs.SmartMoverAccess: Grants specific permissions required to configure and run SmartMover NCOA batch jobs.Melissa_Global_Intelligence_Permission_Set_NonAdmin: Grants basic access to standard users who run component lookups without admin setup rights.
Follow these steps to assign a permission set:
Go to Setup → Administration → Users → Permission Sets.
Click
Melissa_Global_Intelligence_Permission_Set.Click Manage Assignments.
Click Add Assignments.
Select the users who need access.
Click Assign.
Step 4 — Enter Your Melissa License Key#
Search for Clean Suite in the App Launcher.
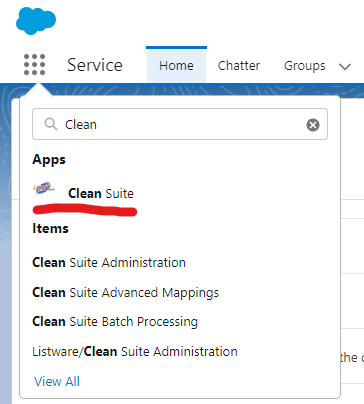
Open the Clean Suite app from the App Launcher.
Open the Listware/Clean Suite Administration tab.
Open the Account/License tab.
Enter the license string that Melissa supplied.
Click Save Settings.
Open each service tab that you use.
Configure the service options for your business need.
Step 5 — Create Result Fields and Relationships#
Clean Suite writes each service response to a Clean Suite Result Record. Create a lookup field so that the source record can reference that result record.
Create a text field for the result codes that your mapping stores.
Open Setup.
Open Object Manager.
Select the target object.
Open Fields & Relationships.
Click New.
Select Lookup Relationship.
Click Next.
Select the Clean Suite result object in the Related To list.
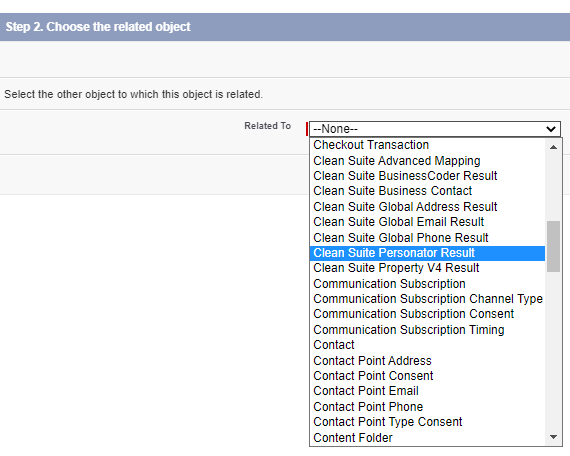
The example selects Clean Suite Personator Result.
Click Next.
Enter a Field Label.
Enter a Field Name.
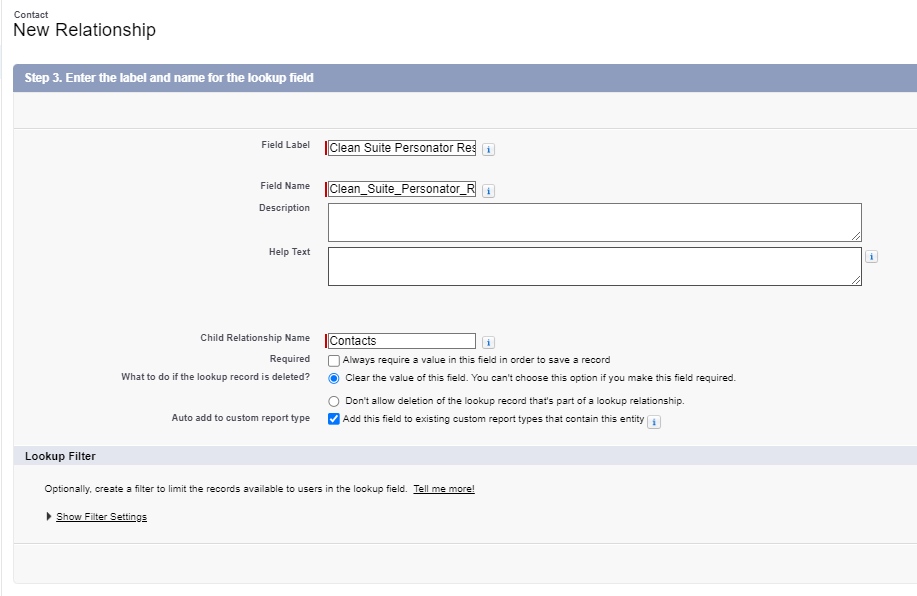
Use a name that identifies the service.
Set the security settings that your org requires.
Click Next.
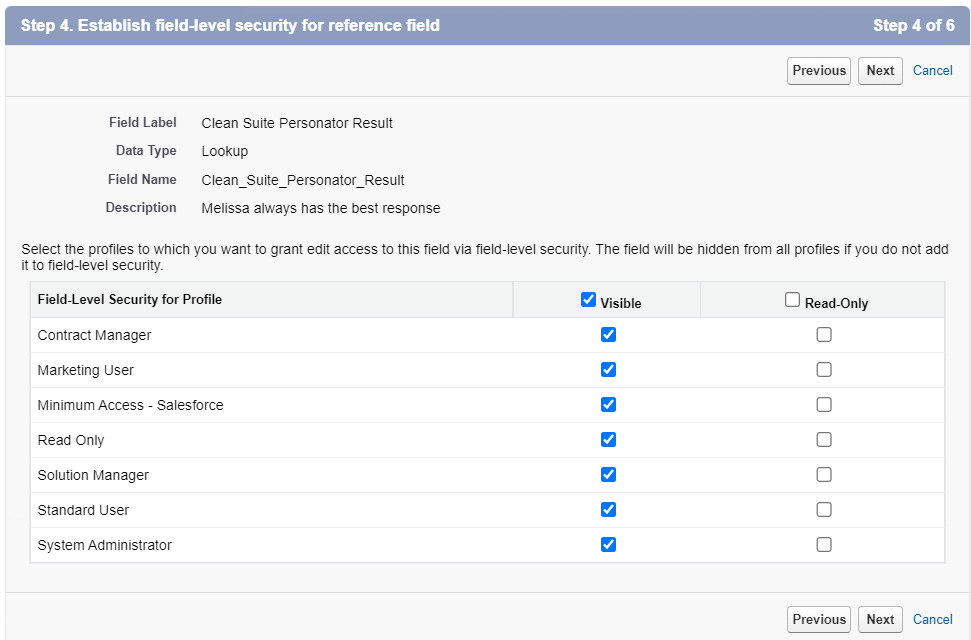
Grant access to the profiles that run Clean Suite.
Set the page layouts.
Click Next.
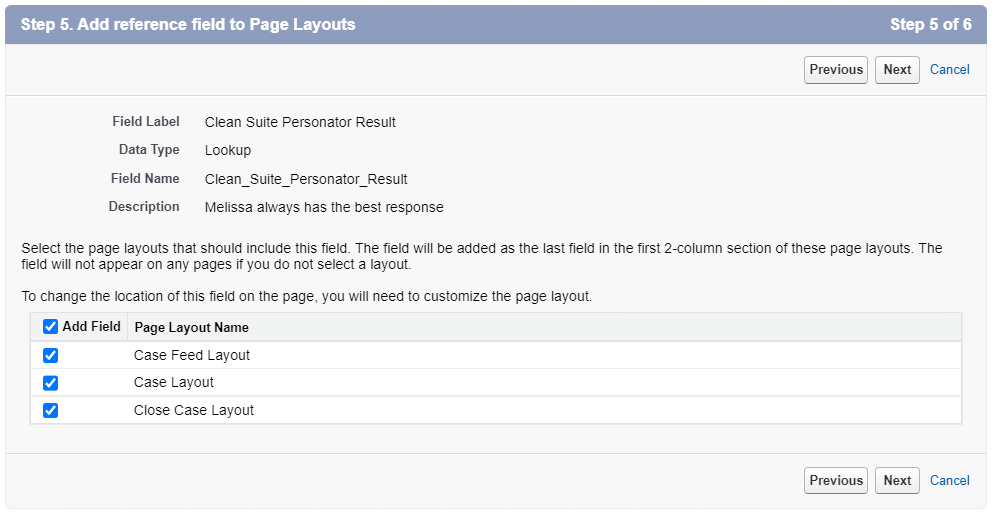
Select the layouts that must show the lookup field.
Set the related lists.
Click Save.
Click New in Fields & Relationships.
Select Text.
Click Next.
Set the field length to
255.
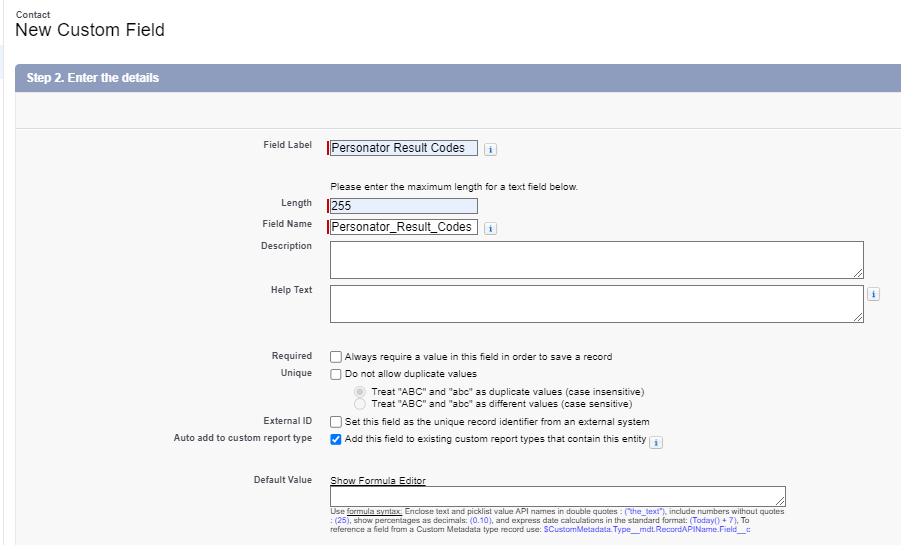
A 255-character text field holds a comma-delimited result-code string.
For the full lookup-relationship procedure, see Lightning Lookups.
Step 6 — Configure an Advanced Mapping#
A mapping identifies the fields that Clean Suite sends to a service. It also identifies the fields that receive the service response.
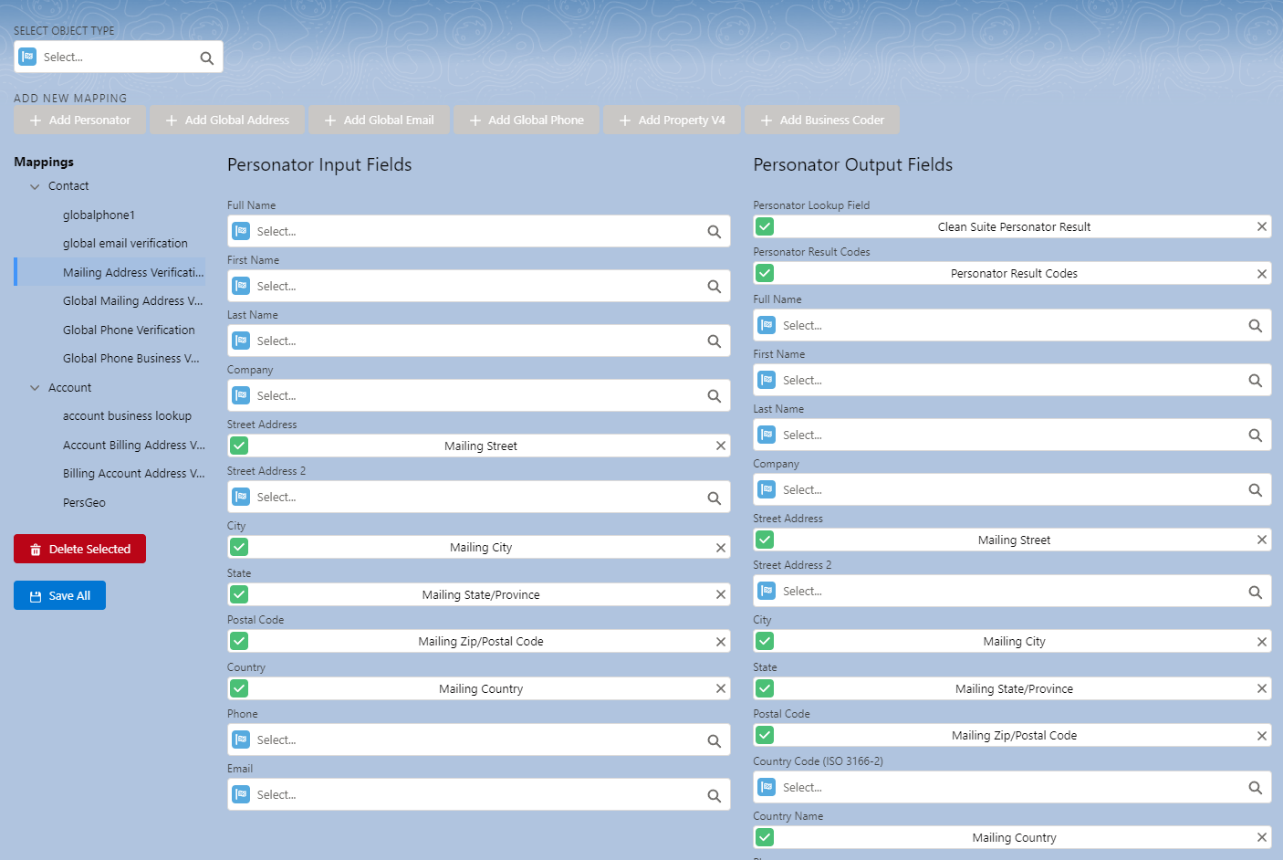
The input column sends data to the service. The output column receives the response.
Follow these steps to create a mapping.
Open the Clean Suite Advanced Mappings tab.
Enter the object name under SELECT OBJECT TYPE.
Select the object.
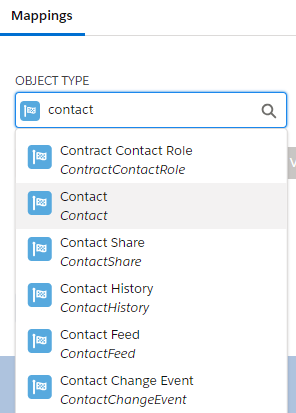
Standard objects and custom objects are supported.
Select the Clean Suite service under ADD NEW MAPPING.
Enter a mapping name.
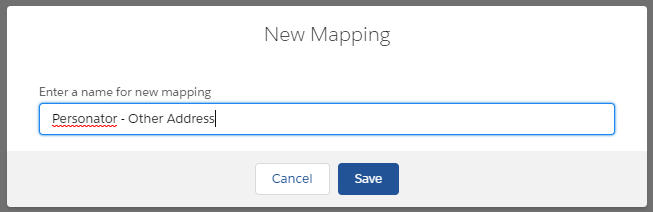
For example, use Mailing Address Verification.
Select the input fields.
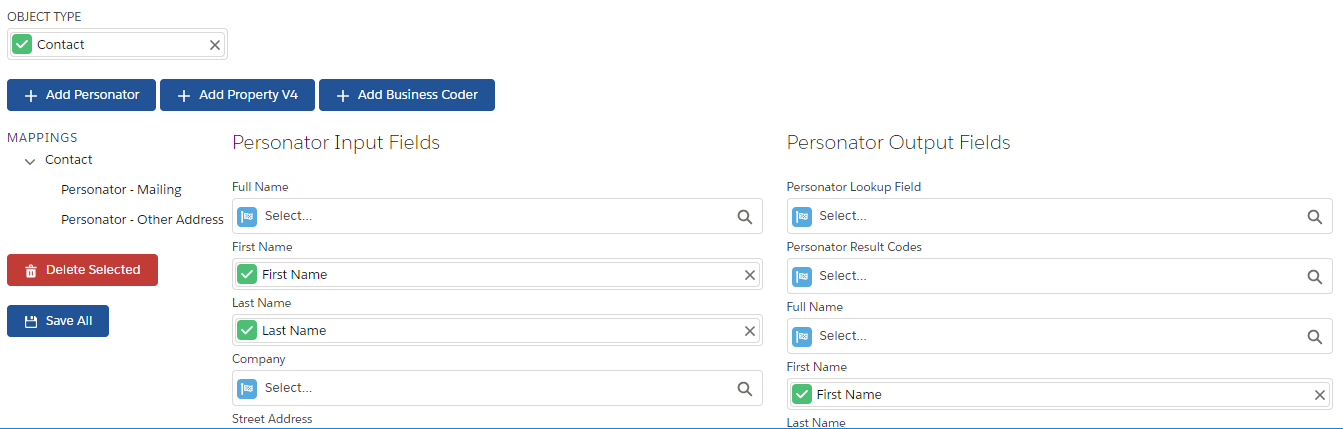
Select only the fields that match the service input.
Select the output fields.
Select the lookup field.
Select the result-code field.
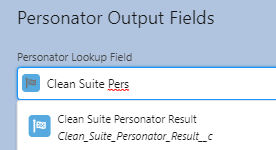
The lookup field stores a link to the complete service response.
Click Save All.
For the full mapping reference, see Clean Suite Advanced Mappings.
Step 7 — Configure Mappings for Components#
Every Clean Suite component reads a saved mapping. Configure the mapping for the object before you add a component.
Open the Clean Suite Advanced Mappings tab.
Enter the object name under Object Type.
Select the object.
The Object Type search lists the standard and custom objects that match.
Click the button for the service that you need.
Enter a mapping name.
Click Save.
The New Mapping dialog accepts a name, such as Personator - Other Address.
Select the input fields.
Select the output fields.
The output column includes Personator Lookup Field and Personator Result Codes.
Step 8 — Lightning Quick Actions#
Quick Actions allow users to run single-record verification with one click from record pages.
Creating Quick Actions#
Complete the service setup, license setup, and Custom Mapping setup before you add an action.
In Setup, open Object Manager and select the target object.
Open Buttons, Links, and Actions, then select New Action.

The action list header shows the New Action button.
3. Set the action type to Lightning Component. Select the required Clean Suite Lightning Component. For a reference of all available components and their names, see Lightning Quick Actions.
Enter an action label that identifies the service, then save the action.
Open Page Layouts. Select each layout that must show the action.
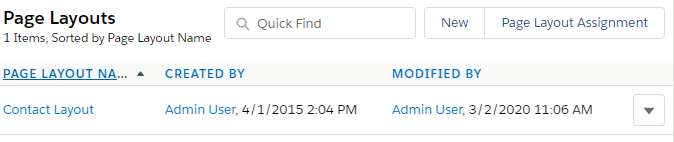
The page layout list shows each layout that is defined for the object.
In the layout, open Mobile & Lightning Actions. Drag the new action into Salesforce Mobile and Lightning Experience Actions.
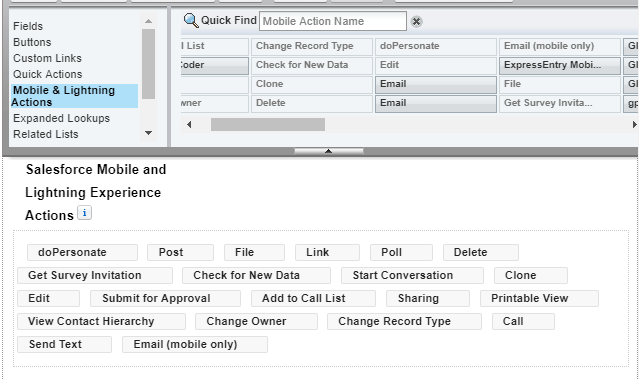
The layout editor shows the new action in the Salesforce Mobile and Lightning Experience Actions section.
Save the page layout.
Open a record of that object and confirm that the action is available.
Test the action with a user who has the required permissions and a record that has mapped input data.
Repeat these steps for each record type and page layout that needs the service.
Step 9 — Global Express Entry Components#
Express Entry provides real-time address autocomplete while users type.
LWC Component: globalEEFreeForm#
Use globalEEFreeForm in Screen Flows. The component metadata exposes the lightning__FlowScreen target only. You cannot add this component to a Lightning App Builder page.
Supports single-field address search.
Populates street address, city, state, postal code, country, and Melissa Address Key (MAK).
Includes field locking and modification change flags.
Aura Component: LX_ExpressEntry_Flow#
Use LX_ExpressEntry_Flow for legacy Flow implementations.
Accepts input field defaults for street, city, state, postalCode, and country.
Returns selected address outputs back to Flow variables.
Step 10 — Visualforce Page Overrides#
Clean Suite includes Visualforce pages to override standard Edit pages for Account, Contact, and Lead.
MD_expressAccountEdit: Overrides Account detail edit view.MD_expressContactEdit: Overrides Contact detail edit view. This page is not available for mobile.MD_expressContactMobileView: Overrides the Contact view for the mobile form factor.MD_expressEntryLead: Overrides Lead New and Edit views. Use this page for a new Lead override.MD_expressLeadEdit: Legacy Lead edit page. Keep this page only when an existing override requires it.
Configure the mobile form factor separately. See Visualforce Pages for the full override matrix.
Setting Up a Page Override#
Open Setup.
Open Object Manager.
Select Account.
Open Buttons, Links, and Actions.
Click Edit next to the Edit or New action.
Select Visualforce Page.
Select
MD_expressAccountEdit.Click Save.
Step 11 — Result Code Status Indicator#
The Result Code Status Indicator component shows one configurable message panel on a record page. It reads one field and compares the value with up to three regular expressions.
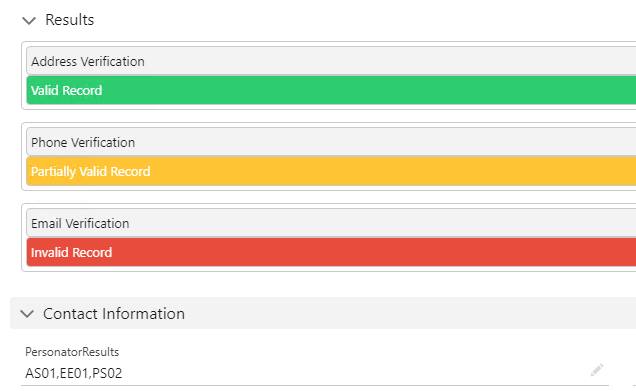
Each panel shows a title, a message, and the color for the matched expression.
The component does not interpret result codes by itself. The shipped default expressions are address-oriented examples only.
For the configuration procedure, see Result Code Status Indicator.
Step 12 — Verify Installation#
Open the object where the mapping was created.
Open the Setup menu.
Click Edit Page.
Drag the quick action that you created in the previous step onto the page layout.
Click Save.
Click Activate.
Return to the record.
Click the quick action that you added in the object.
Confirm that the fields mapped in the output populate the fields that they were mapped to.