Unison Quickstart#
Introduction#
Unison by Melissa is a platform as a service that provides you with easy access to Melissa’s powerful verification and cleansing objects.
You can use Unison by Melissa to:
The Unison Platform allows enterprise level clients to create a self-hosted system housing the entire set of Melissa libraries and capabilities into one extensible platform.
Meet demands for high speed and security applications.
Access the core Melissa objects: Address, Email, Name, and Phone.
Minimum System Requirements#
Ubuntu 20.04
32GB RAM
2TB disk space
16 CPU Cores
User with Root or Sudo permissions
Pre-Install#
Melissa will provide clients with a downloadable zip file that contains all of the files needed to install Unison. It is recommended to have a method of extracting the zip file’s contents. In this example, we will use the “unzip” utility. You can install this by running “sudo apt-get install unzip”.
System Access Requirements#
In order for the install to perform its activities it will need internet access and connections to various servers. Along with the standard apt repository it also needs access to:
http://ppa.launchpad.net/ansible/ansible/ubuntu (to install Ansible)
https://helm.baltorepo.com/stable/debian/packages/helm/ (to install Helm)
ucr.melissadata.net (to install Melissa Software)
docker.io (to install various supporting packages needed)
ghcr.io (to install Keda autoscaling)
docker.elastic.co (to install Docker)
k8s.gcr.io (for NFS mounts)
public.ecr.aws (to install Redis)
quay.io (for Argo administration)
pkgs.k8s.io (for Kubernetes install)
download.opensuse.org (for older CRIO builds)
Installation Steps#
This document provides steps on how to install Unison for the first time.
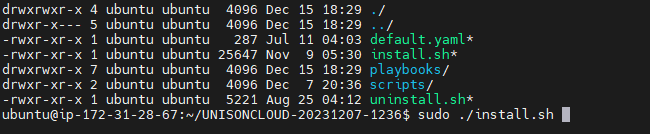
Copy the Unison zip file to somewhere convenient on your server. I am using the home directory for the currently logged in user.
Unzip the Unison zip File. For example:
unzip UNISONCLOUD-20231207-1236.zip
Navigate to the extracted directory. For example:
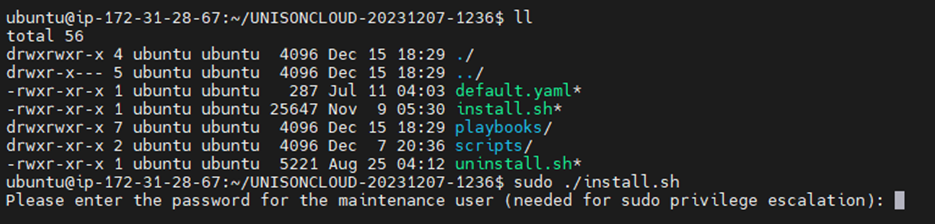
cd UNISONCLOUD-20231207-1236
Run the install.sh script with sudo permissions.
sudo ./install.sh
Enter the password for the current user with sudo permissions.
(Optional) By default Unison uses port 38083, if you wish you can change it now by typing y and hitting enter. Otherwise type n to keep the default value.

Wait for Installation of Ansible to complete.
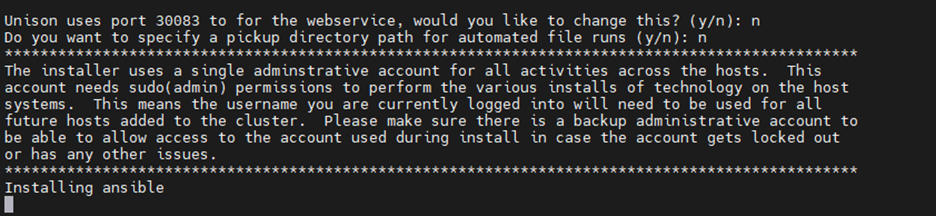
(Optional) You can specify a pickup directory for automated file runs by typing
yand hitting enter. Otherwise typenif you are not planning on using automated runs.
(Optional) You can add additional machines to the cluster if you wish by typing
yand hitting enter. Otherwise typenif you are only using one machine.
The installation is complete when you see the instructions to head to the browser.

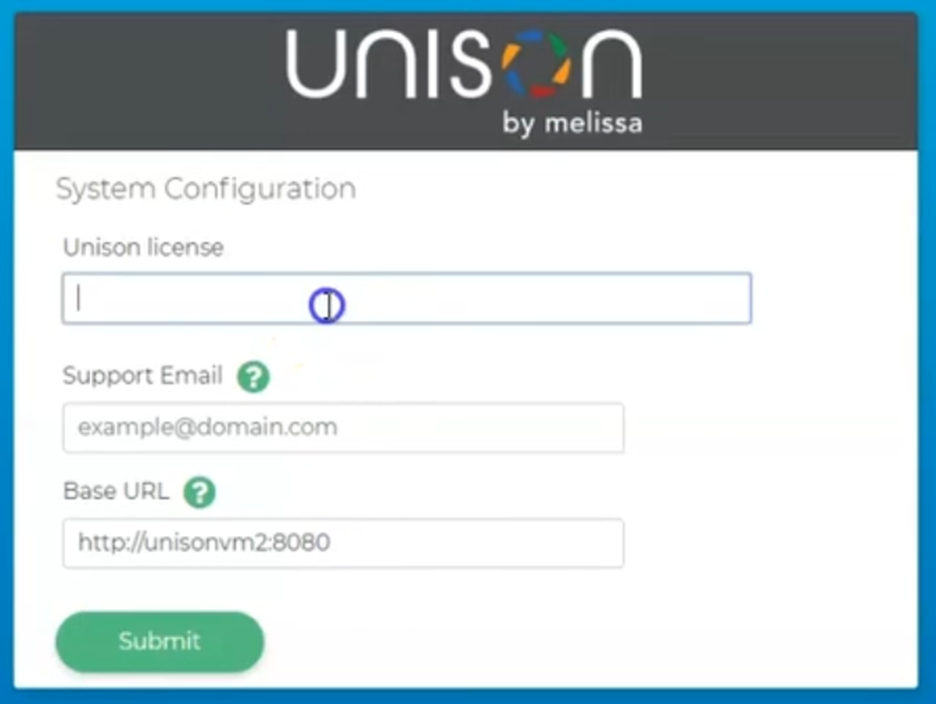
Navigate to the link provided in step #10 and click the “Get Started” button to complete the setup.
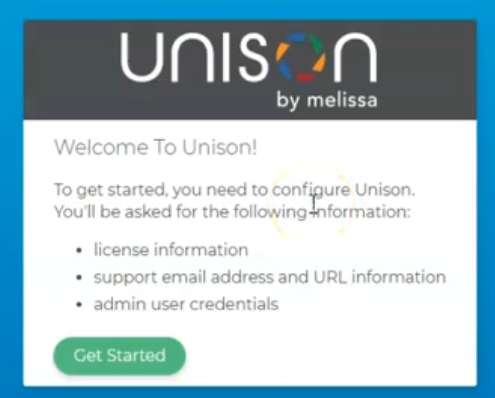
Enter a License Key (This key is provided after the Unison Service is purchased.)
Enter a support email.
Enter a new Base URL if needed.
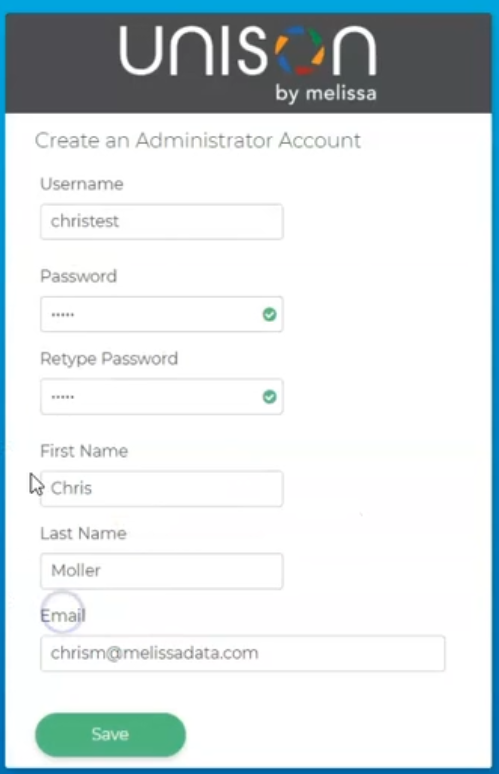
Next, Setup an Admin Account.
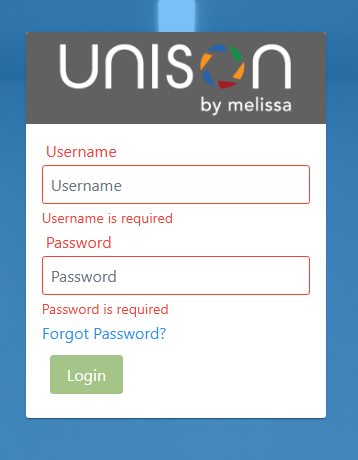
Login with the account created.
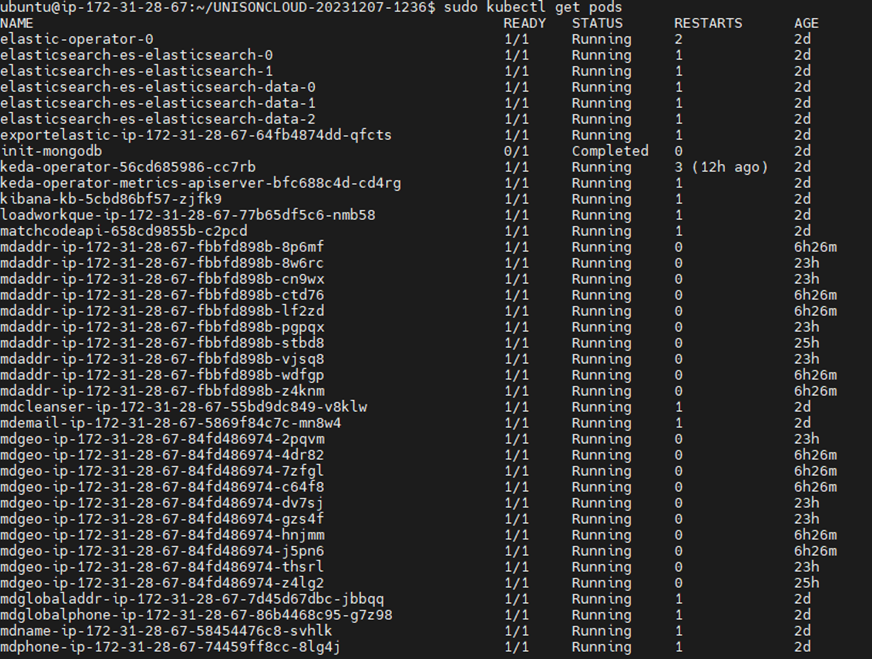
Check all services are up with kubectl get pods.
sudo kubectl get pods
Software Update Instructions#
Whenever there is a new version of Unison software available, follow the steps below to upgrade Unison to a new version.
Download the latest version of Unison into a directory of your choice. In this example we’re using our home directory. Use the command
wgetto get a download link from the command line.Extract the
tar.gzfile into its directory~/unisontar zxvf unison_global-1.2.23.tar.gz
Navigate to the Unison directory.
cd unison
Run the install.sh script.
sudo ./install.sh
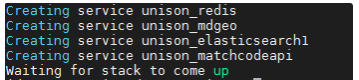
Wait for the install to complete (this can take a while).
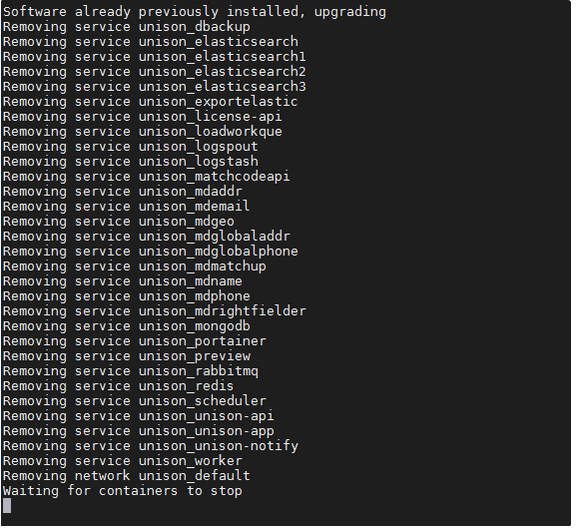
You’ll know it’s done when it displays a message like this:
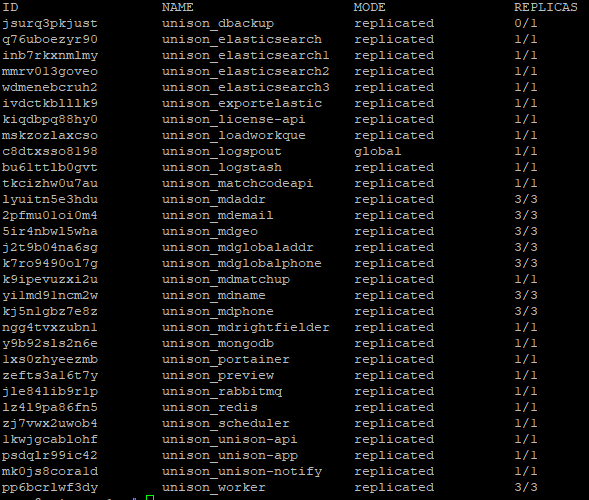
Check to see if all services are up and running.
docker service ls
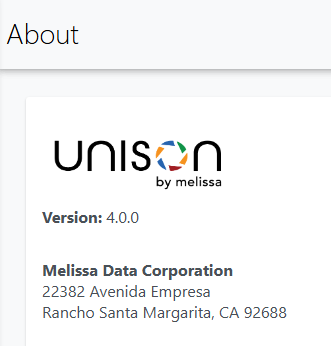
Once you’ve ensured all services are working, then the Unison app has been updated! You can verify this by checking the Version Info in the About section. The version number displayed here should match the version number on the file you downloaded.
Address Cleanse Tutorial#
The following steps will guide you in the basic usage of an Address Cleanse Data Enrichment in Unison by Melissa.
Login
You must first enter your login credentials at the login page.
Data Enrichment
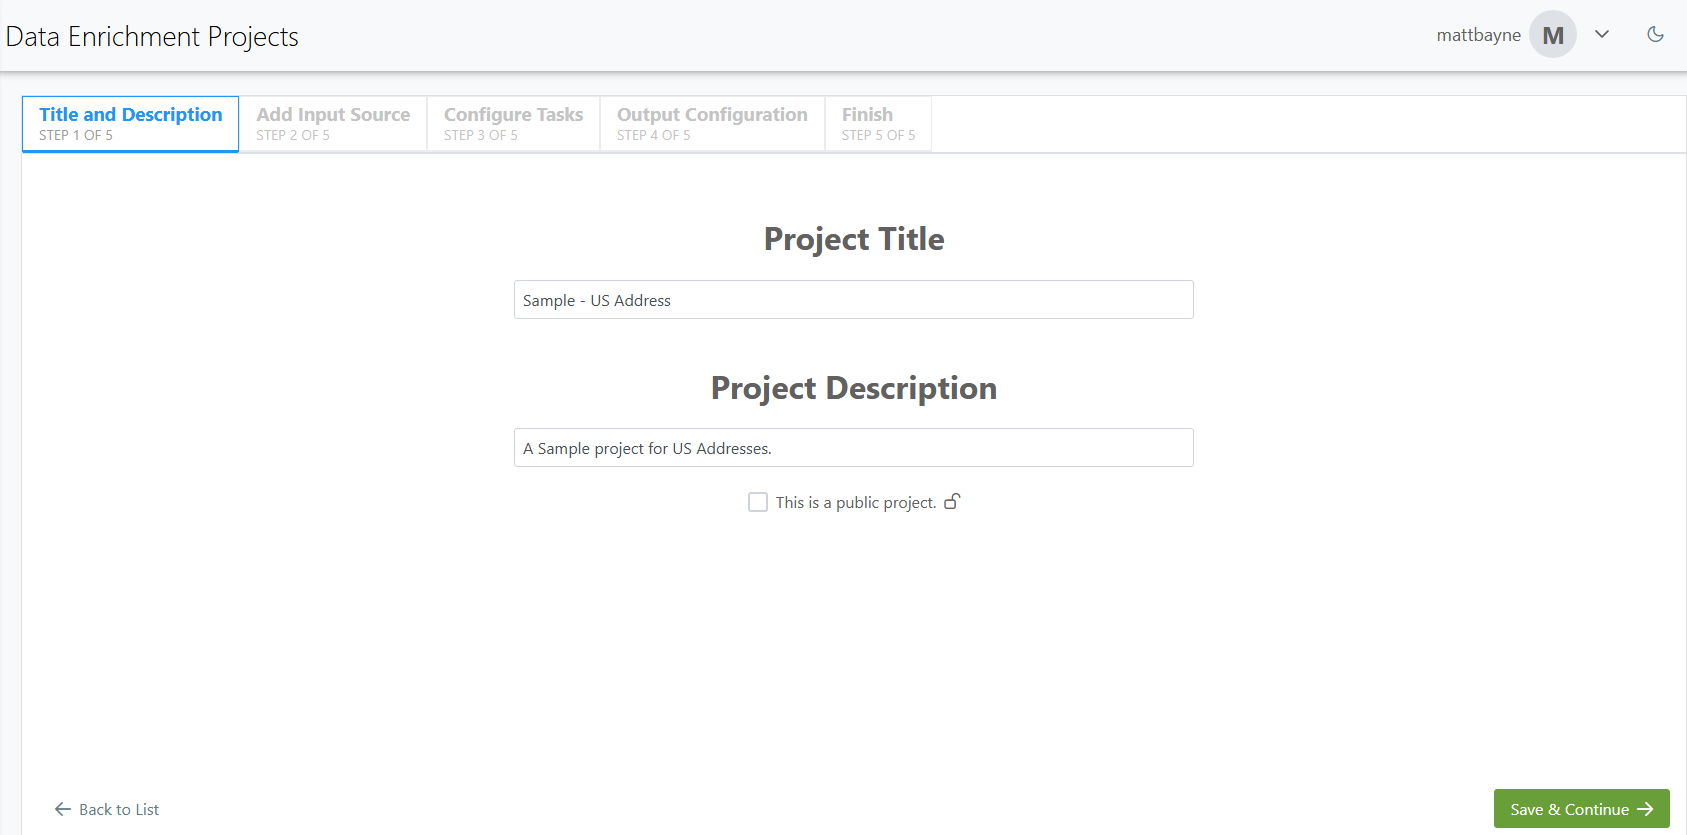
To start a new project, first click Projects, then click Data Enrichment.
Title and Description
You will now be at step one, where you can enter a project title and description. Once you’ve done this, click Save & Continue →.
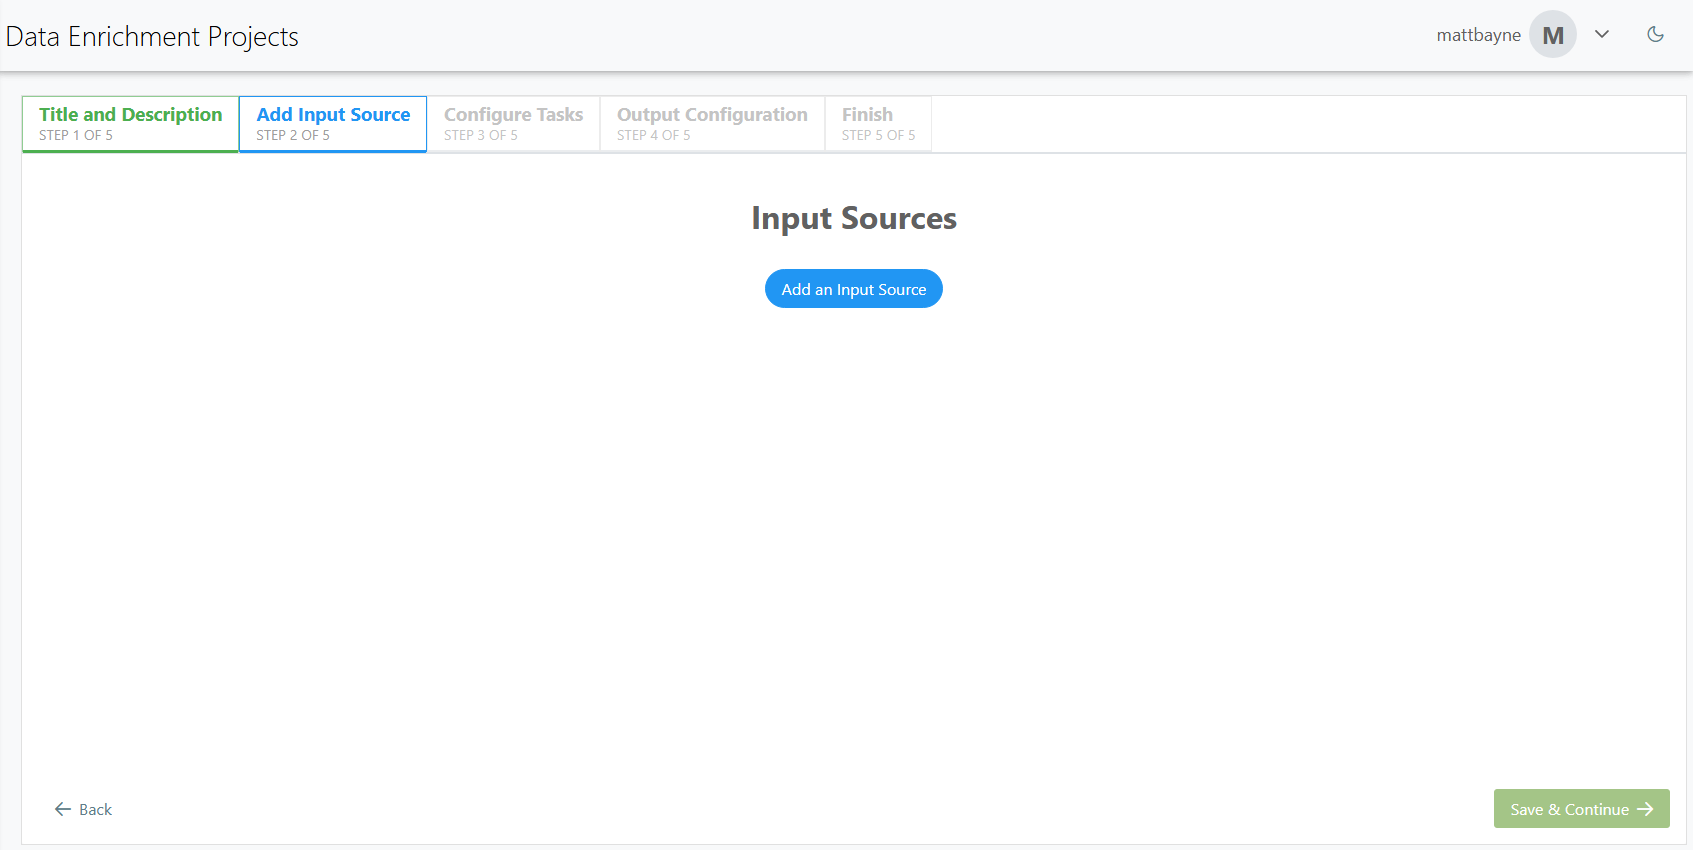
Add Input Source
Then select an input source for your project.
Choose an Input File
Click Add an Input Source to open a window. Under the Select a Source section you can upload or select an input file.
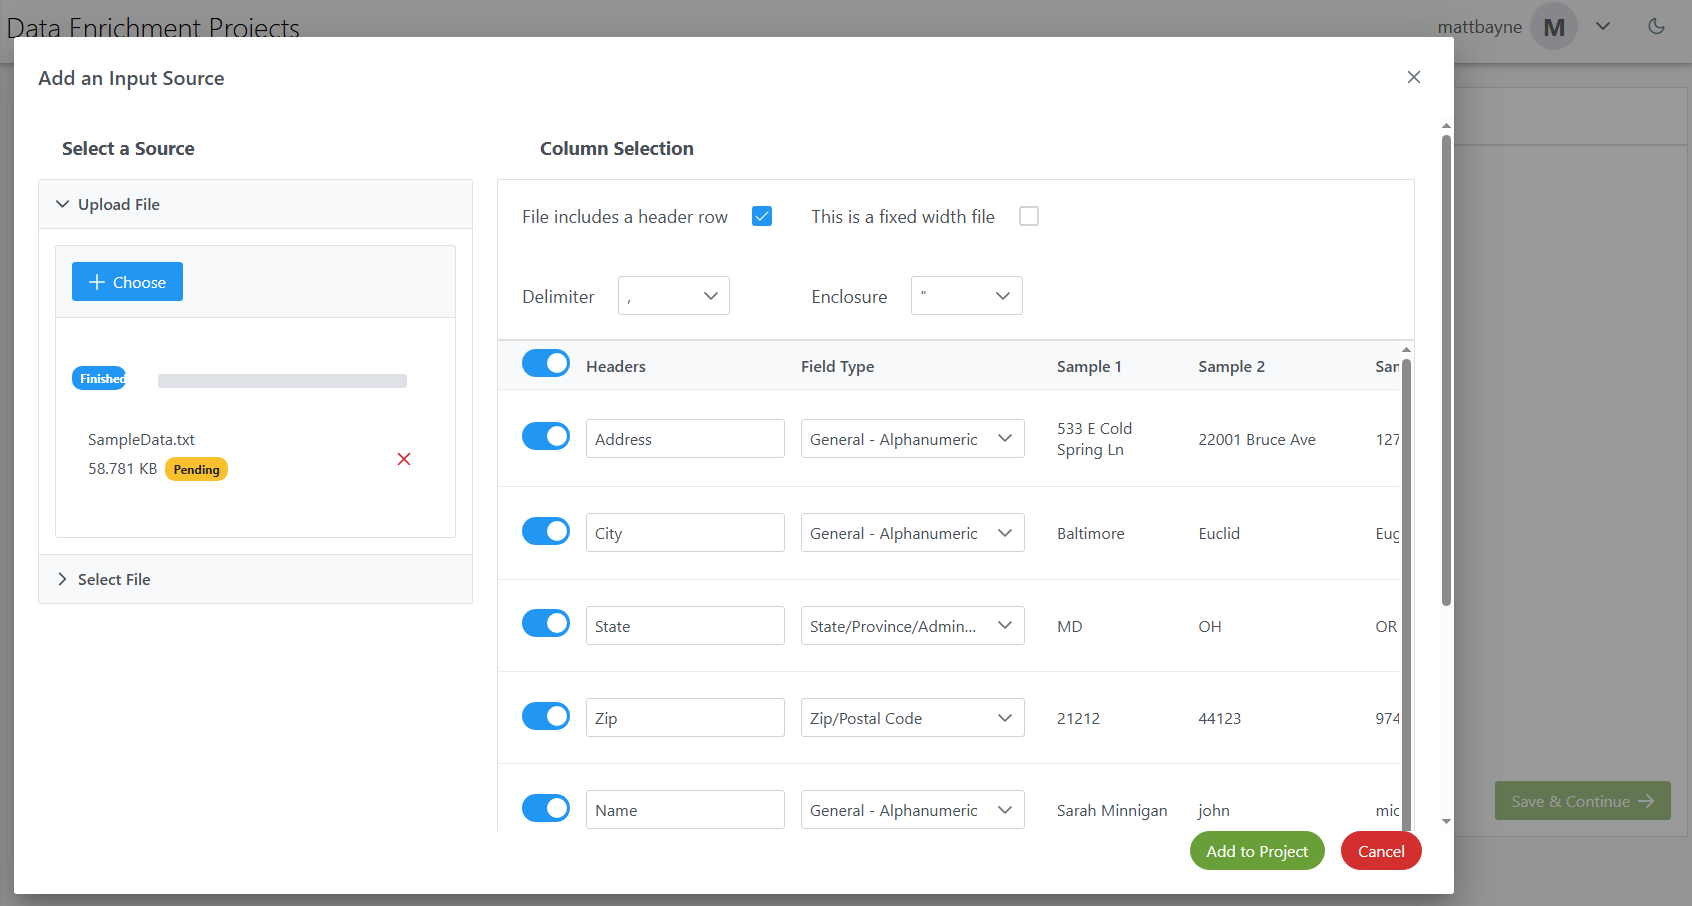
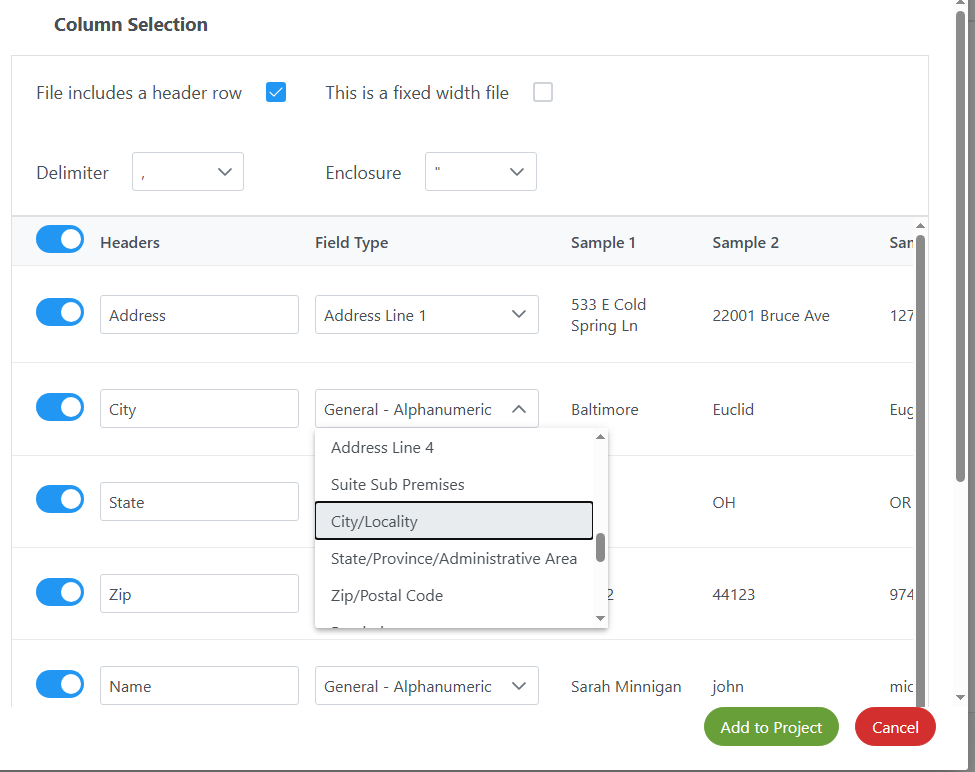
Once you’ve chosen an input file, under the Column Selection section, select the appropriate Field Type for every input field. There will be sample input to help you determine what types to choose.
When you’re done with this file, click Add to Project to finalize your input source. After you’ve added all input files you want (in this case, just the one file), click Save & Continue →.
Configure Tasks
This leads to step three, Configure Tasks.
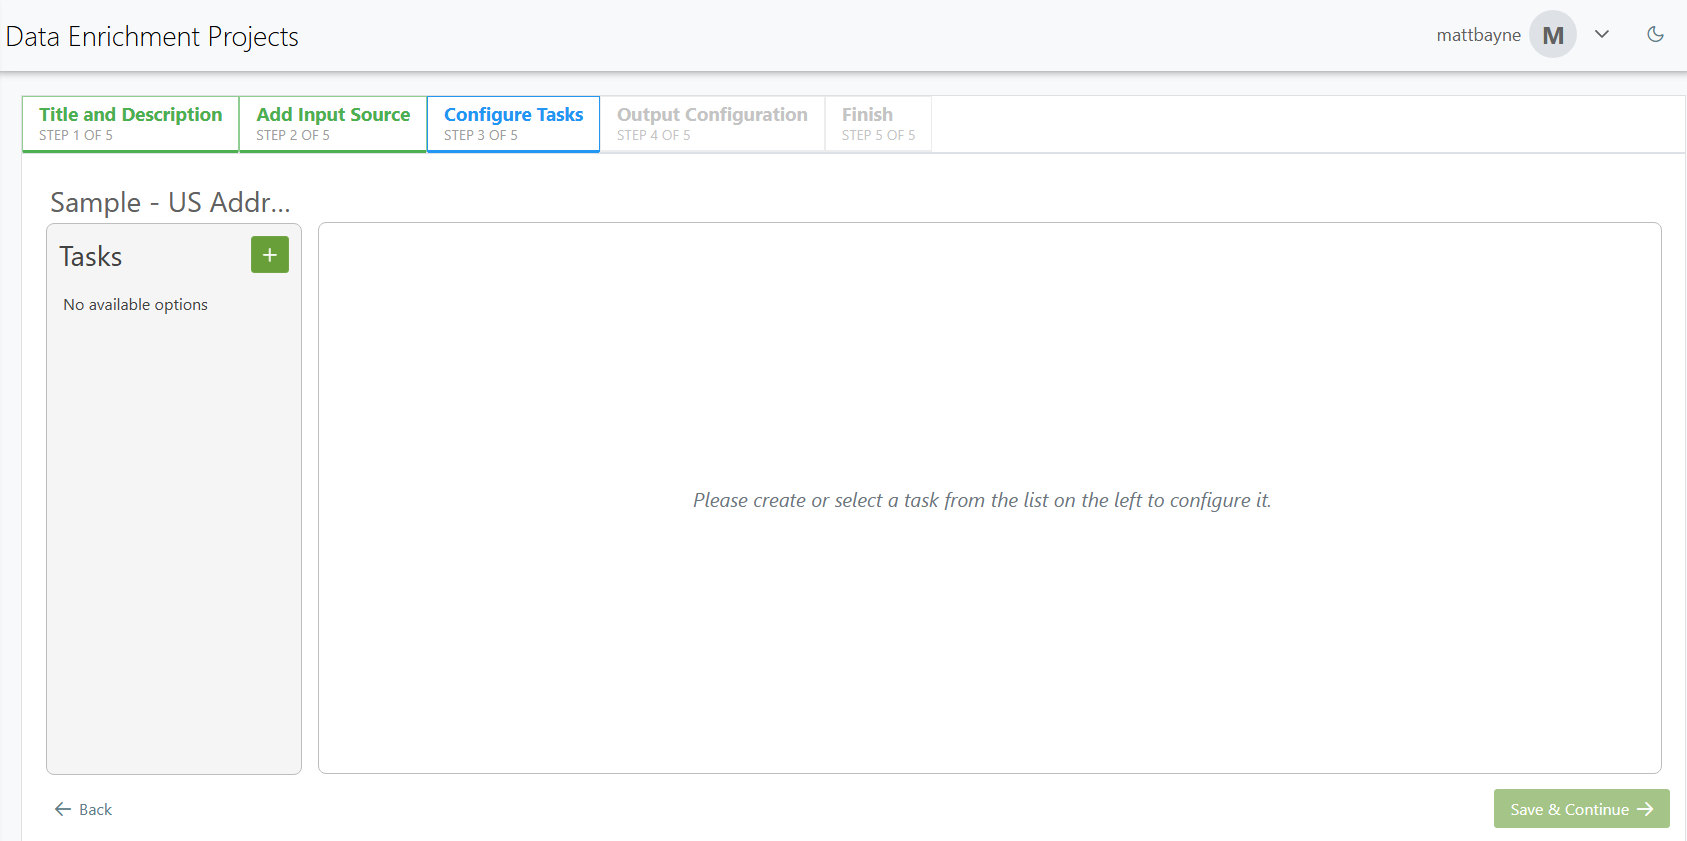
Click the + (plus symbol) next to Tasks to select the data enrichment task you want to use on your data. From the dropdown we’ll select Address Cleansing (US).
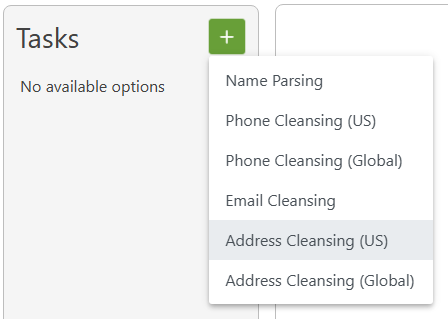
Address Cleansing (US)
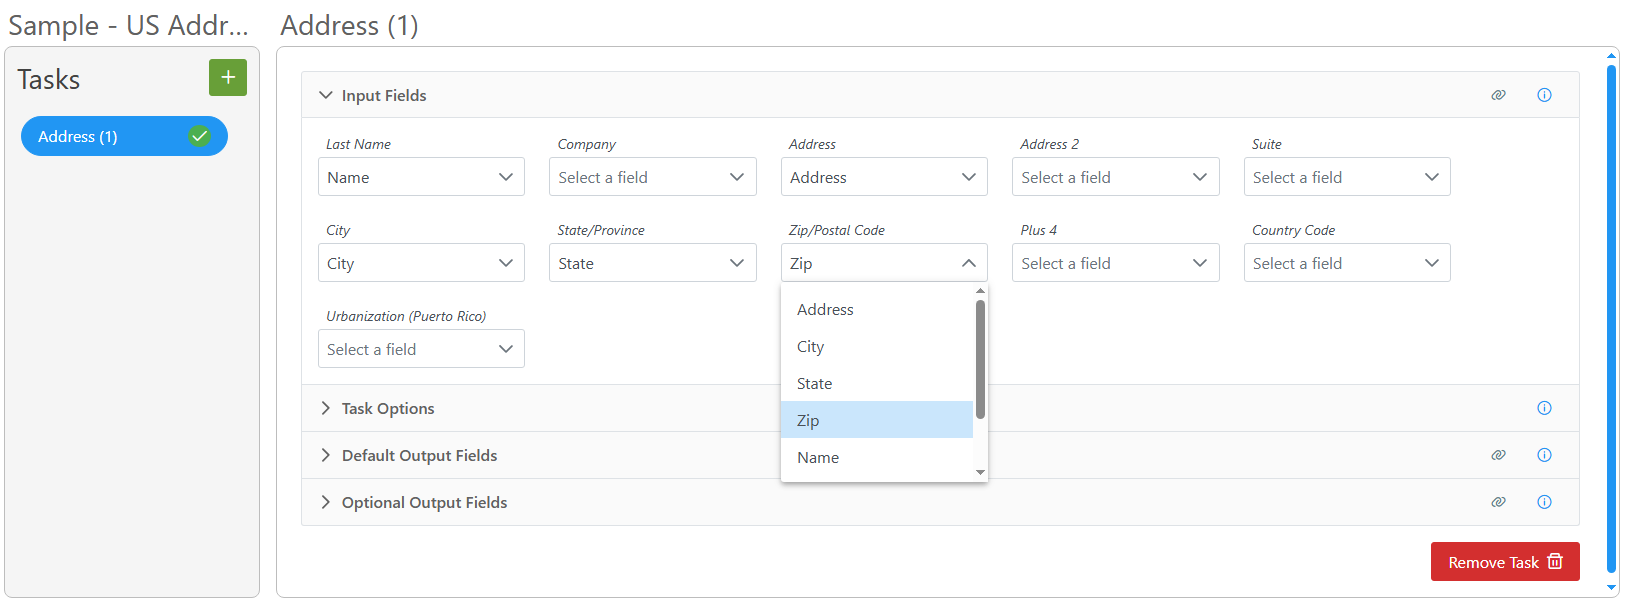
Input Fields
Under the Input Fields rollout, select which fields to use as input and how they should map.
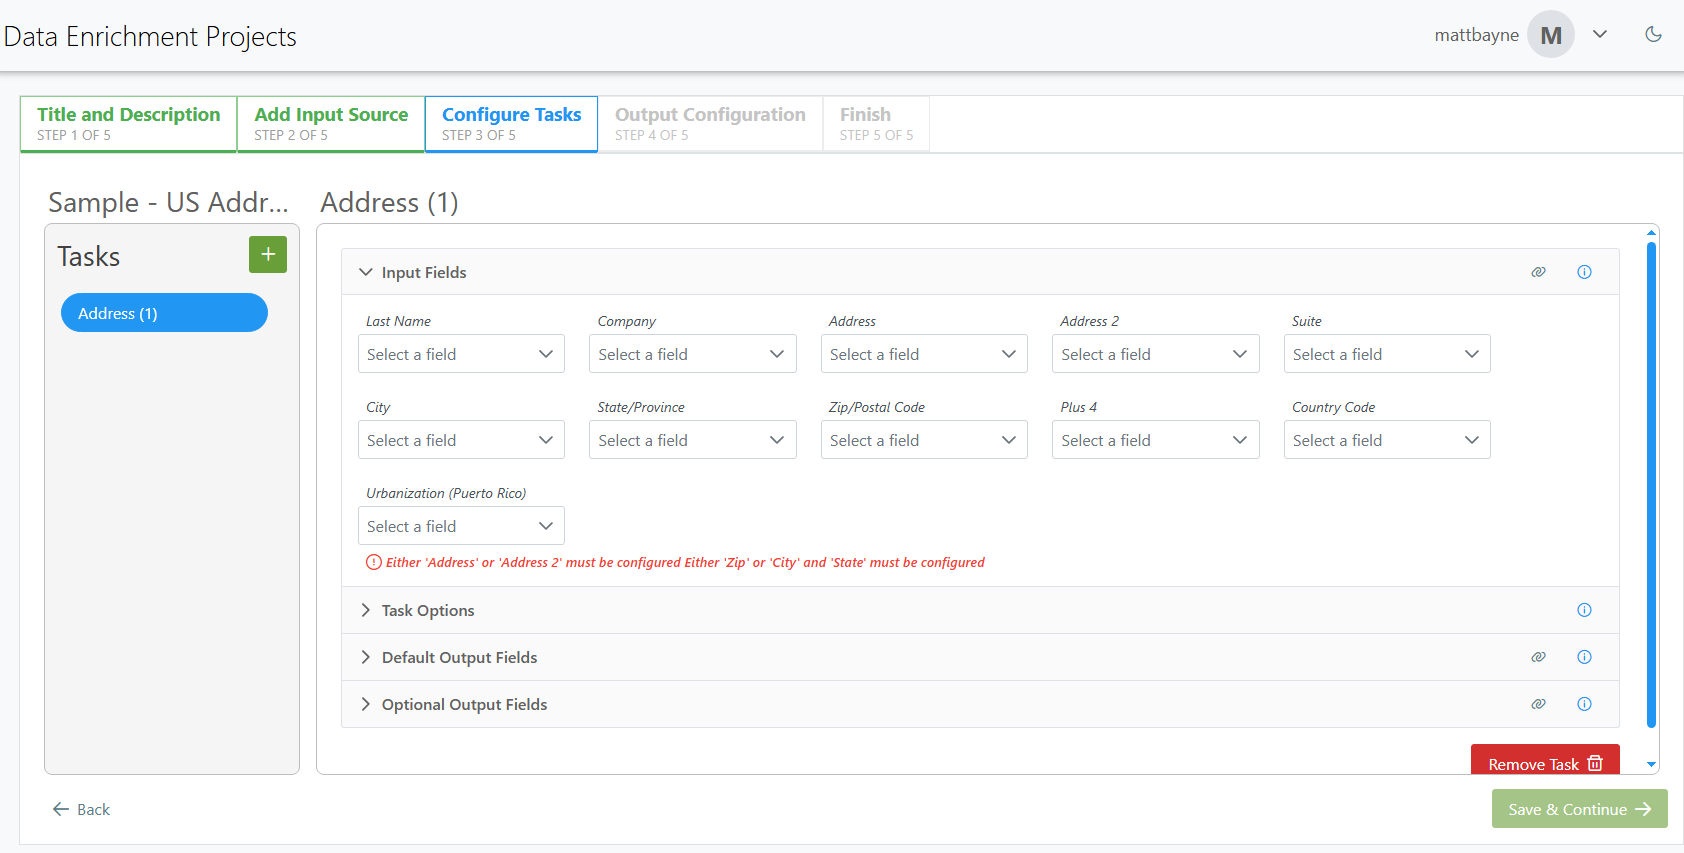
Clicking on a field will open a drop-down menu with a list of available fields from your input file.
Task Options
The Task Options let you set options for your cleansing operation, like how diacritics or city names are handled. In this instance we won’t change anything.

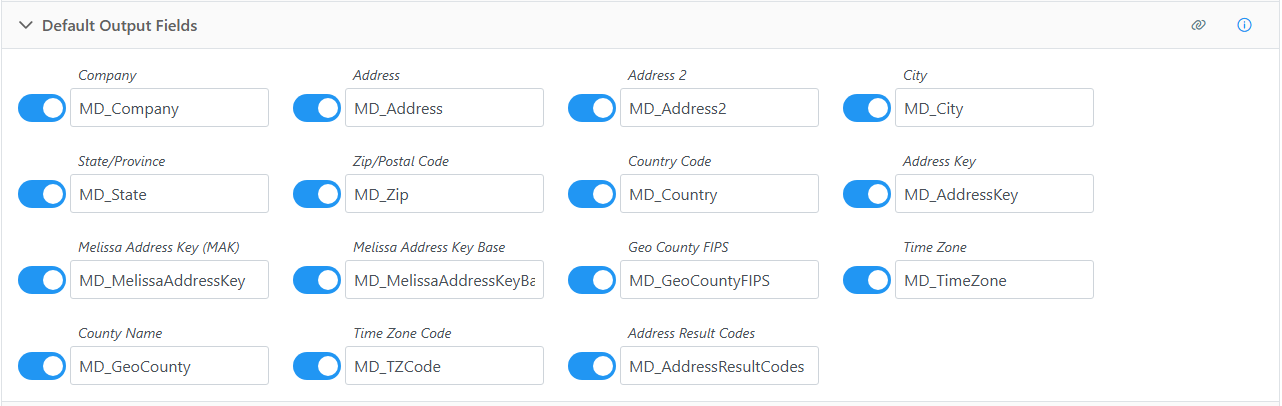
Output Fields
You can also control your output fields. Clicking the respective output field section will have a rollout that shows the fields for that group. Here you can choose which fields to output, and optionally rename the fields.
Once you’re done configuring your task, click Save & Continue →.
Output Configuration
You’ll now be one step four, Output Configuration. Here we’ll write to a file. Enter a file name and then select your enclosure and delimiter. You can also choose your compression method, to append a timestamp, or include the header.
File Settings
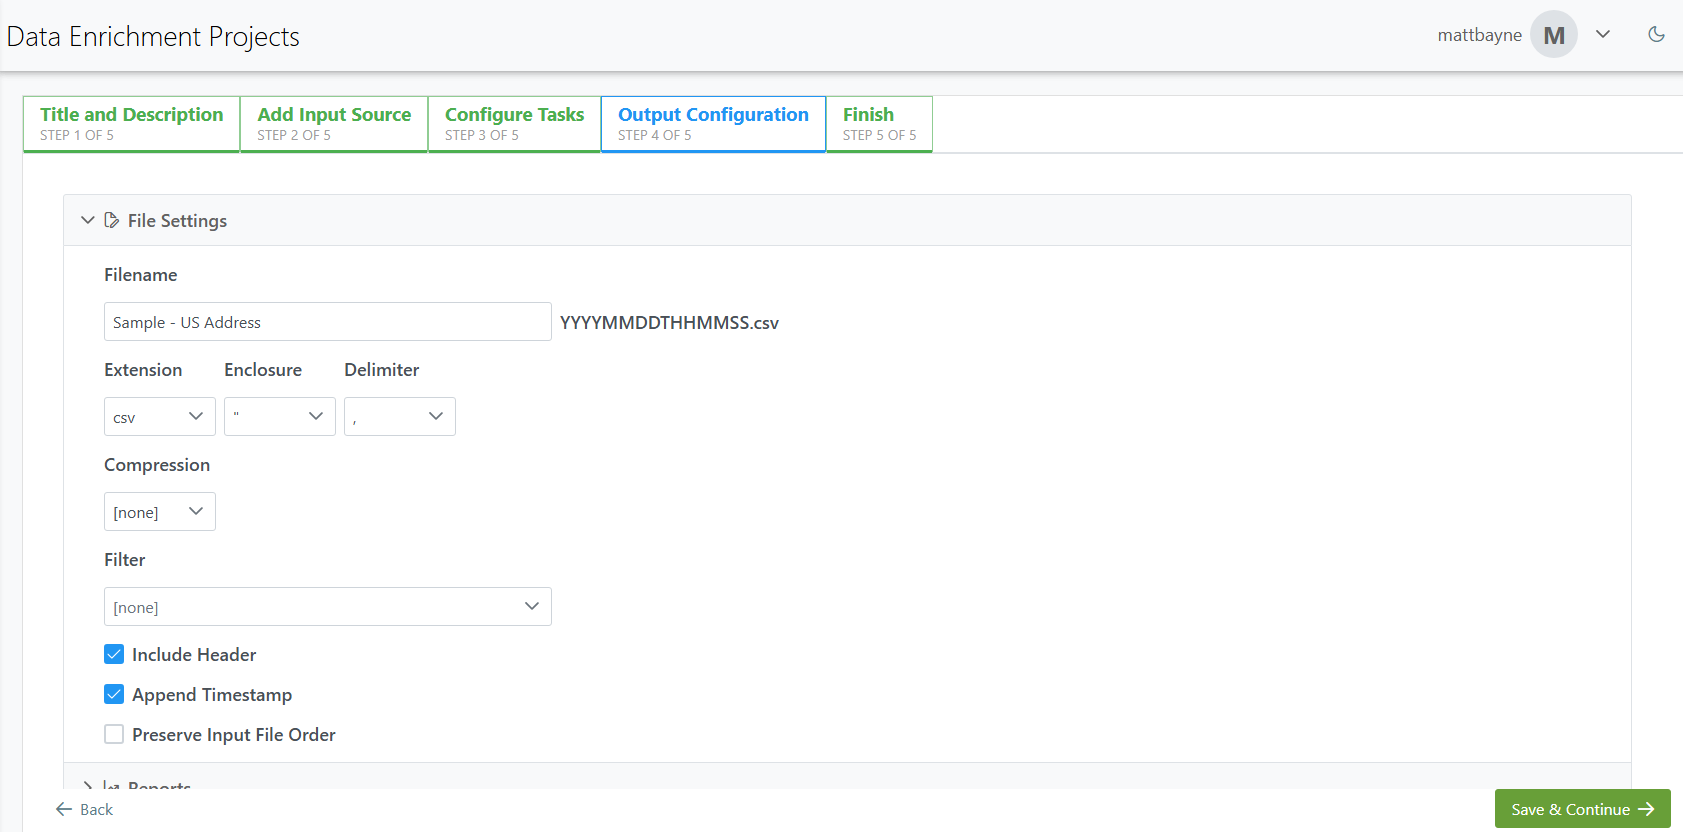
Filter
To get specific data from your file you can use a filter. This will filter your resulting data, using the result codes of the records to limit your results. For example, selecting the Full Address Matches (USPS) filter shows that any records with an
AS01result code will be output.
Reports
In this secion you can check the box next to Default Reports to have those reports generate when the job is ran.

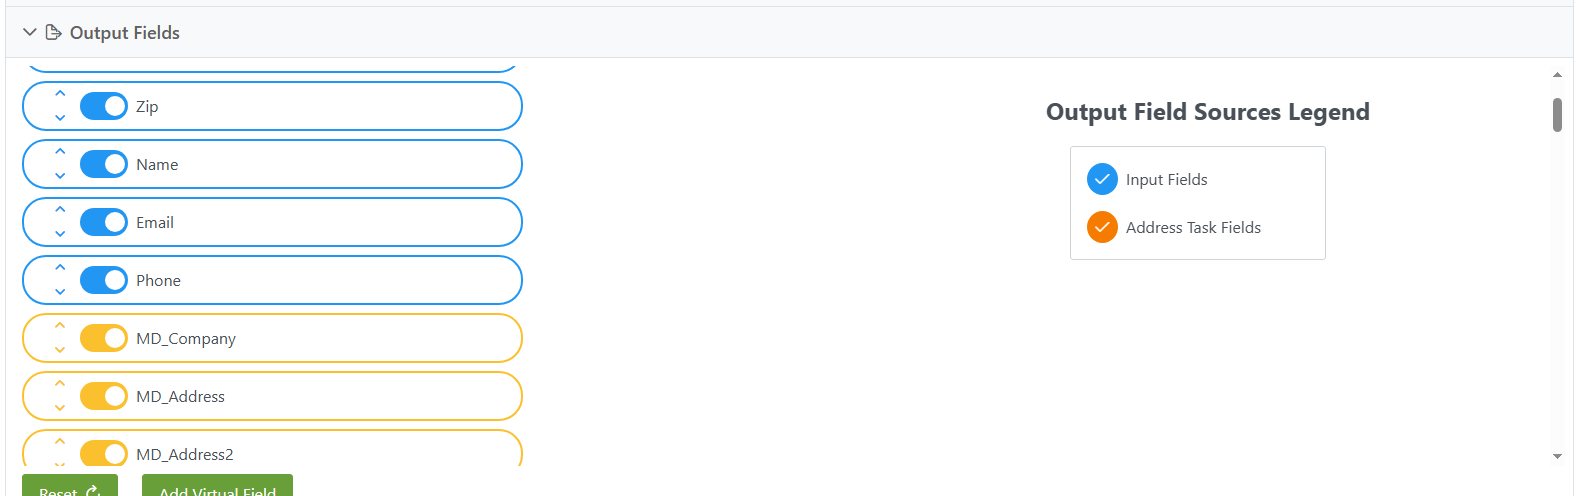
Output Fields
Clicking the rollout arrow next to Output Fields will show the default output fields and their order.
You can remove unwanted fields from your output by clicking the button next to each field. You can also re-order your fields by using the up and down arrows drag and drop.
Finish
The project is now ready to be Run Now or Run Later.
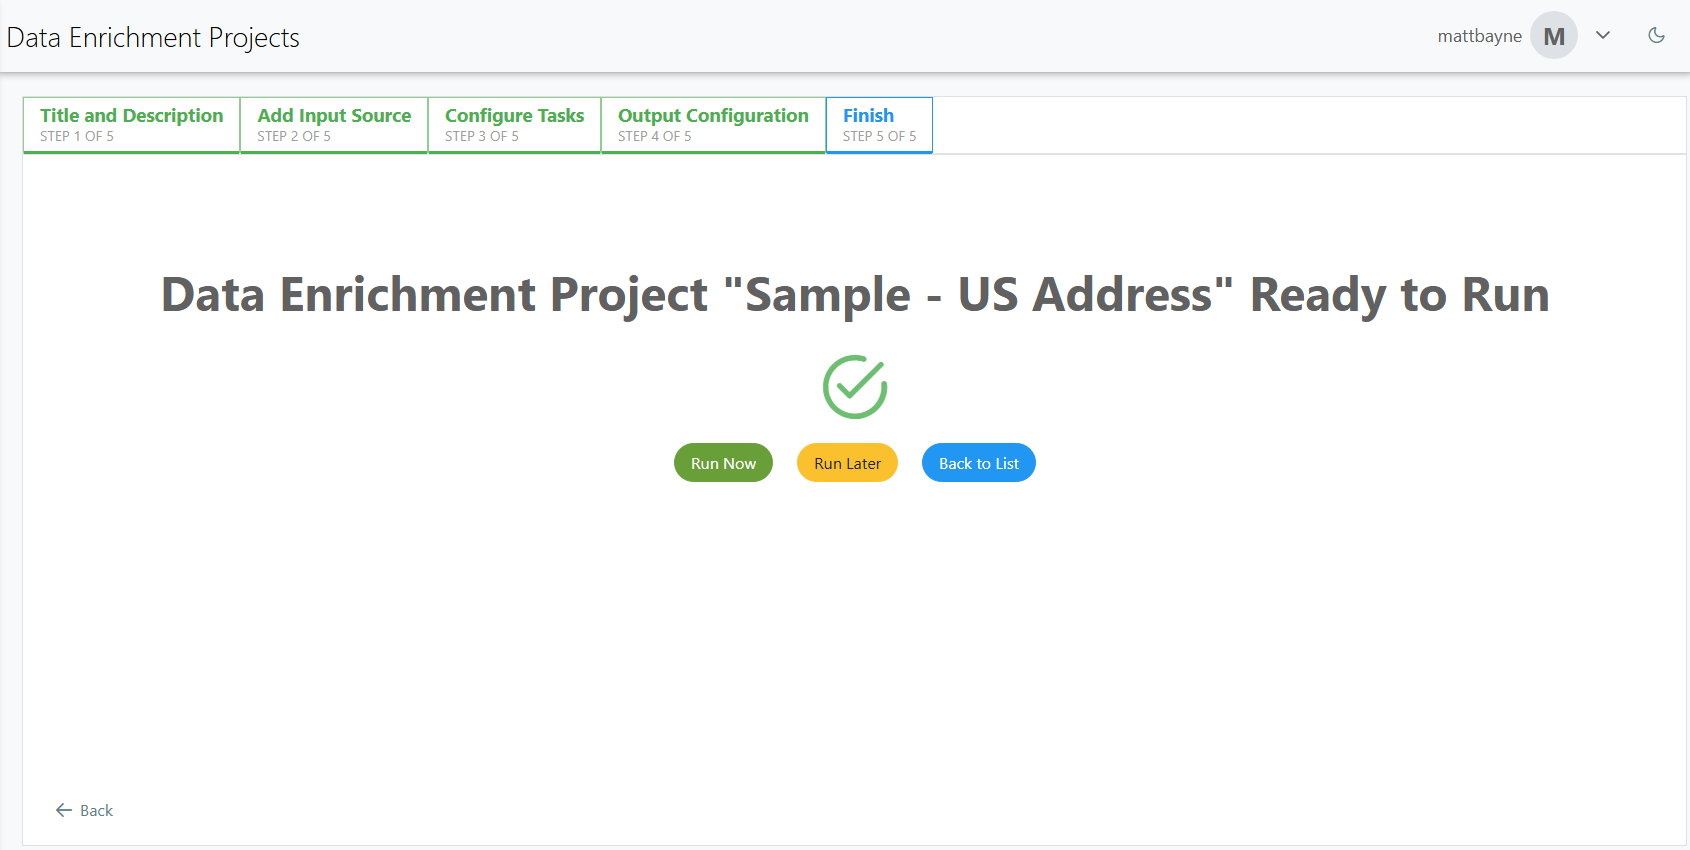
Run Now
The Run Now button will begin processing your project immediately.
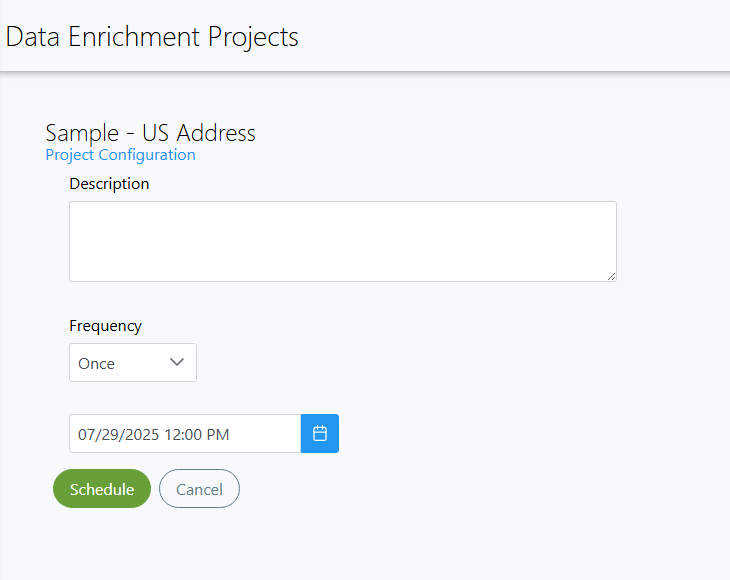
Run Later
The Run Later button will let you schedule your project to run at a different time.
In the Data Enrichment Projects window, enter a description of your scheduled project, a frequency of execution and a start date/time.
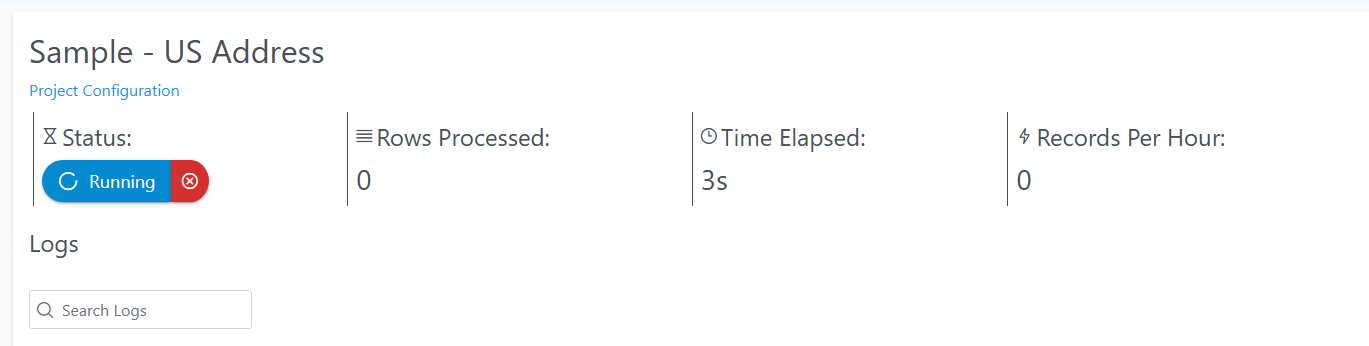
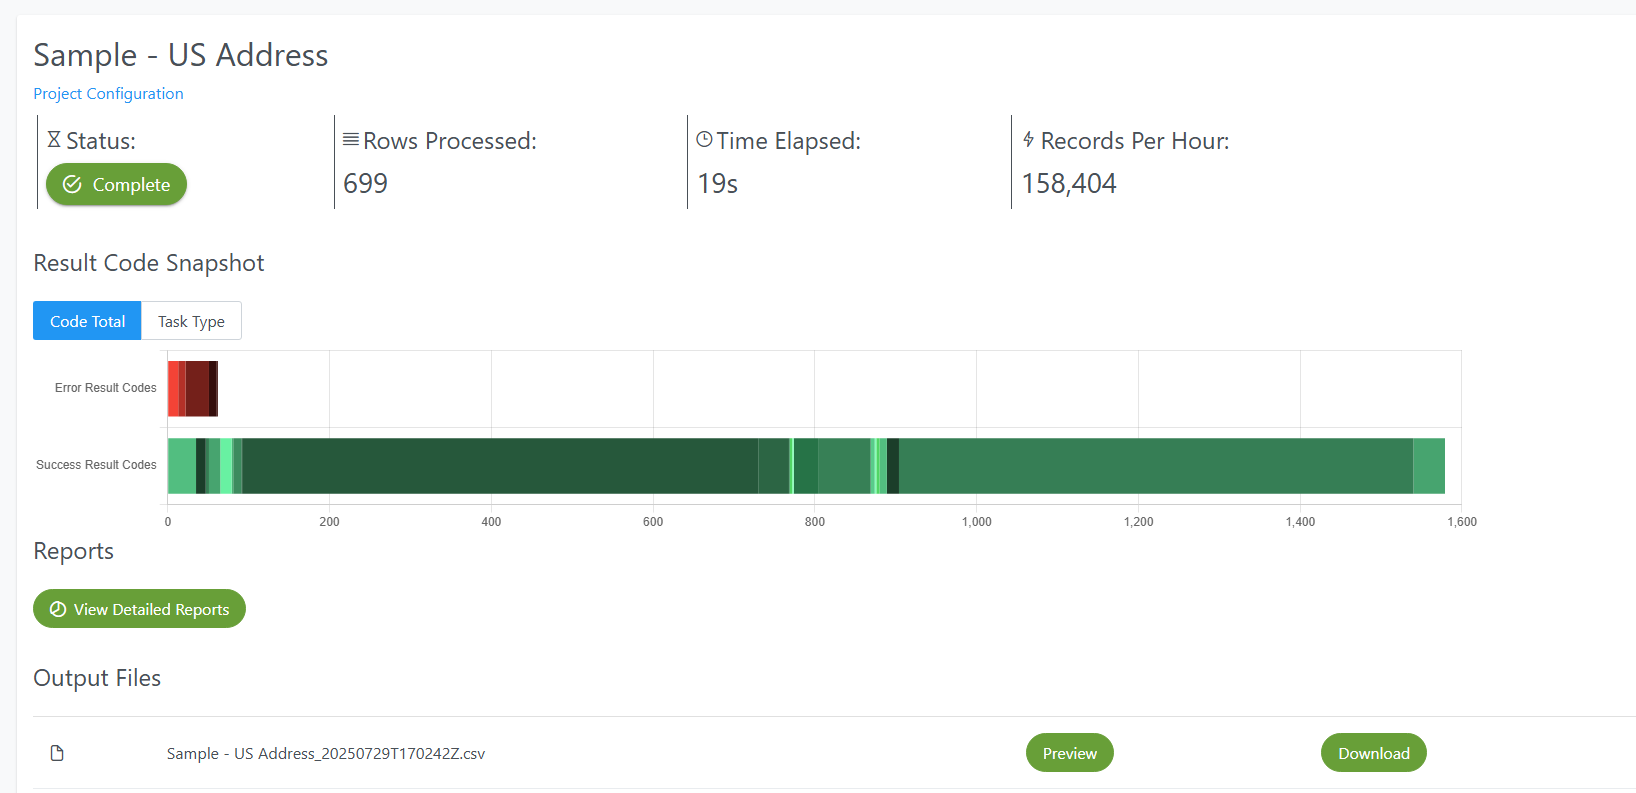
Job Status
Once a job has started, you can check the job status to view it’s state, the number of rows processed, time elapsed, date started and date completed.
Output Files
When the job has completed, you can also view any output files generated. You can either view it by clicking the view button or download it by clicking the download button.
Detailed Reports
A completed job will also have detailed reports. These will depend on which service you use and display generated result codes. These codes will detail the overall status of your project, changes made to the data, and any errors encountered.
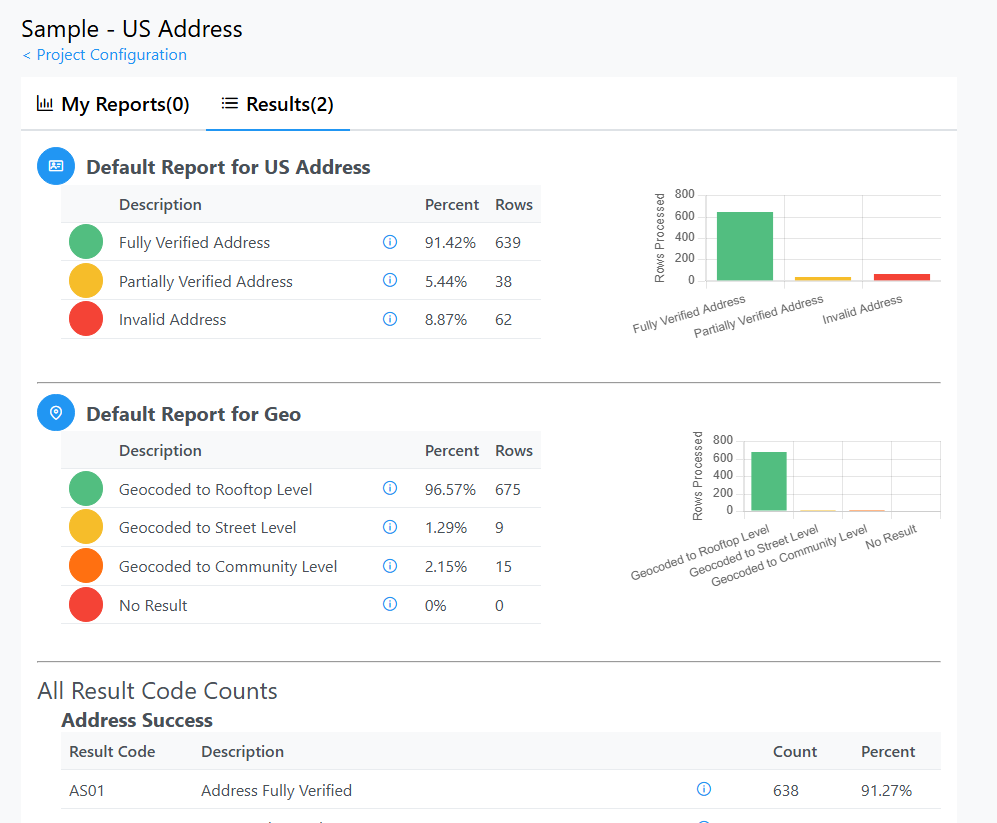
These reports will depend on which service you use and display generated result codes. These codes will detail the overall status of your project, changes made to the data, and any errors encountered.
Software Rollback Tutorial#
In some situations a Unison version upgrade can cause an unsuccessful upgrade, requiring starting from a previous version to fix. If this occurs, you can follow the steps below to rollback to a previous version of Unison you initially installed in your system.
Steps to Rollback Unison Version:
Navigate
cdto the rollback directory/work/.rollback.cd /usr/local/melissa/work/.rollback
Copy the files from the version you want to rollback to into the current file locations.
cp .config.1.2.18 /usr/local/melissa/work
cp docker-compose.yml.1.2.18 /usr/local/melissa/work/unisonMultiTemplate/docker-compose.yml
cp docker-compose.base.yml.1.2.18 /usr/local/melissa/work/unisonMultiTemplate/docker-compose.base.yml
Navigate to the work directory
/work.cd /usr/local/melissa/work
Load the environmental variables necessary to deploy the stack.
for v in $(cat .config); do export $v ;done
Navigate to the stack deployment config directory.
cd /usr/local/melissa/work/unisonMultiTemplate
Make sure the old stack is torn down.
docker stack rm unison
docker container ls
(This should show nothing listed.)
Log in to the server you are rolling back.
docker login -u unison -p 9YJxcRTM1yRgz0xJagTw ucr.melissadata.net
Deploy the stack.
docker stack deploy -c docker-compose.yml --with-registry-auth unison
Ensure the stack has come up
docker service ls
(All should show 1/1 or 3/3, etc.)
LDAP Settings#
There are 4 sections to fill out when configuring LDAP settings on a Unison environment.
LDAP Connection Settings#
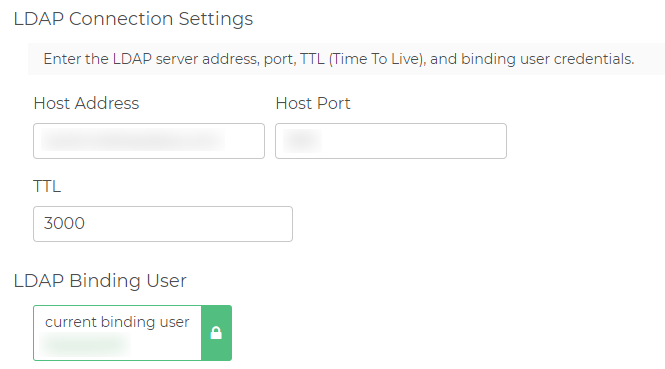
Host Address
This is the LDAP Host Server address.
Host Port
Port on the LDAP Host Server
TTL
LDAP time to live. This is the time, in seconds, that the server will store the records before they are revalidated.
LDAP Distinguished Name#
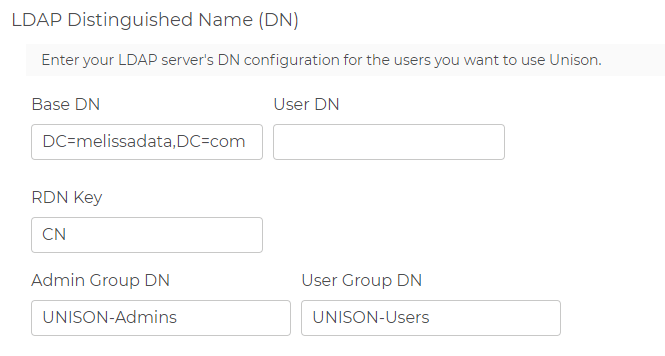
Base DN
LDAP Base Distinguished Name. This specifies the domain by using domain components.For example:DC=melissadata,DC=com.User DN
LDAP User Distinguished Name. This specifies the server by using Organizational Unit (OU).For example:OU=mdserver.RDN Key
Relative Distinguished Name.For example:CN=.Admin Group DN
LDAP Admin Group Distinguished Name. This specifies admin group names.For example:OU=AdminGroup1, OU=AdminGroup2.User Group DN
LDAP User Group Distinguished Name. This specifies the user group names.For example:OU=UserGroup1,OU=UserGroup2.
LDAP User Attributes#
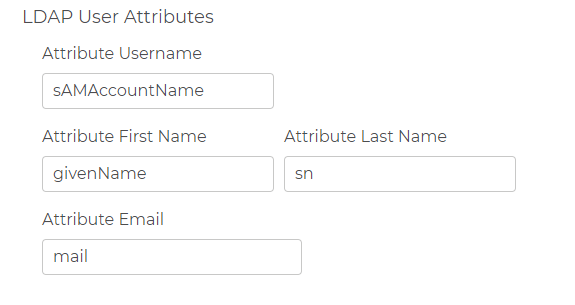
Attribute Username
The username for the account.For example:sAMAccountName=UserName.Attribute First name
The first name associated with the account.For example:givenName=FirstName.Attribute Last name
The last name SN(surname) associated with the account.For example:sn=LastName.Attribute Email
This specifies the email.For example:email=mail@domain.com.
LDAP Test#
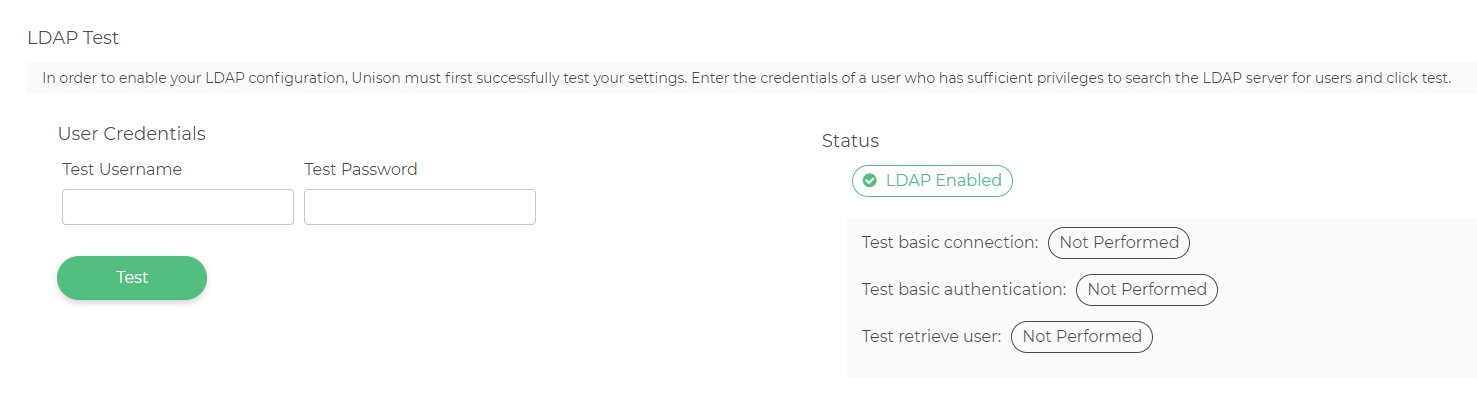
In order to enable your LDAP configuration, Unison must first successfully test your settings. Enter the credentials of a user who has sufficient privileges to search the LDAP server for users and click test.