

Clean Suite for CRM: Salesforce Other#
Custom Code#
Use Clean Suite global Apex classes when you add package services to custom Salesforce automation.
Before You Write Code#
Confirm the installed package namespace is
MDPERSONATOR.Confirm the user has the required Clean Suite permission set.
Confirm the target fields and Custom Mapping exist.
Test the code in a sandbox.
Check result codes and logs after each test.
Select an Execution Path#
Use this path to select the service execution method.

Diagram flow
Choose the execution method → Process one record
Choose the execution method → Process a record set
Choose the execution method → Run in a trigger with uncommitted work
Process one record → Call the public Apex service method
Process a record set → Start a batch job
Run in a trigger with uncommitted work → Use a future method or asynchronous process
Call the public Apex service method → Check result codes and logs
Start a batch job → Check result codes and logs
Use a future method or asynchronous process → Check result codes and logs
Call a Single-Record Service#
Use the service method that matches the data type.
Id recordId = '003000000000001AAA';
String addressResult = MDPERSONATOR.MD_GlobalAddressWSExt.doGlobalAddress(recordId);
String emailResult = MDPERSONATOR.MD_GlobalEmailWSExt.doGlobalEmail(recordId);
String phoneResult = MDPERSONATOR.MD_GlobalPhoneWSExt.doGlobalPhone(recordId);
String personResult = MDPERSONATOR.MD_PersonatorWSExt.doPersonator(recordId);
Use Trigger-Safe Callouts#
Do not call an HTTP service directly from a transaction that has uncommitted work. Use a package future method instead.
The package supplies these global future methods. Each method starts an asynchronous callout for one record.
Service |
Future method |
|---|---|
Global Address |
|
Global Email |
|
Global Phone |
|
Personator |
|
Property |
|
BusinessCoder |
|
Each method carries the @Future(callout=true) annotation. It returns no value.
For a bulk trigger, use MD_PersonatorWSExt.doOnePersonatorBatch(List<Id> recordIDs). One call processes every record in the trigger.
Do not make one callout per record inside a trigger loop. Use a batch job for record sets.
Add a Trigger#
Call a future method from a trigger to avoid synchronous HTTP callouts in an uncommitted transaction.
This example shows a Contact trigger that verifies every new or updated Contact record with Personator.
// Trigger on Contact
trigger ContactPersonatorTrigger on Contact (after insert, after update) {
   Set<Id> contactIds = new Set<Id>();
   for (Contact c : Trigger.new) {
      contactIds.add(c.Id);
   }

   ContactPersonatorHandler.verifyContacts(new List<Id>(contactIds));
}

// Handler class
public class ContactPersonatorHandler {
   public static void verifyContacts(List<Id> contactIds) {
      if (contactIds.isEmpty()) {
            return;
      }

      MDPERSONATOR.MD_PersonatorWSExt.doOnePersonatorBatch(contactIds);
   }
}
Object: Contact
Why async is required: Triggers execute in a transaction with uncommitted work. HTTP callouts are forbidden in this state. The @Future(callout=true) method executes asynchronously after the transaction commits.
The package method MD_PersonatorWSExt.doOnePersonatorBatch is the asynchronous handler. The custom handler class above is synchronous and delegates to that package method.
Start a Batch Job#
Construct a package batch class, then pass it to `Database.executeBatch`. The batch constructors are global. Custom Apex can call them.
Id jobId = Database.executeBatch(
   new MDPERSONATOR.MD_PersonatorBatch(
      'SELECT Id FROM Contact LIMIT 10', // tested SOQL query
      true,                              // update the source record
      true,                              // process all records
      true,                              // use Clean Suite mappings
      'Mailing Address Verification'     // Custom Mapping name
   ),
   100                                    // Salesforce batch size
);
The package supplies four Clean Suite batch classes. Each class takes the same five constructor arguments.
Service |
Batch class |
|---|---|
Personator |
|
Global Address |
|
Global Email |
|
Global Phone |
|
The Custom Mapping must exist for the object and the service. If the mapping is absent, the job fails.
MD_CleanSuiteBatchController.executeBatchJob is package-internal. That method is public, not global. It drives the Clean Suite Batch Processing tab only. Custom Apex cannot call it.
Check the returned Async Apex job Id. Use Async Apex Jobs and Clean Suite Log to monitor the result.
Start a Batch Job from Anonymous Apex#
Create the Custom Mapping for the object and service.
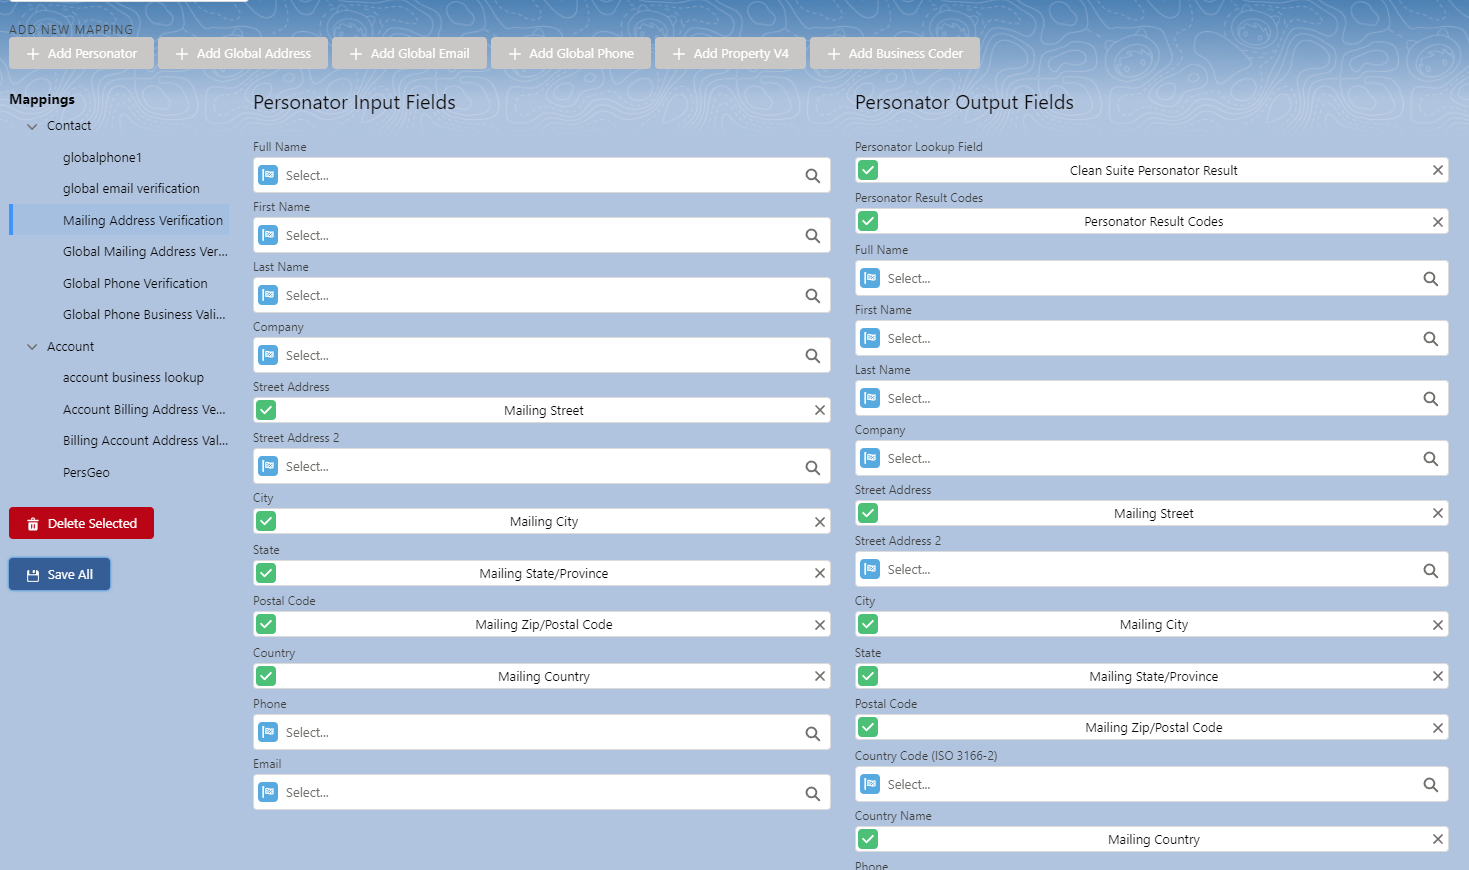
The example uses a Contact mapping named Mailing Address Verification.
Run the batch class from Developer Console > Execute Anonymous. Pass the mapping name.
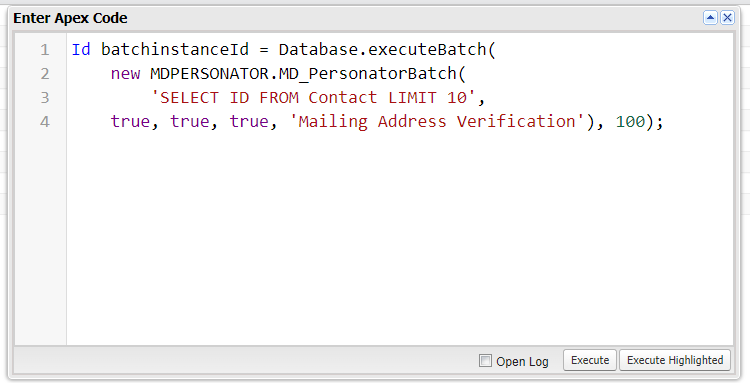
Database.executeBatch returns the Async Apex job Id.
Open Setup > Apex Jobs to review the job and its status.
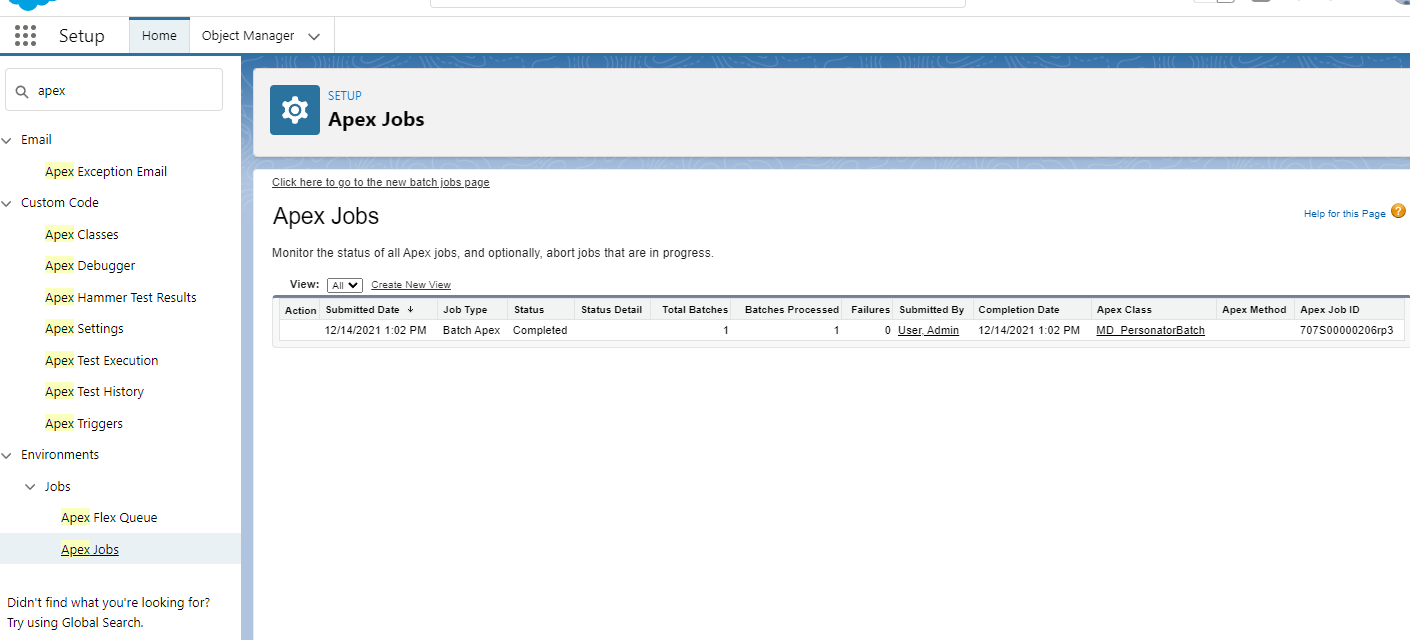
The list shows the status, processed batches, and failure count.
Express Entry Lightning Action Override#
Use a custom Lightning Component to override the standard New action with an Express Entry form.
The packaged LX_ExpressEntry component cannot serve as an action override. It does not implement the lightning:actionOverride interface that Salesforce requires for a standard action.
Melissa supplies the sample code for the custom component. Download the archive before you start.
Extract the archive. Confirm that it holds the three source files.
The archive holds
ExpressEntryNew.cmp,ExpressEntryNewController.js, andExpressEntryNewHelper.js. Each file supplies one part of the new Lightning Component bundle.In Developer Console, create a Lightning Component bundle. Enter a descriptive name.
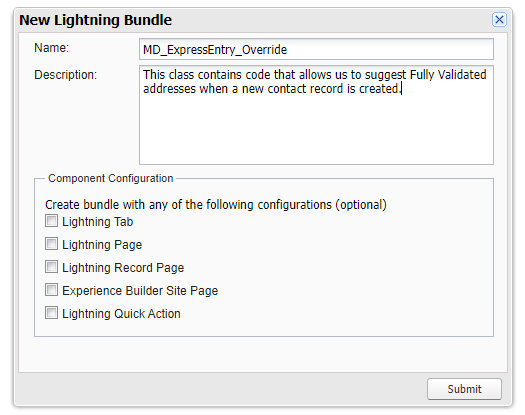
The example uses the name MD_ExpressEntry_Override.
Copy the contents of
ExpressEntryNew.cmpinto the.cmpfile of the new bundle. Save the file.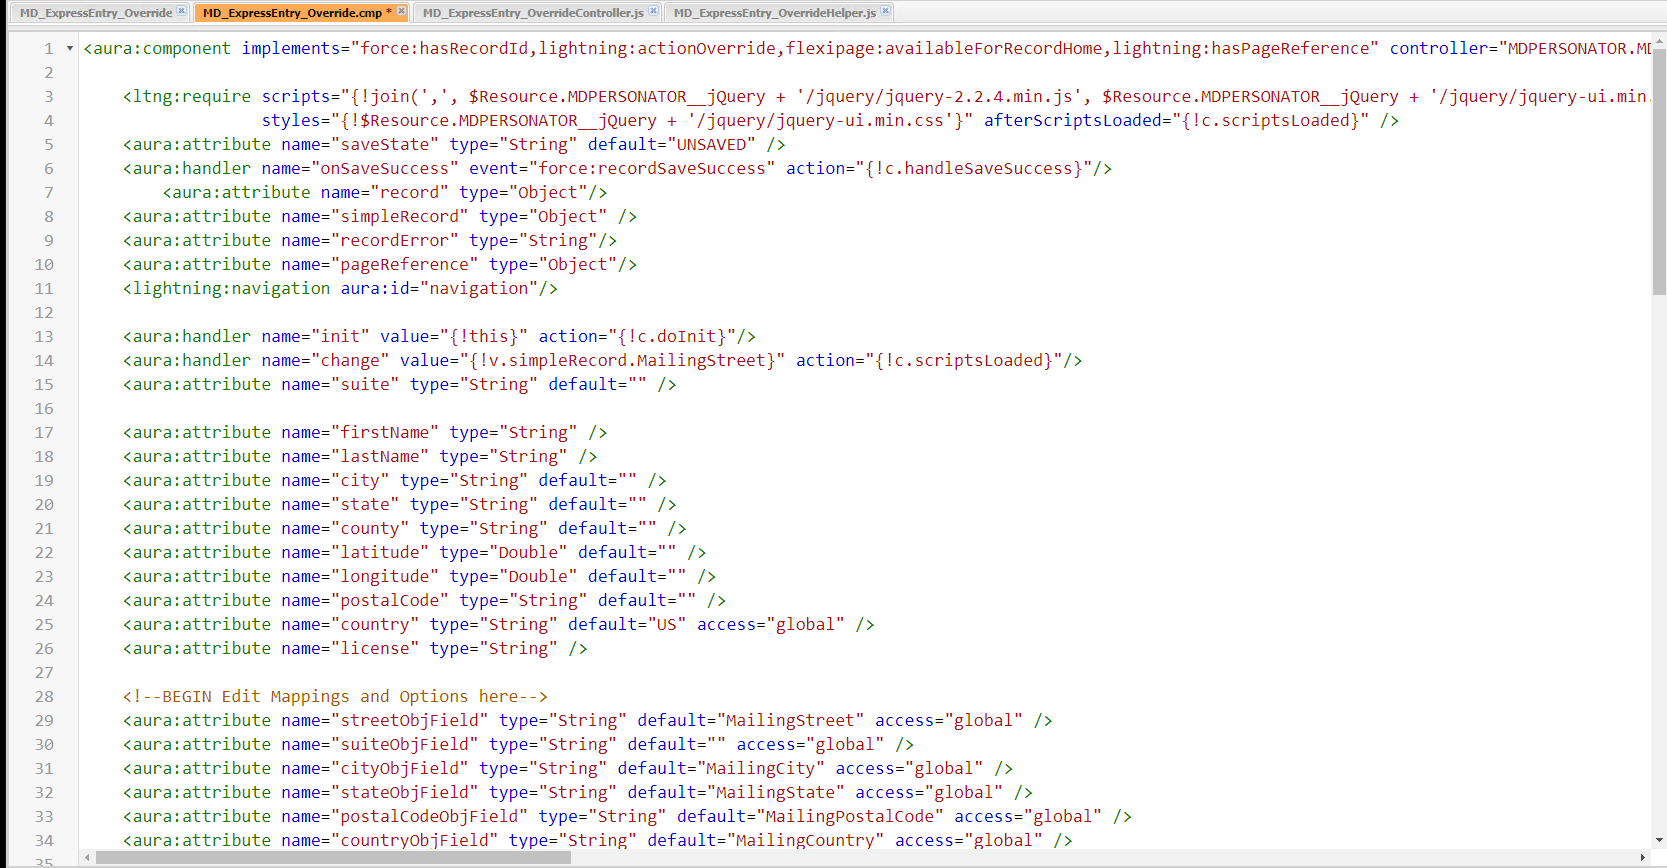
Overwrite the generated markup. Press Ctrl+S to save the file.
Copy the contents of
ExpressEntryNewController.jsinto the controller.jsfile. Save the file.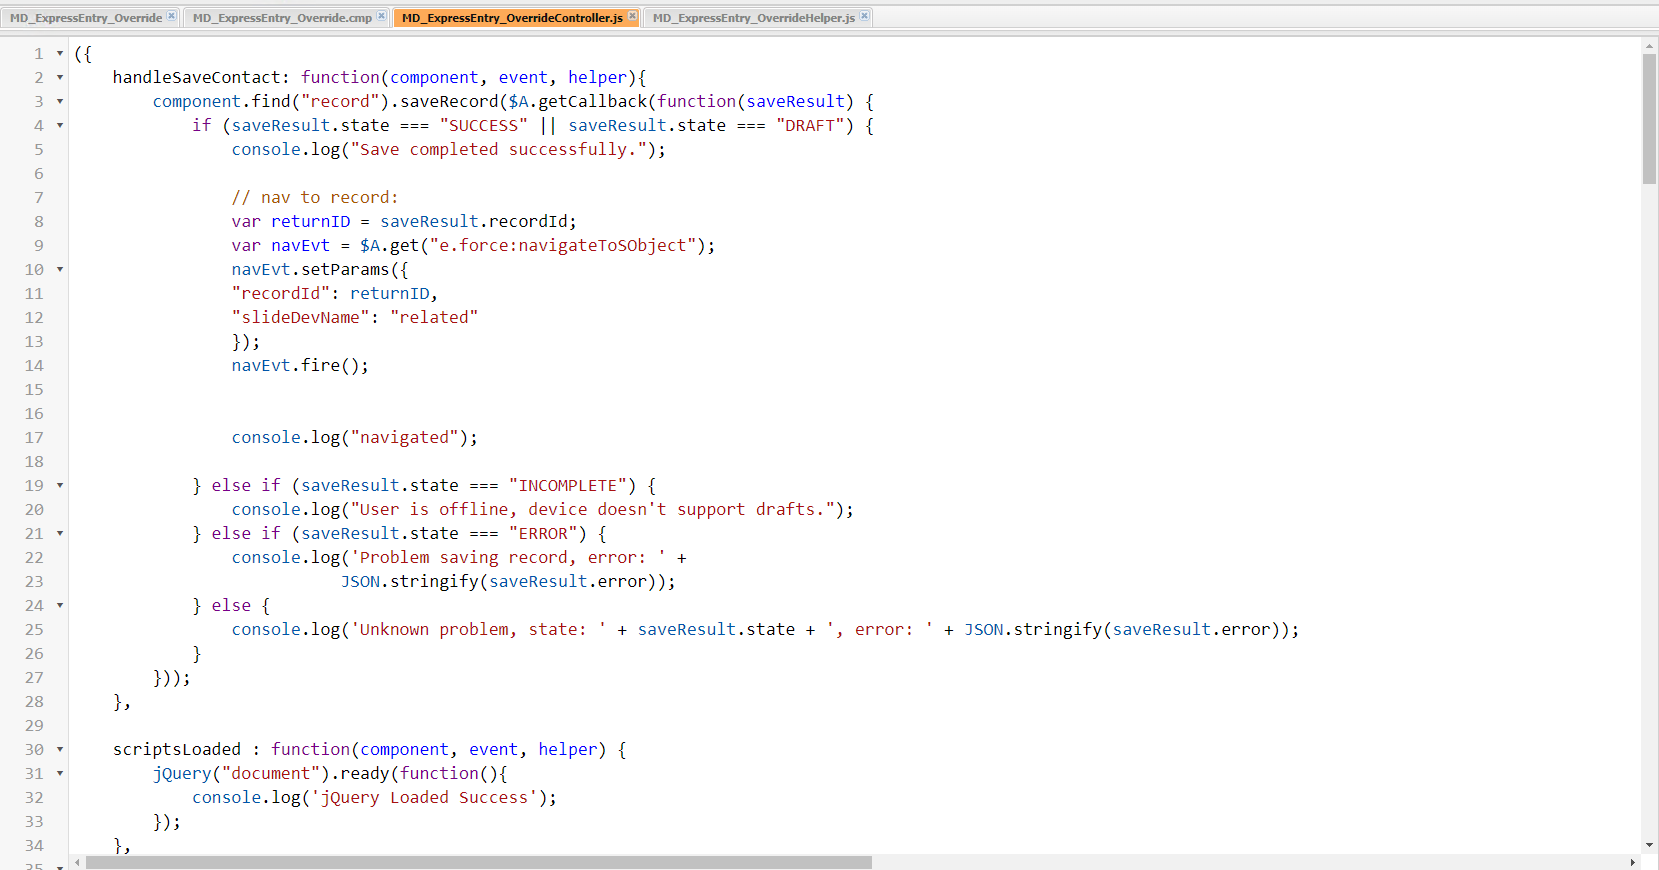
The controller handles the component events.
Copy the contents of
ExpressEntryNewHelper.jsinto the helper.jsfile. Save the file.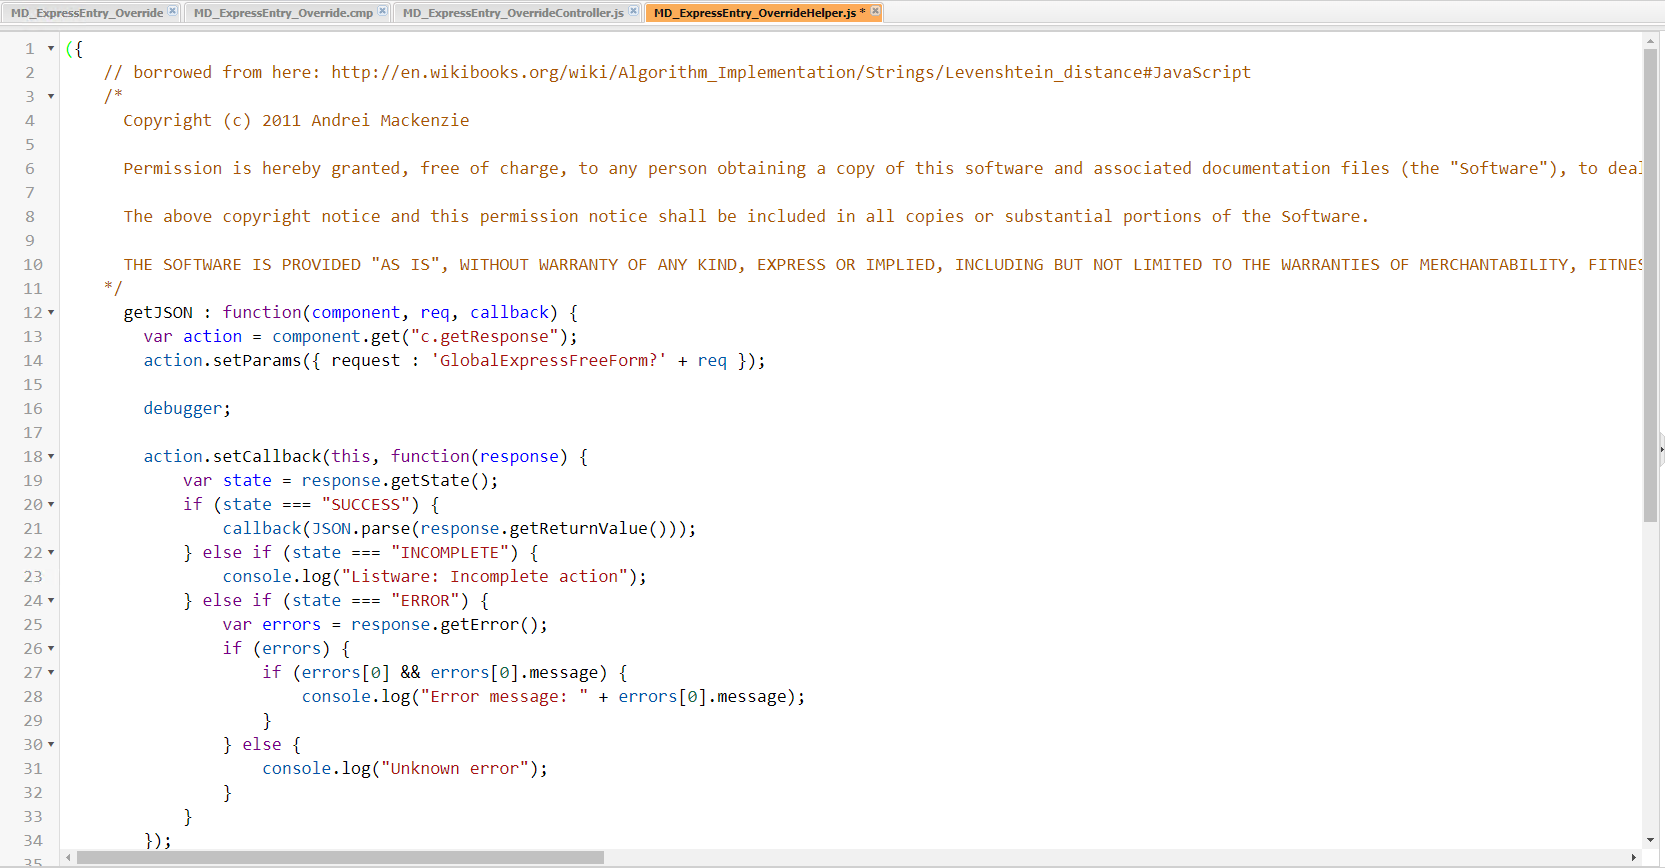
The helper creates the record from the selected address.
In Object Manager, open Buttons, Links, and Actions. Find the New action and click Edit.
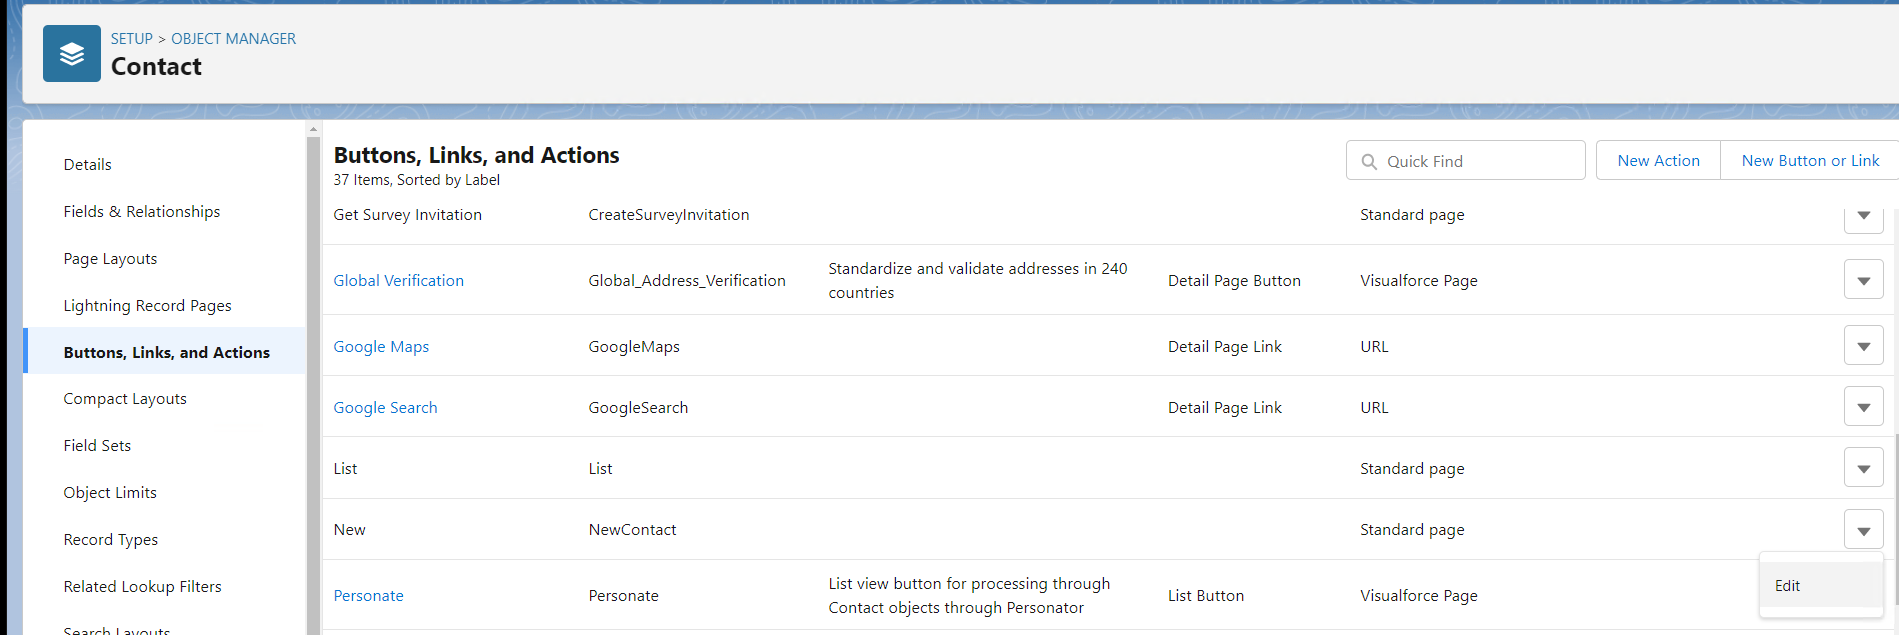
Use the dropdown at the right of the action row.
In Lightning Experience Override, select Lightning Component. Select the new component, then click Save.
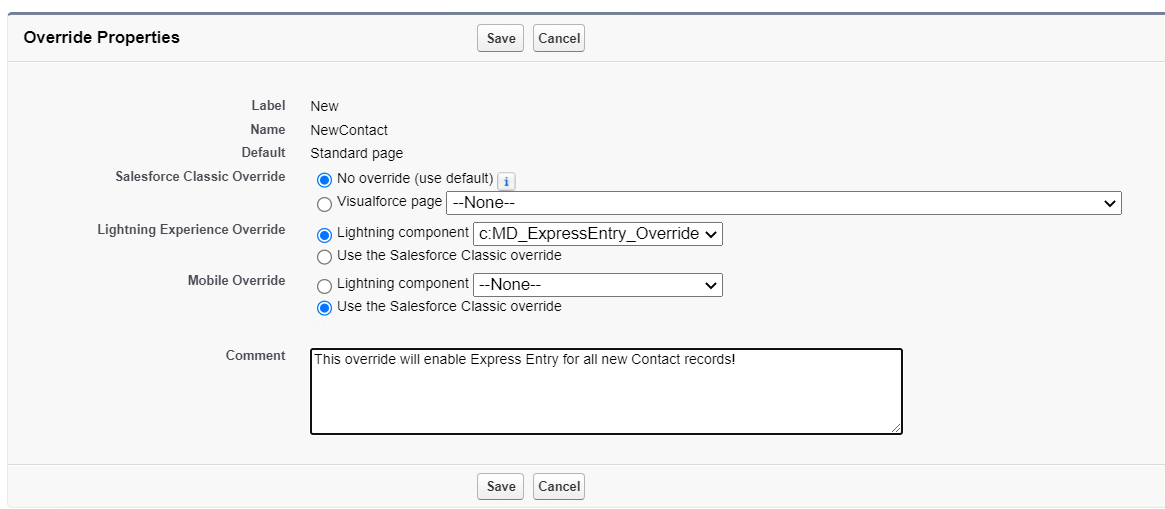
The standard New action now opens the custom component.
Open the object and select New. Select an address, then confirm that the record is created.
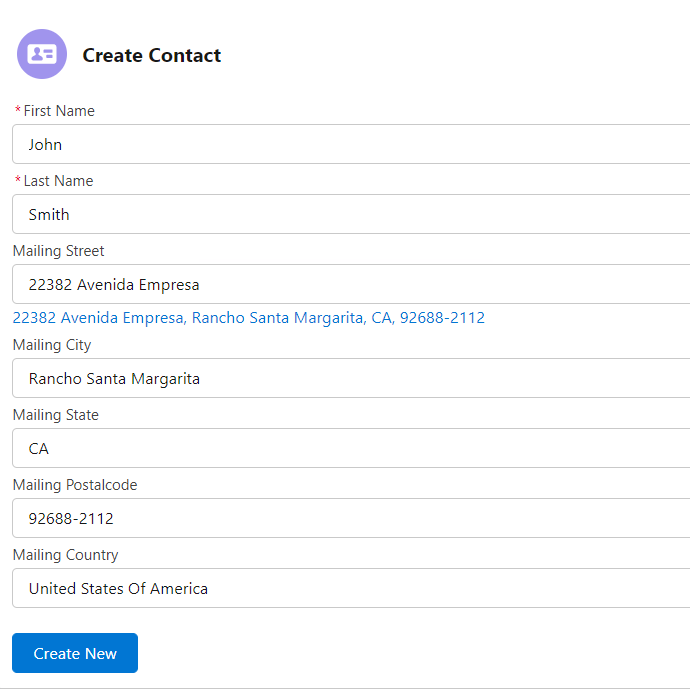
Click Create New to save the record with the selected address.
Test the override in a sandbox before you deploy it. An override replaces the standard action for every user of that object.
Error Handling#
Handle empty results and exceptions. Preserve the result codes and error details that help an administrator correct the mapping, license, or field permissions.
Training and Support#
Use these official Melissa resources for current product documentation and support.