Listware For Excel Tutorials#
After you install Listware and set your License Key, you are ready to use Listware. Follow along with the steps below to perform a sample cleansing.
Open a spreadsheet containing your data in Excel.
US Tutorial#
Select US#
Select the Listware Ribbon followed by the US Check & Verify button.

The US Check & Verify panel will open.
Select Data#
Choose what data you want to use by click-dragging a box around it and clicking the ‘Select Data to Process’ button.
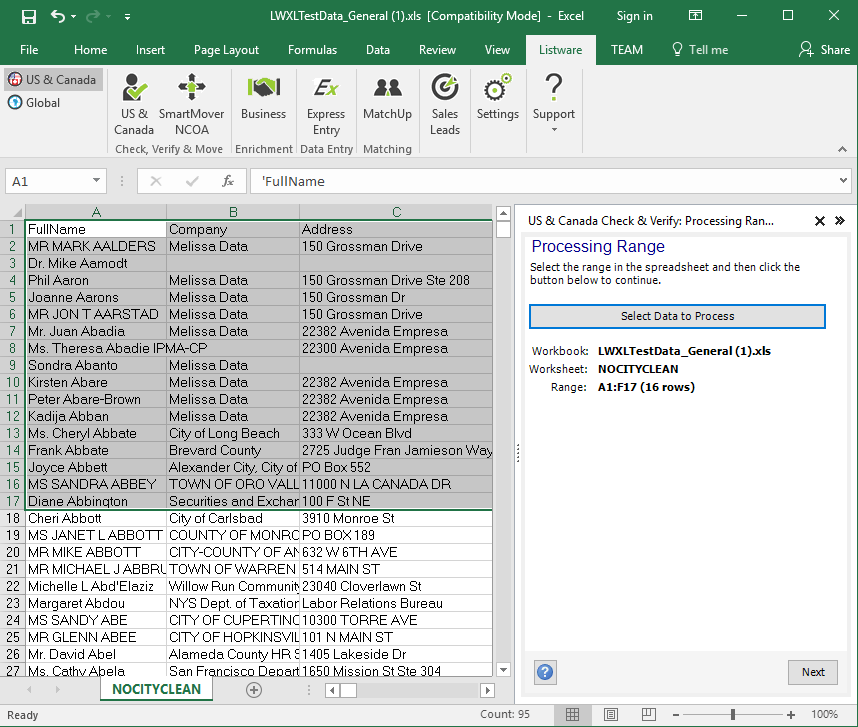
Once your data has been selected, click ‘next’ to move on to the Cleansing Operations step.
Choose Cleansing Operations#
Choose which cleansing operations you require.
For more information on Melissa Credits, please see Credit Cost

Click ‘next’ to continue on to the Input Columns step.
Input Columns#
Specify the input columns you want to process.
For example, if your data has Full Name, Address 1, City, State, and ZIP4, you should map these columns by selecting the column in the drop-down boxes next to its corresponding column.
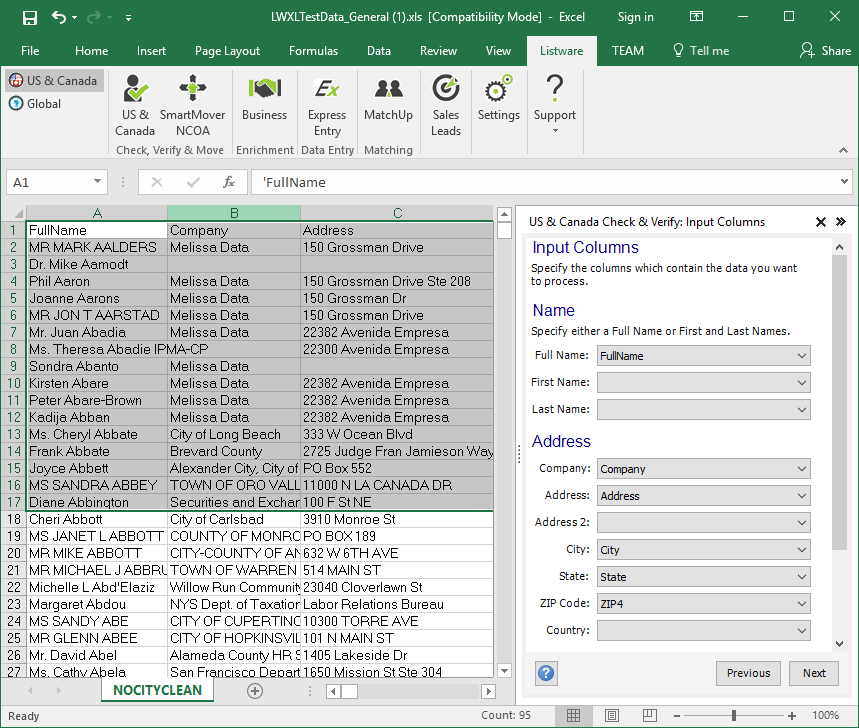
Once your input columns have been mapped, click ‘next’ to continue on to the Output Columns step.
Output Columns#
Specify what data you want to output.
You cannot receive output for column that have no matching input unless you are using the Append action.
For example, if you have no input phone field do not select phone as an output when Append is not checked under the Cleansing Operations: This will cause a warning and US Check & Verify will not perform any actions until you change this to follow the requirements. But if you choose Append as a Cleansing Operation, you can create a phone output without a phone input because a valid name and address input is likely to append that contacts phone number.
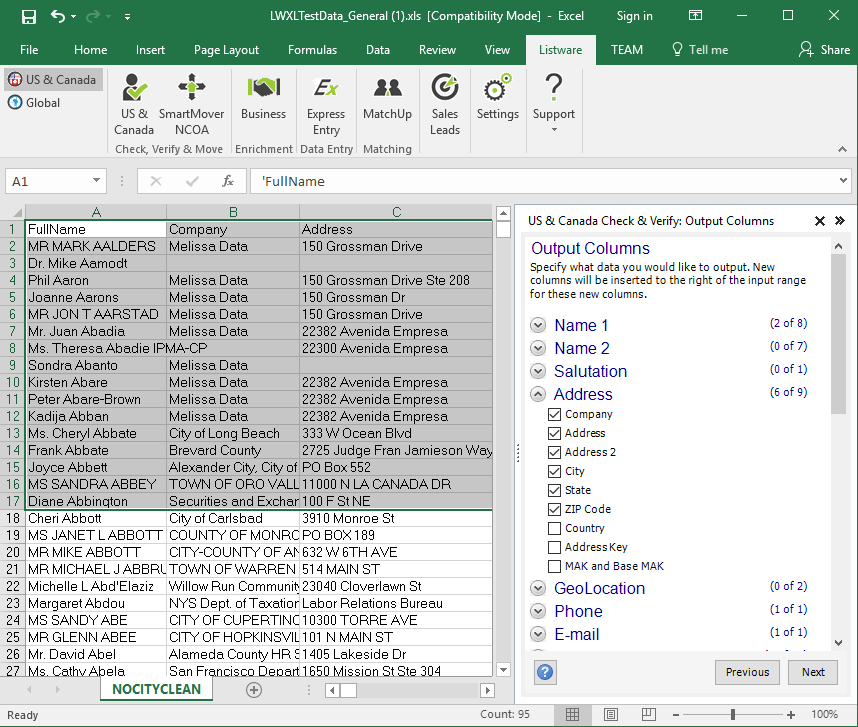
Once your output data has been chosen, click ‘next’ to continue to the Reporting step.
Reporting#
Specify if you want a report created and the contents of that report.
When processing is completed, you have the option of having a new sheet created and inserted immediately following the processed sheet. This reporting sheet will contain statistics and settings summarizing the processing run.
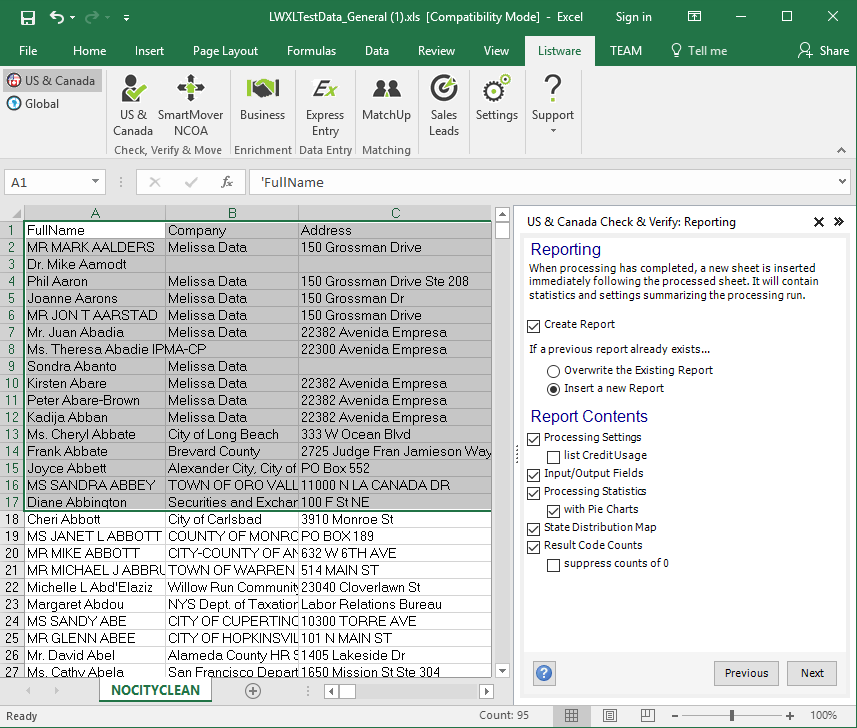
Once you choose what reports you want, click ‘next’ to continue to the Review Settings step.
Finalize Settings#
Review and finalize your settings.
If there are any warnings, they will be listed here. These will need to be resolved before you can process the data.
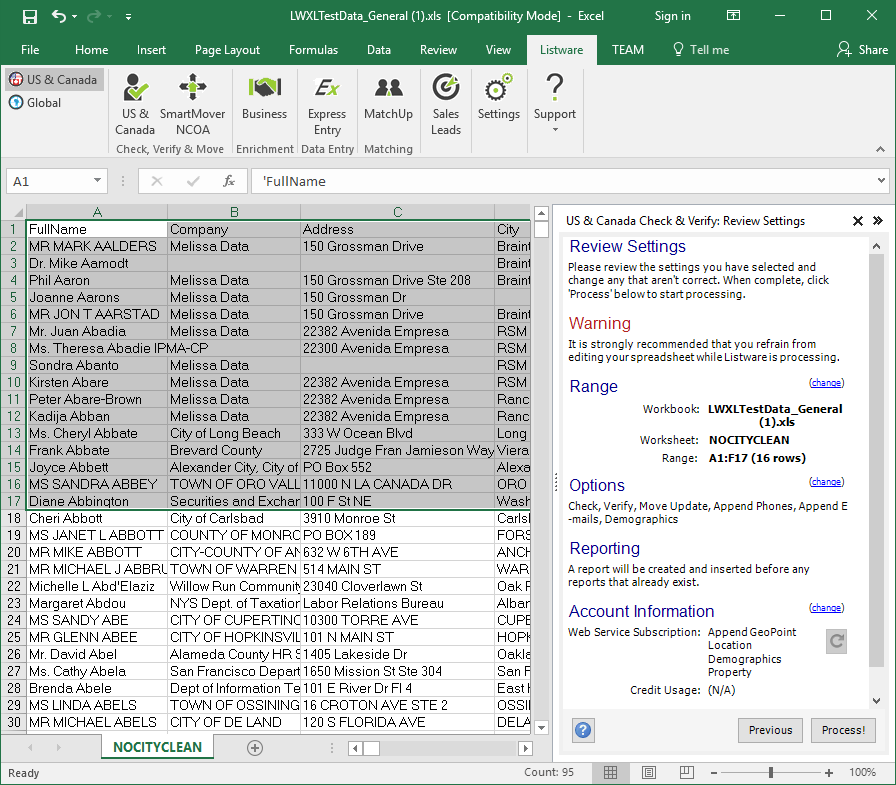
Click ‘Process!’ to begin processing your file. A progress bar will be displayed.
Note: It is strongly recommended that you refrain from editing your spreadsheet while Listware is processing.
Processing Complete#
Once processing is complete you can ‘Review’ errors, ‘Restart’, or ‘Close’ the process.
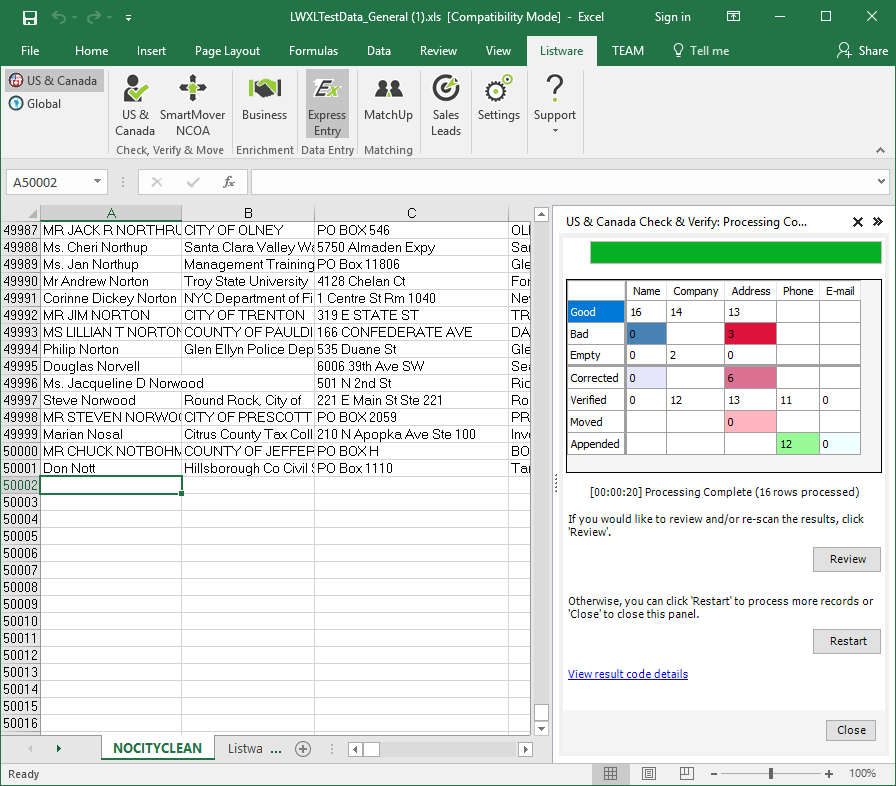
Review will allow you to fine-tune your data. See step 9 for more information.
Restart will run the process again.
Close will close the side bar.
Review#
If you choose to ‘Review’ any Errors you will be directed to a Navigation side bar that allows you to modify any data that has returned errors.
When reviewing you can edit the input data of the current record being reviewed.

For example: With a record where the Organization and Address were in the wrong input columns, you can paste them into the correct field and hit re-scan. The record will then be reprocessed according to the cleansing operation. If the result returns a better result code you can then select save to write those properties to the actual sheet (You will not be charged a credit for re-scanning a previously processed record)
Save#
When you are satisfied with your data, use the Excel menu to save your spreadsheet.
Global Tutorial#
Select Global#
Select the Listware Ribbon followed by the Global Check & Verify button.

The Global Check & Verify panel will open.
Select Data#
Choose what data you want to use by click-dragging a box around it and clicking the ‘Select Data to Process’ button.
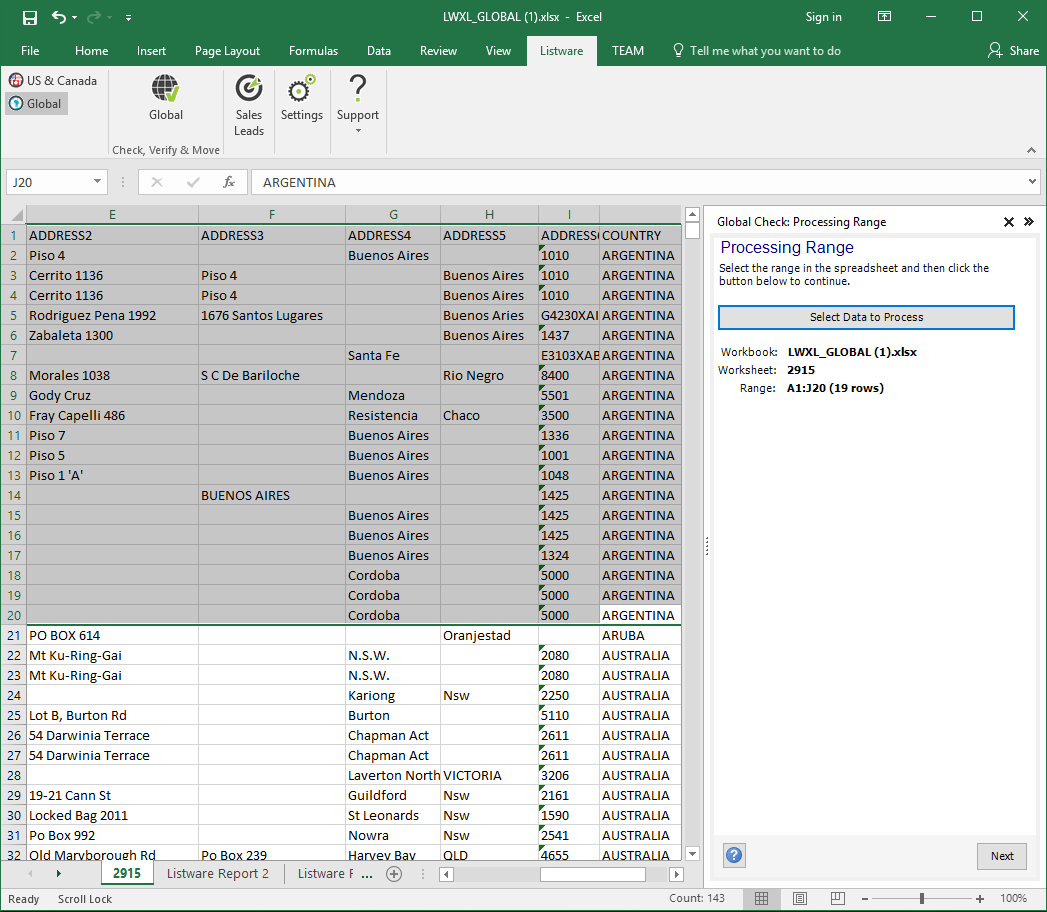
Once your data has been selected, click ‘next’ to move on to the Cleansing Operations step.
Choose Cleansing Operations#
Choose which cleansing operations you require and specify your country of origin, what type of script to output, and the default country.
For more information on Melissa Credits, please see Credit Cost
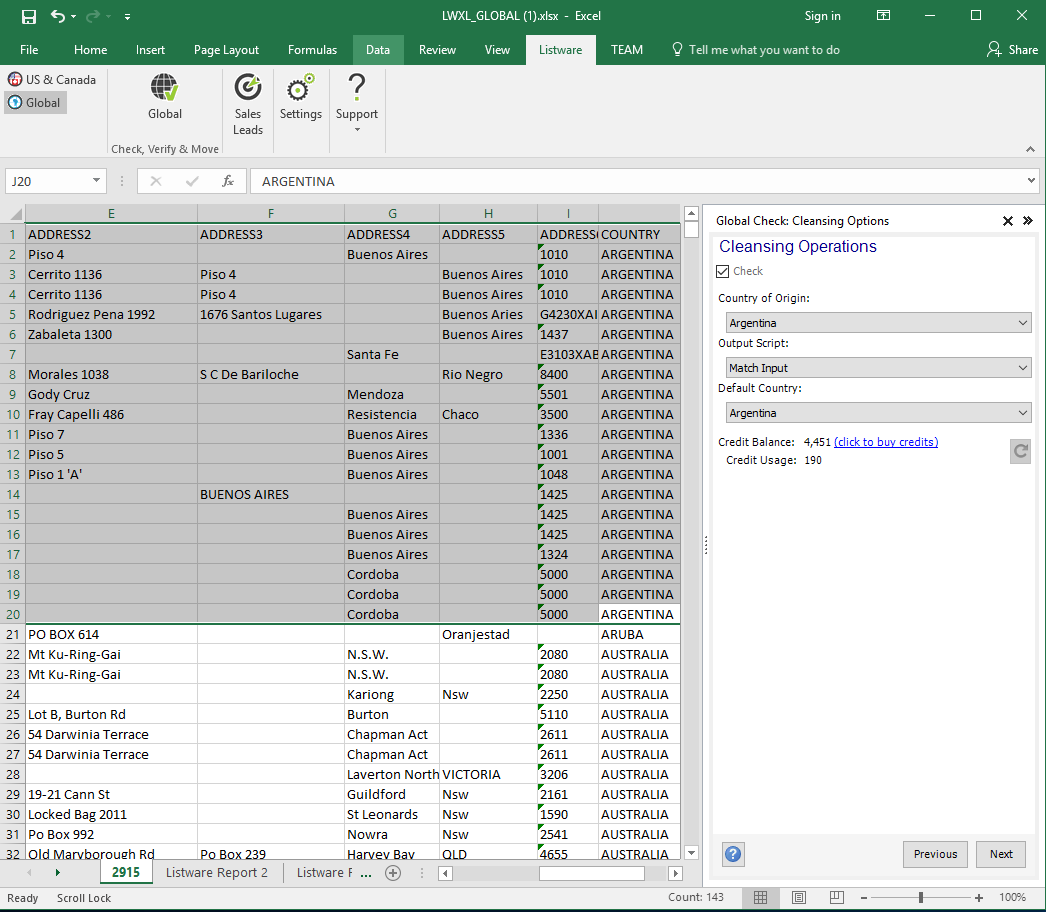
Click ‘next’ to continue on to the Input Columns step.
Input Columns#
Specify the input columns you want to process.
For example, if your data has Address Line 1, Locality, Admin Area, and Postal Code, you should map these columns by selecting the column in the drop-down boxes next to its corresponding column.
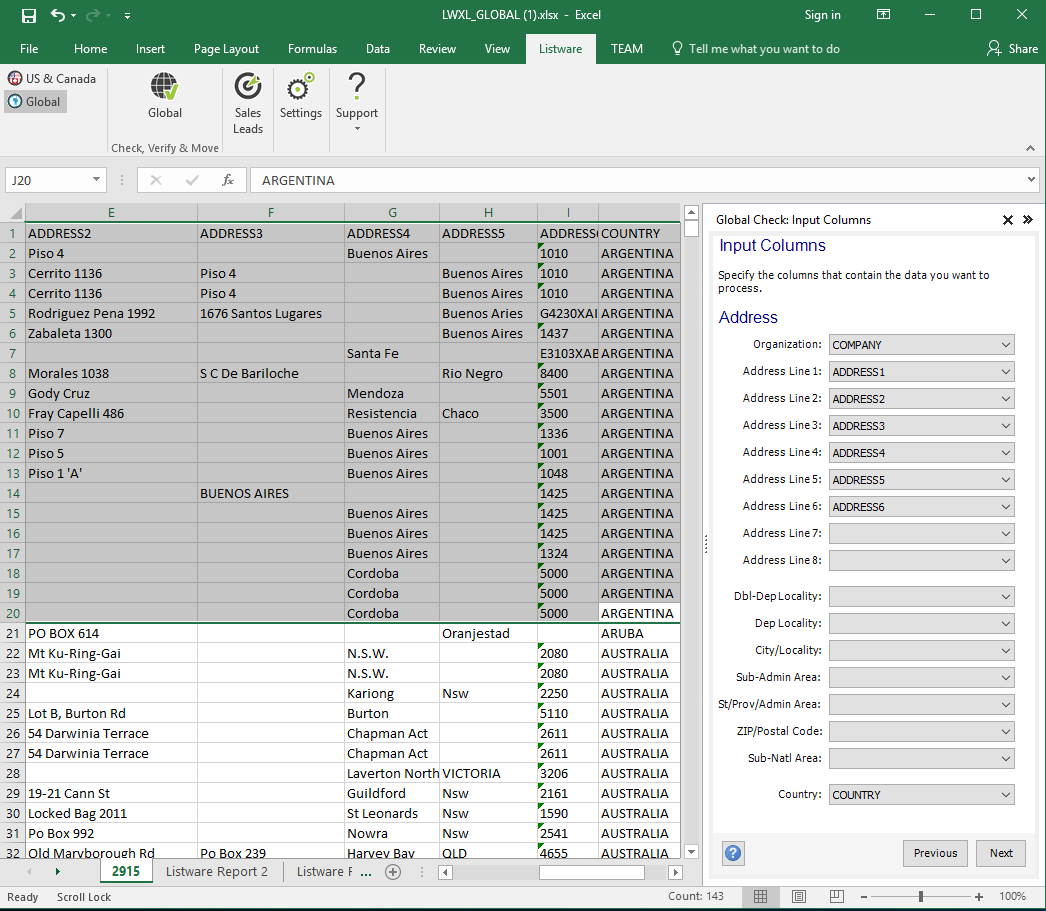
Once your input columns have been mapped, click ‘next’ to continue on to the Output Columns step.
Output Columns#
Specify what data you want to output.
You can quickly select all or none of the fields using the right-click menu.
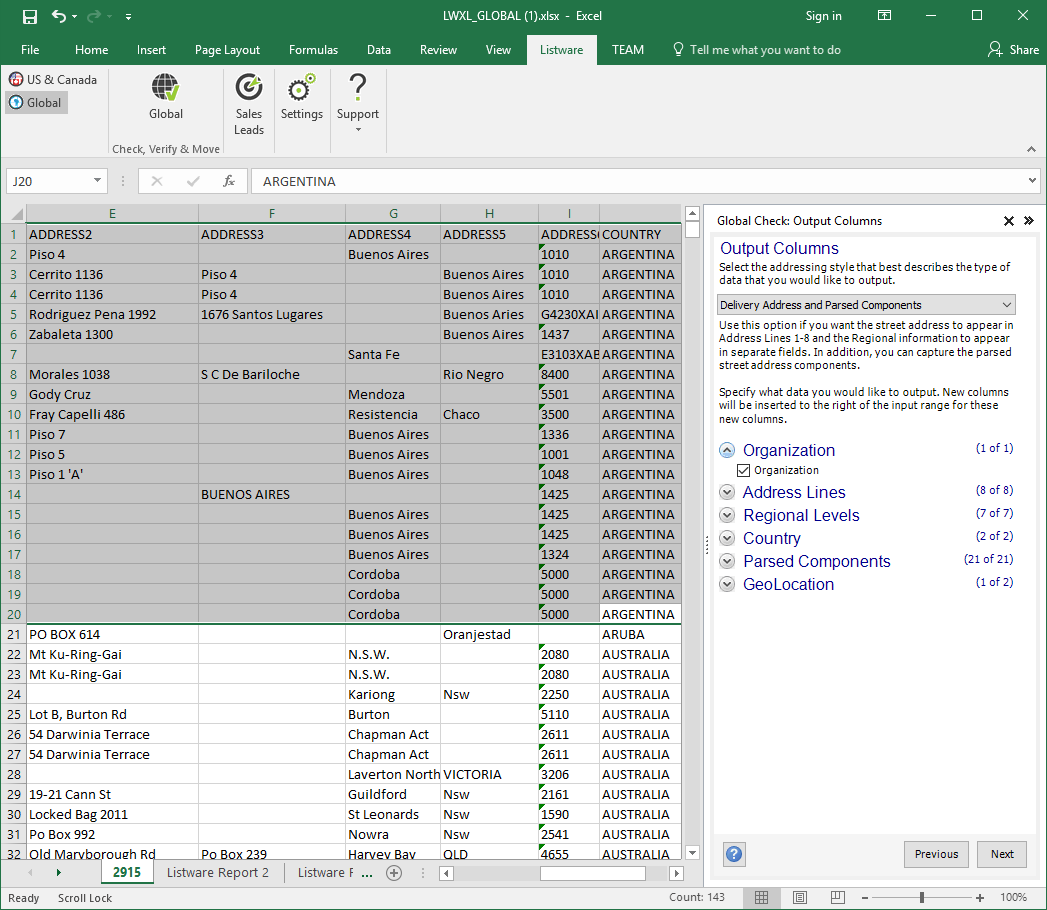
Once your output data has been chosen, click ‘next’ to continue to the Reporting step.
Reporting#
Specify if you want a report created and the contents of that report.
When processing is completed, you have the option of having a new sheet created and inserted immediately following the processed sheet. This reporting sheet will contain statistics and settings summarizing the processing run.
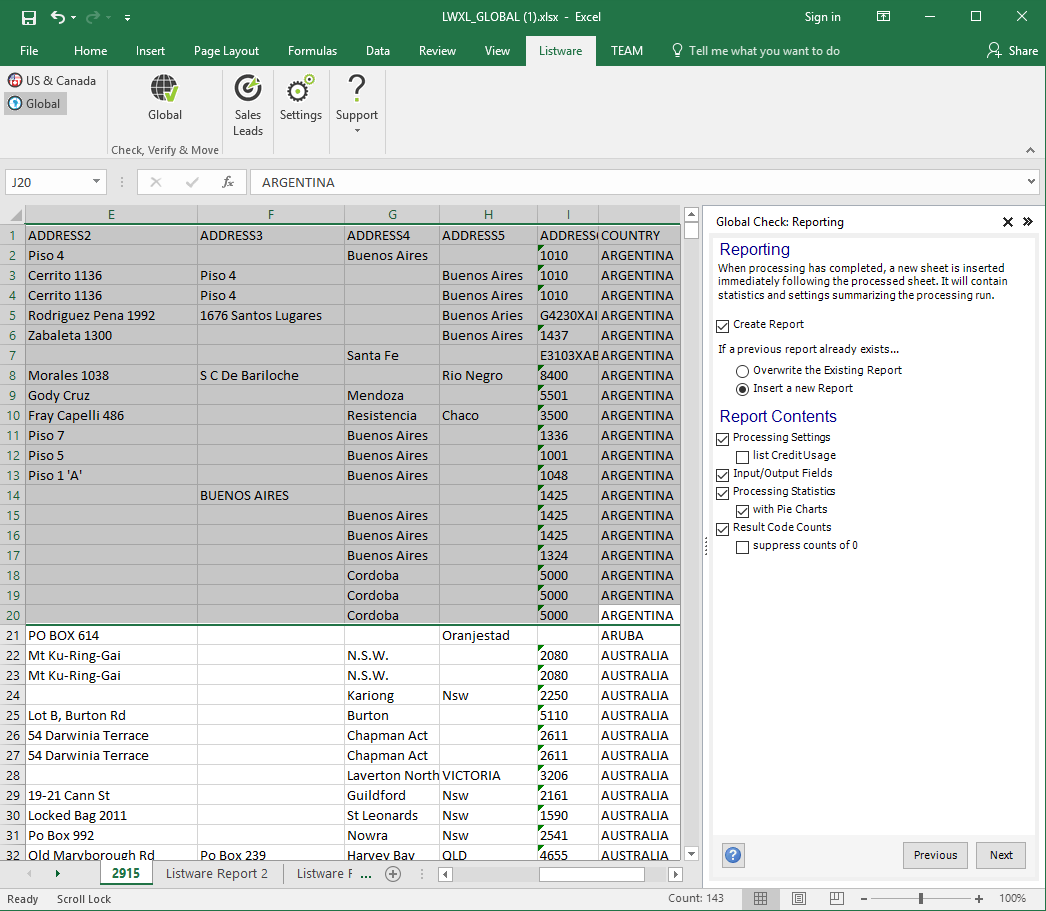
Once you choose what reports you want, click ‘next’ to continue to the Review Settings step.
Finalize Settings#
Review and finalize your settings.
If there are any warnings, they will be listed here. These will need to be resolved before you can process the data.
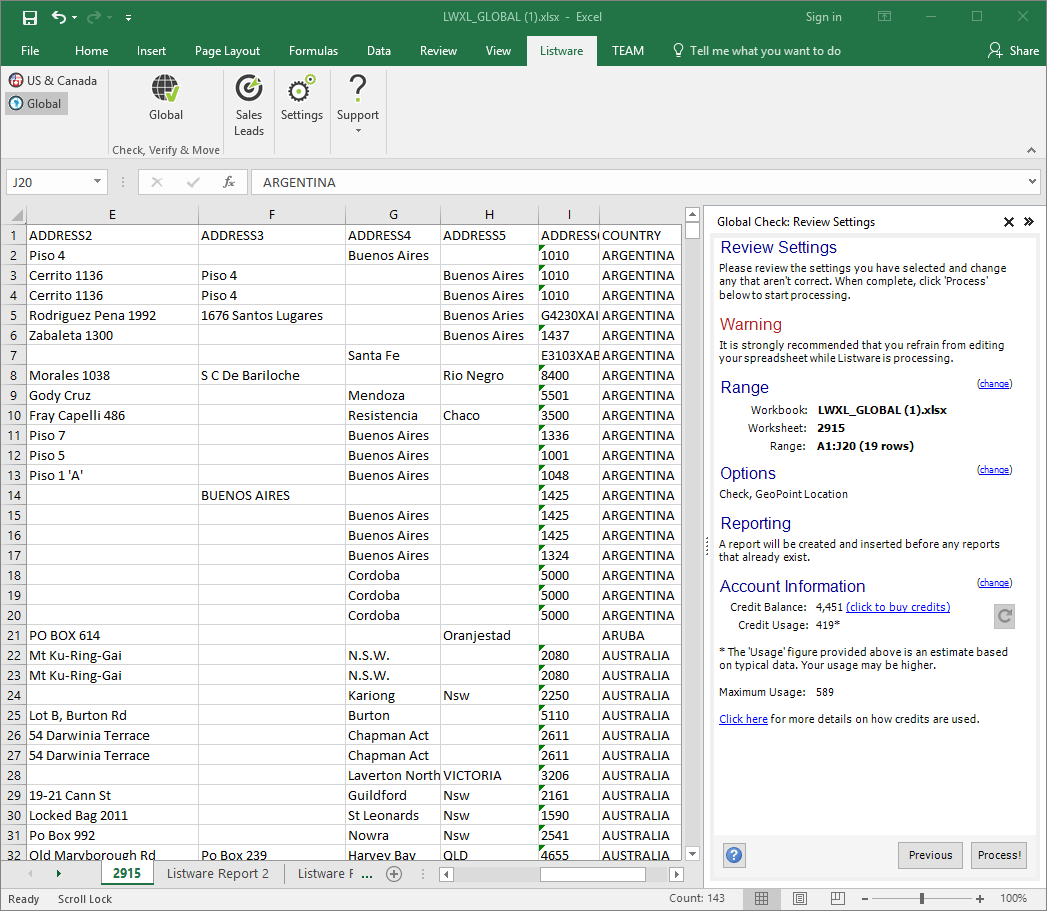
Click ‘Process!’ to begin processing your file. A progress bar will be displayed.
Note: It is strongly recommended that you refrain from editing your spreadsheet while Listware is processing.
Processing Complete#
Once processing is complete you can ‘Review’ errors, ‘Restart’, or ‘Close’ the process.
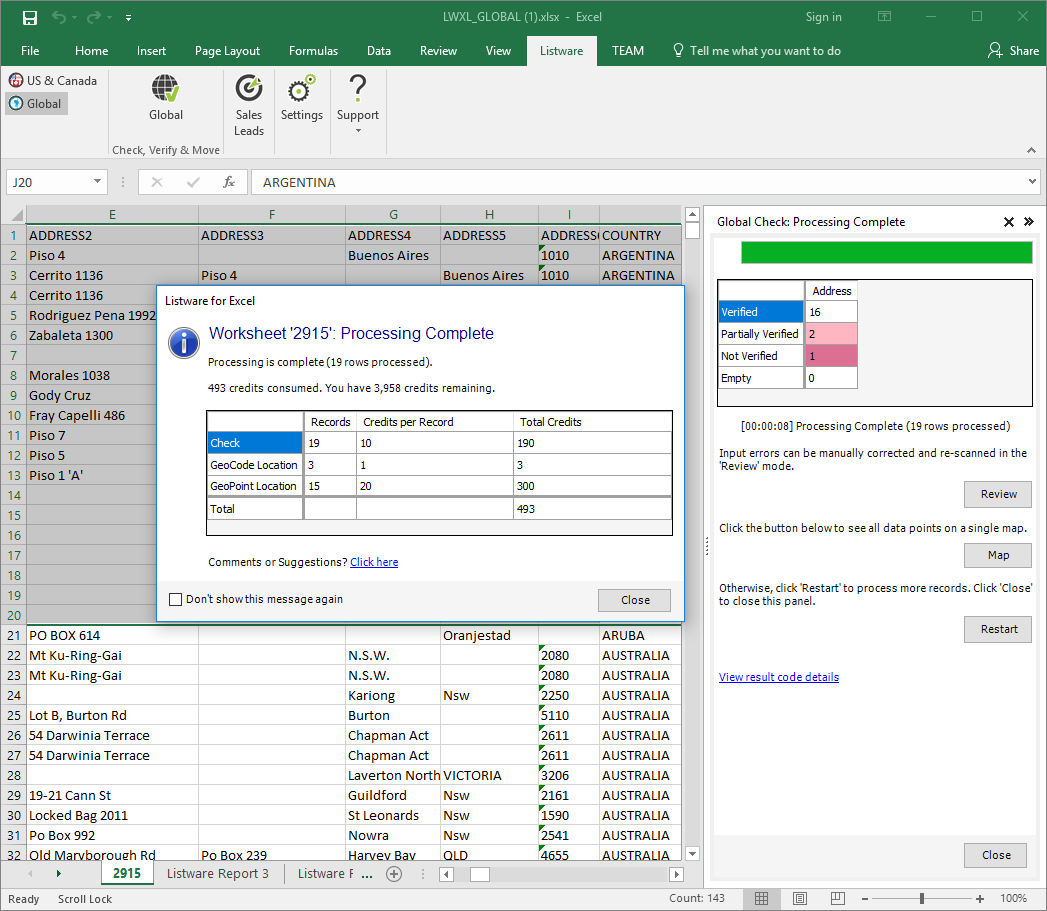
Review will allow you to fine-tune your data. See step 9 for more information.
Restart will run the process again.
Close will close the side bar.
Review#
If you choose to ‘Review’ any Errors you will be directed to a Navigation side bar that allows you to modify any data that has returned errors.
When reviewing you can edit the input data of the current record being reviewed.
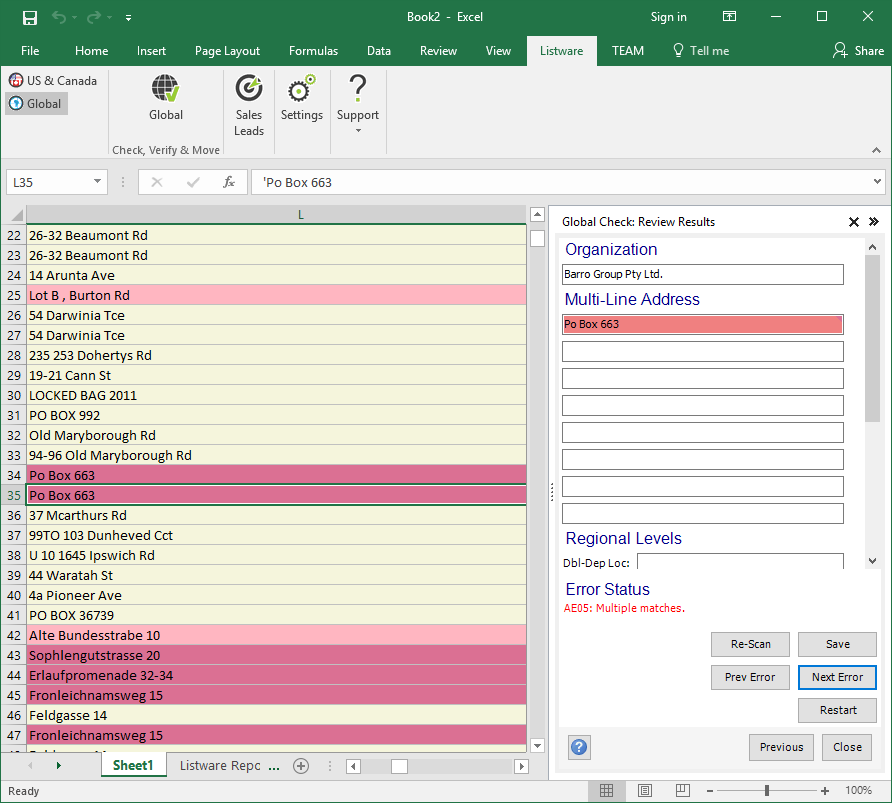
For example: With a record where the Organization and Address were in the wrong input columns, you can paste them into the correct field and hit re-scan. The record will then be reprocessed according to the cleansing operation. If the result returns a better result code you can then select save to write those properties to the actual sheet
Save#
When you are satisfied with your data, use the Excel menu to save your spreadsheet.
Business Coder Tutorial#
Select Business Coder#
Select the Listware Ribbon followed by the Business Coder button.

The Business Coder panel will open.
Select Data#
Choose what data you want to use by click-dragging a box around it and clicking the ‘Select Data to Process’ button.
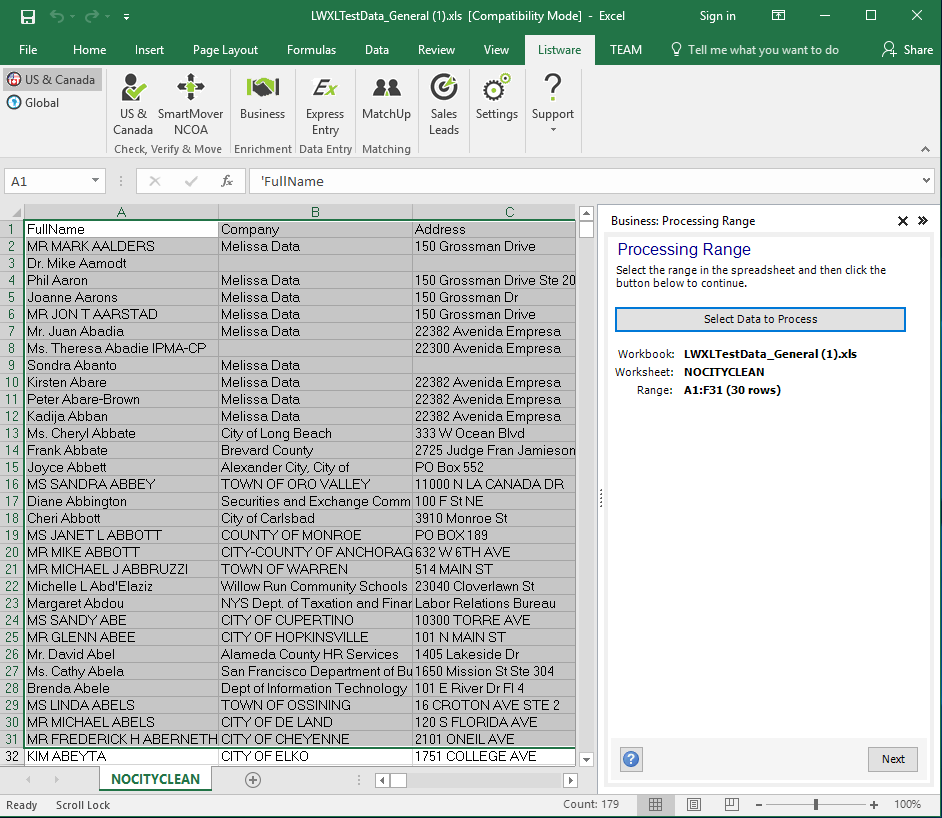
Once your data has been selected, click ‘next’ to move on to the Cleansing Operations step.
Choose Options#
Choose which options you require.
For more information on Melissa Credits, please see Credit Cost
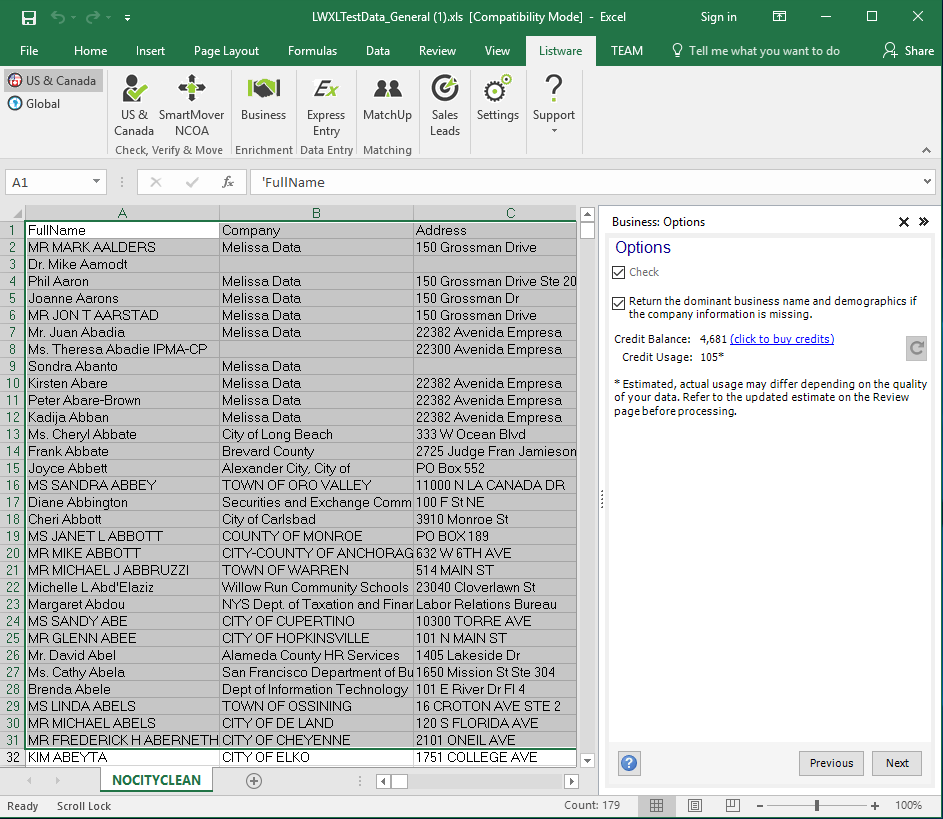
Click ‘next’ to continue on to the Input Columns step.
Input Columns#
Specify the input columns you want to process.
For example, if your data has Company, Address, City, State, ZIP, and Phone, you should map these columns by selecting the column in the drop-down boxes next to its corresponding column.
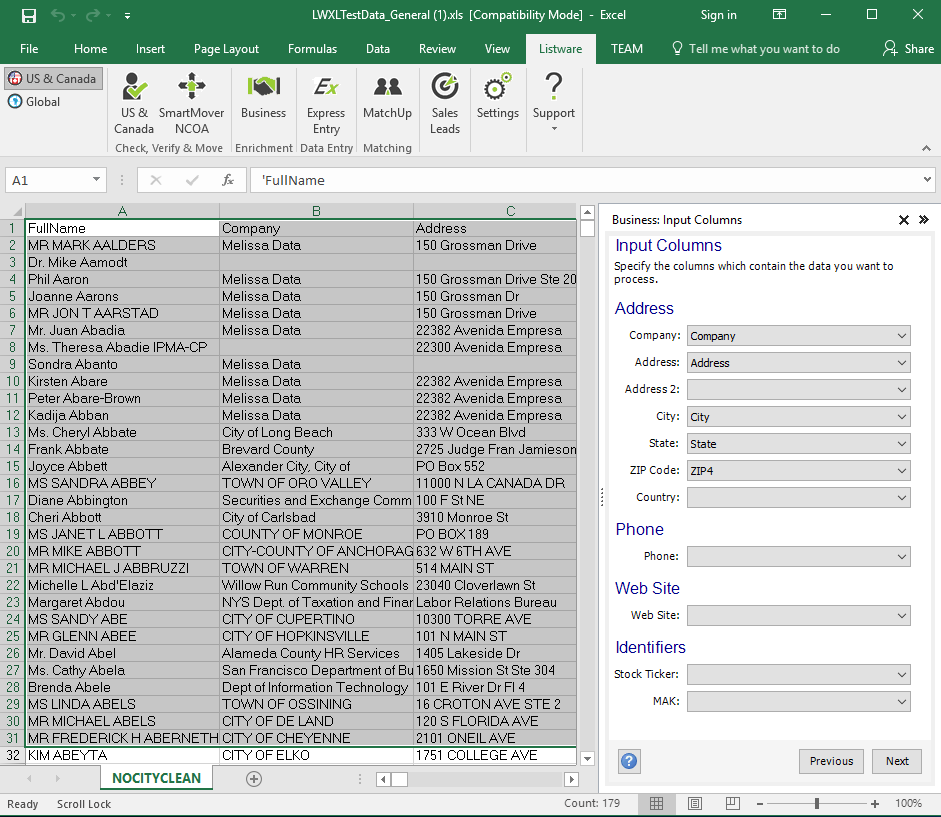
Once your input columns have been mapped, click ‘next’ to continue on to the Output Columns step.
Output Columns#
Specify what data you want to output.
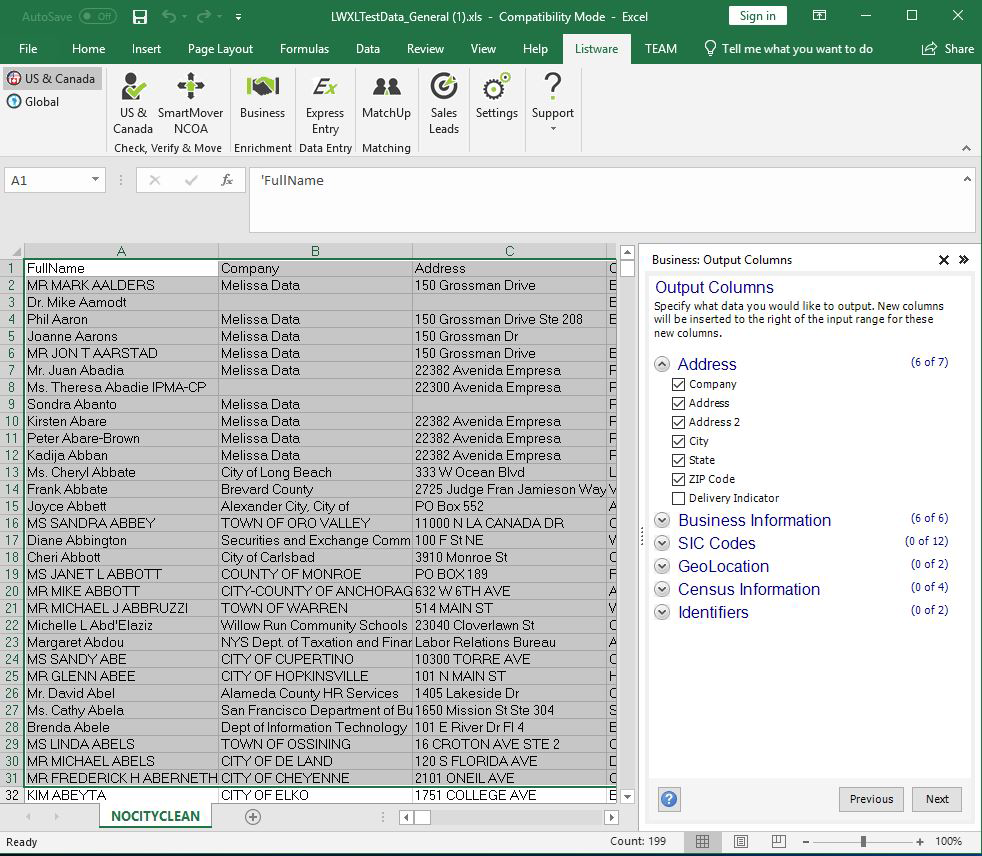
Once your output data has been chosen, click ‘next’ to continue to the Reporting step.
Reporting#
Specify if you want a report created and the contents of that report.
When processing is completed, you have the option of having a new sheet created and inserted immediately following the processed sheet. This reporting sheet will contain statistics and settings summarizing the processing run.
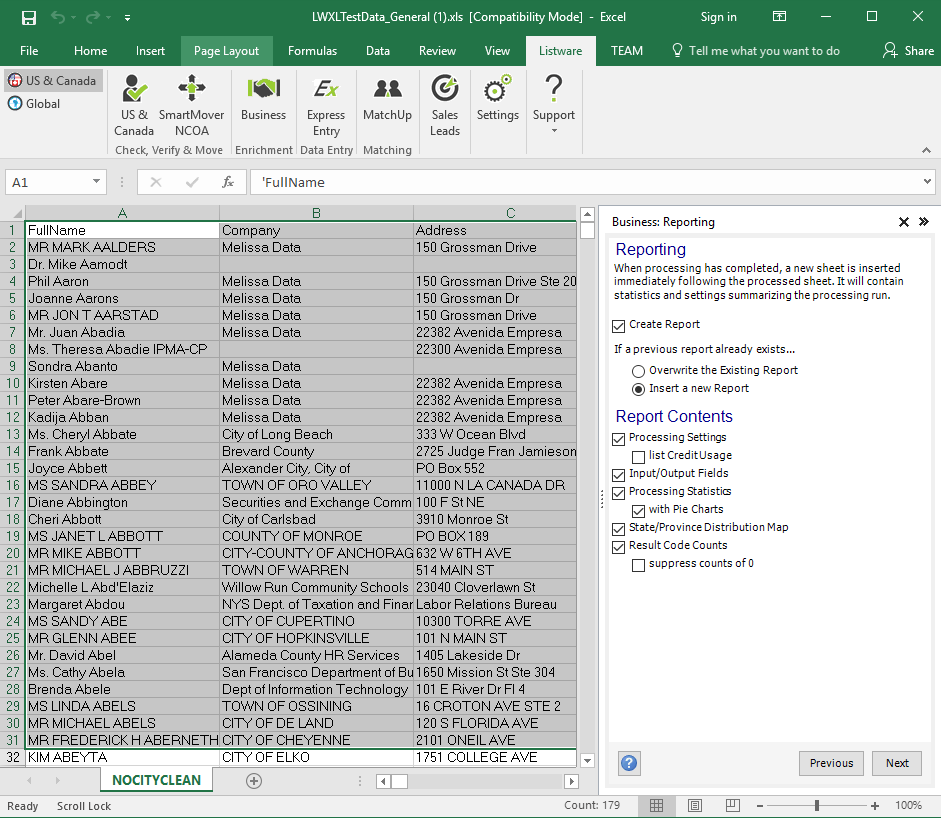
Once you choose what reports you want, click ‘next’ to continue to the Review Settings step.
Finalize Settings#
Review and finalize your settings.
If there are any warnings, they will be listed here. These will need to be resolved before you can process the data.
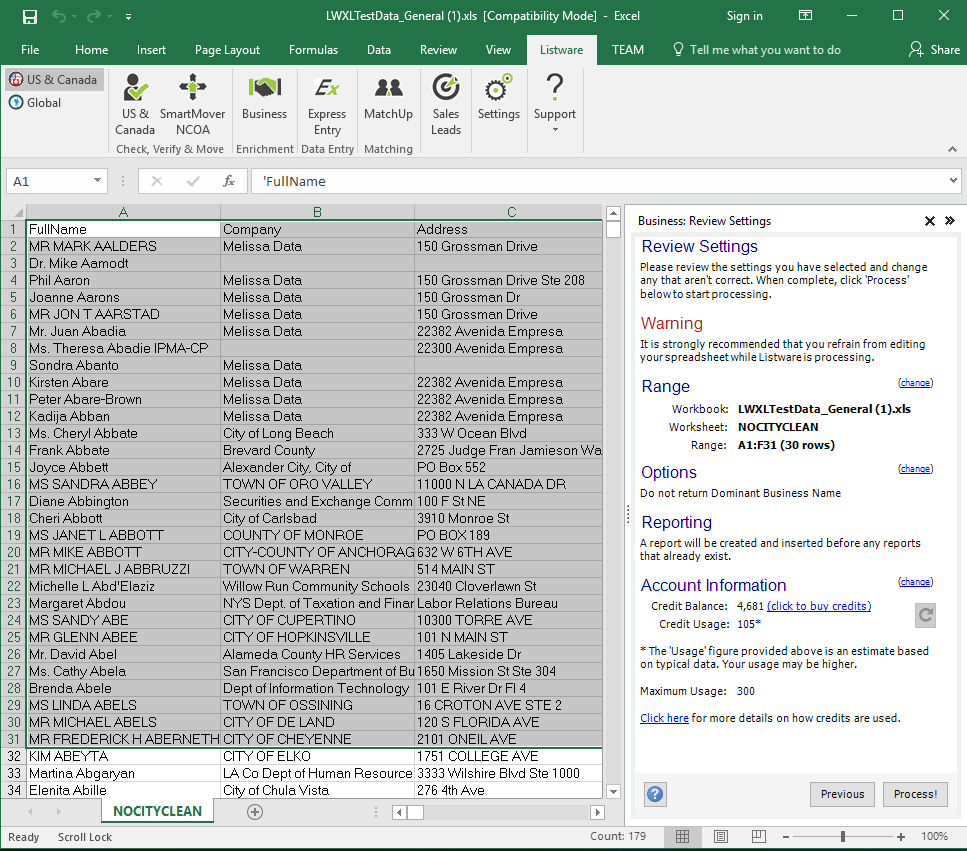
Click ‘Process!’ to begin processing your file. A progress bar will be displayed.
Note: It is strongly recommended that you refrain from editing your spreadsheet while Listware is processing.
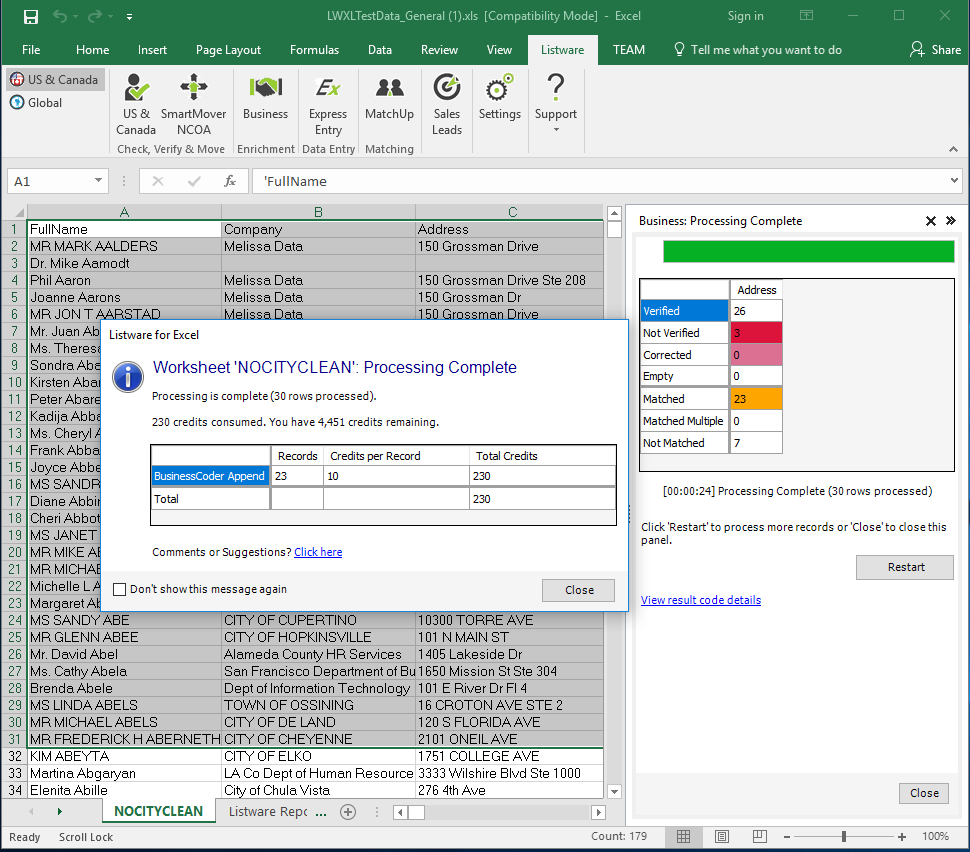
Process Complete#
Once processing is complete you can ‘Map’ the data points, ‘Restart’, or ‘Close’ the process.
Map will map the data points on a web page.
Restart will run the process again.
Close will close the side bar.
Review#
If you chose to create a report in Reporting, you will have a Listware Reporting sheet you can navigate to in your excel book.
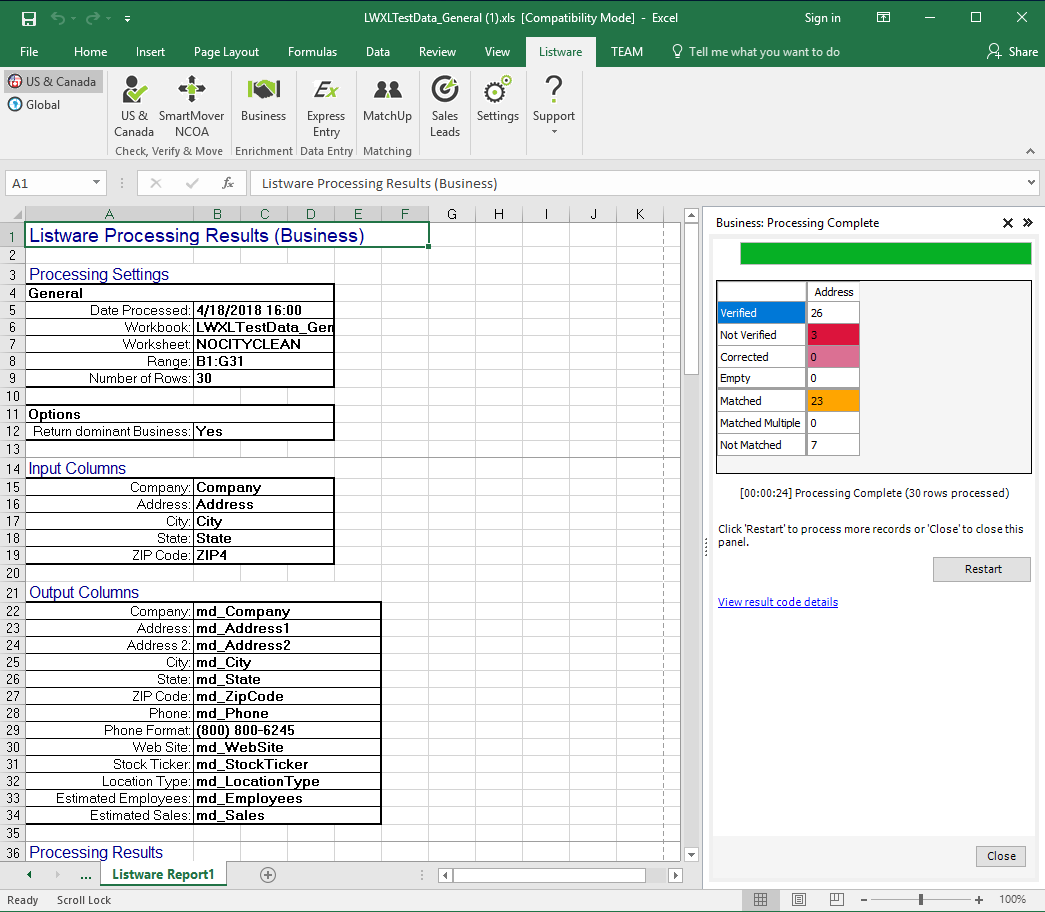
Here you will see a detailed breakdown of your data and the cleansing process.
Save#
When you are satisfied with your data, use the Excel menu to save your spreadsheet.
SmartMover Tutorial#
Select SmartMover#
Select the Listware Ribbon followed by the SmartMover NCOA button.
The SmartMover NCOA panel will open.
Select Data#
Choose what data you want to use by click-dragging a box around it and clicking the ‘Select Data to Process’ button.
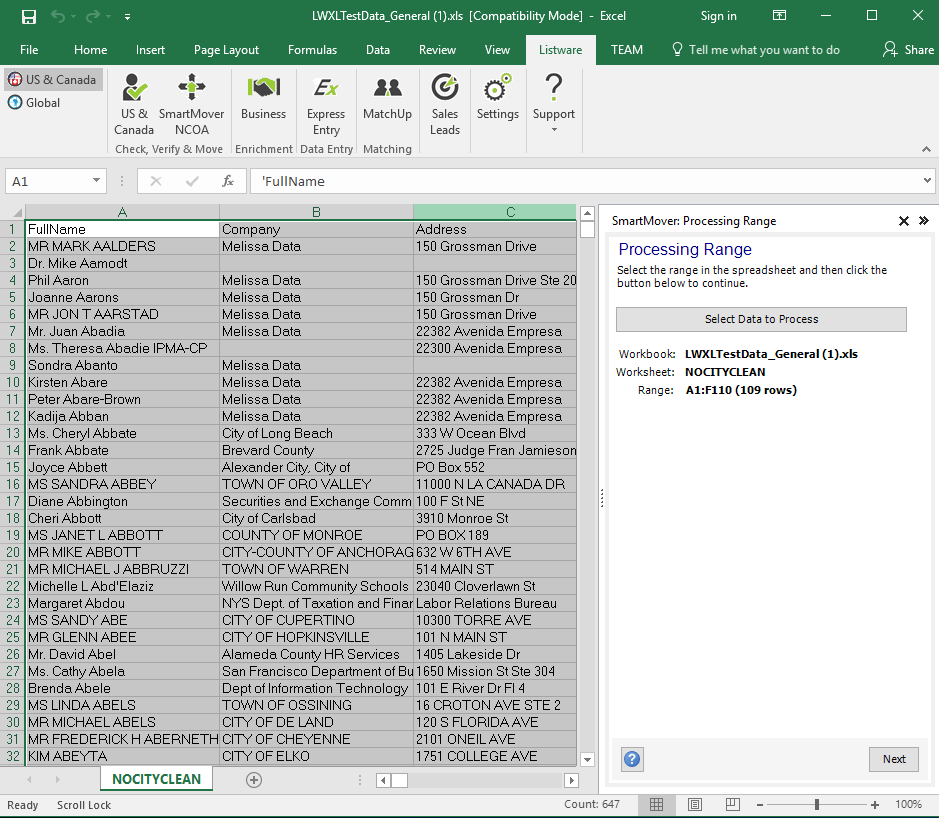
Once your data has been selected, click ‘next’ to move on to the NCOA Options step.
PAF#
You must have a PAF on file with Melissa to use SmartMover NCOA.

If you see the “No PAFs on file (click for more information)” warning, you do not have a PAF on file. Please click the “click for more information” link and follow the prompts to set up your PAF. For more information, see PAF.
Choose NCOA Options#
Choose which NCOA options you require.
For more information on Melissa Credits, please see Credit Cost
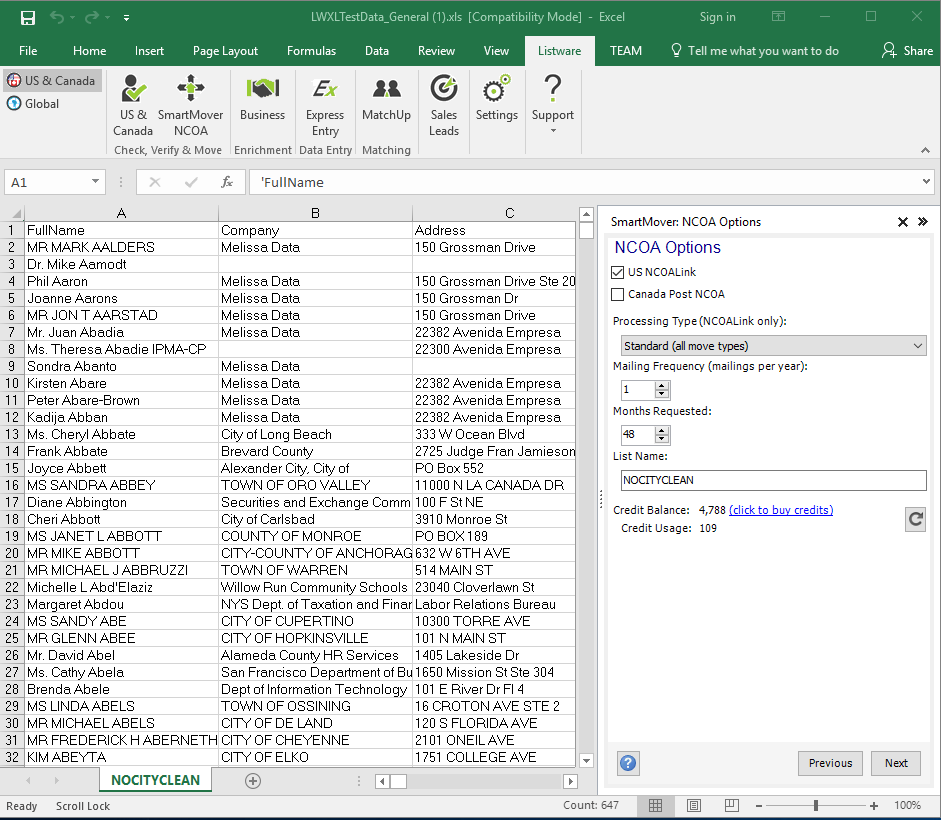
Click ‘next’ to continue on to the Input Columns step.
Input Columns#
Specify the input columns you want to process.
For example, if your data has Full Name, Address 1, City, State, and ZIP4, you should map these columns by selecting the column in the drop-down boxes next to its corresponding column.
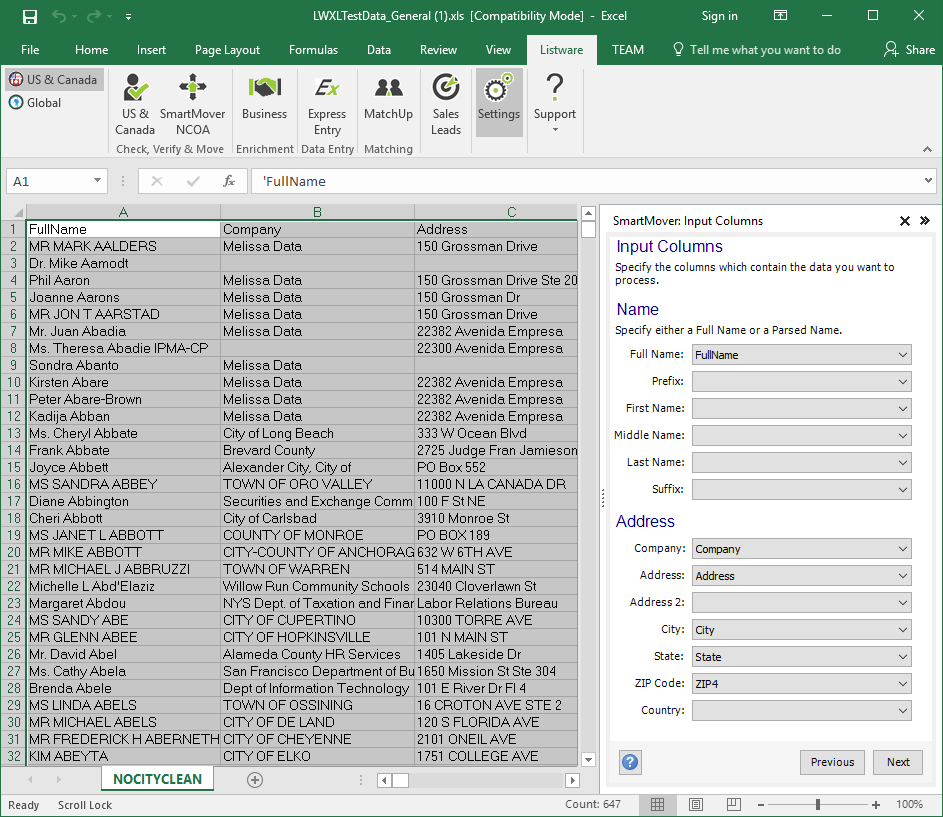
Once your input columns have been mapped, click ‘next’ to continue on to the Output Columns step.
Output Columns#
Specify what data you want to output.
You can quickly select all or none of the fields using the right-click menu.
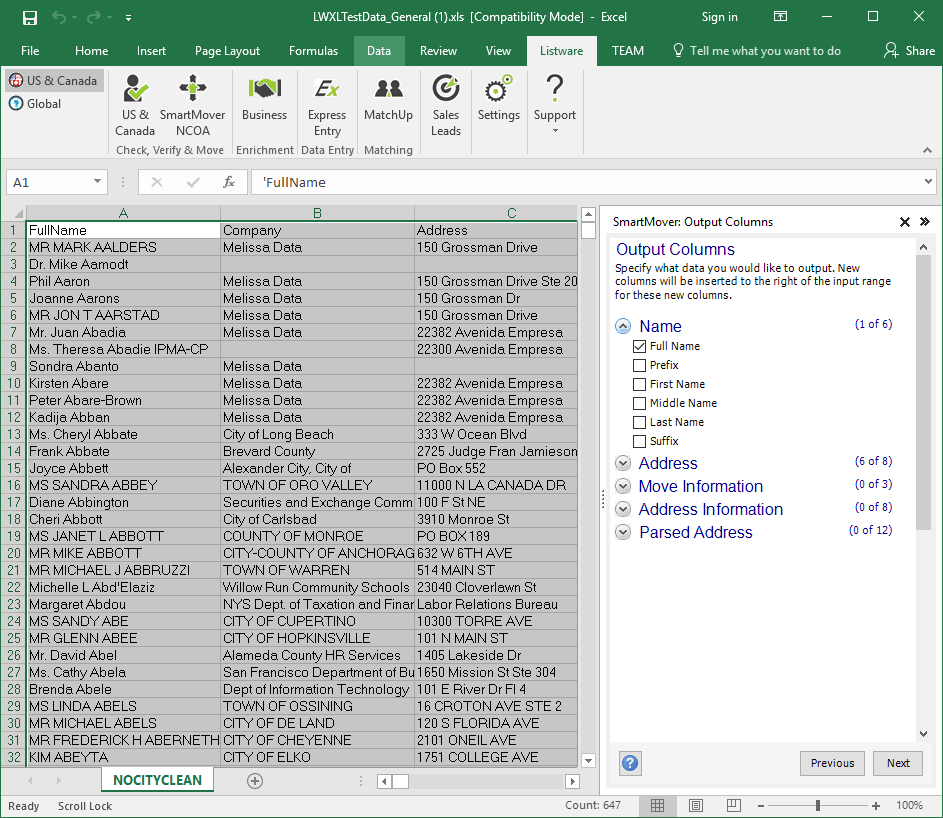
Once your output data has been chosen, click ‘next’ to continue to the Review Settings step.
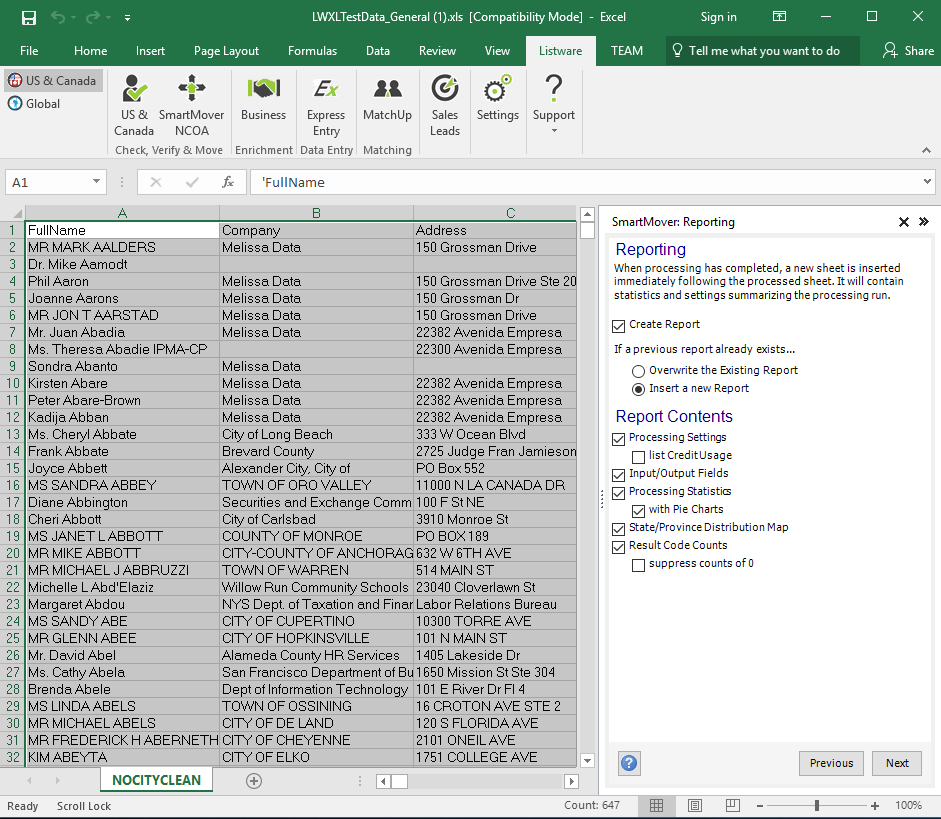
Reporting#
You can choose what reports you want to be generated here.
Finalize Settings#
Review and finalize your settings.
If there are any warnings, they will be listed here. These will need to be resolved before you can process the data.
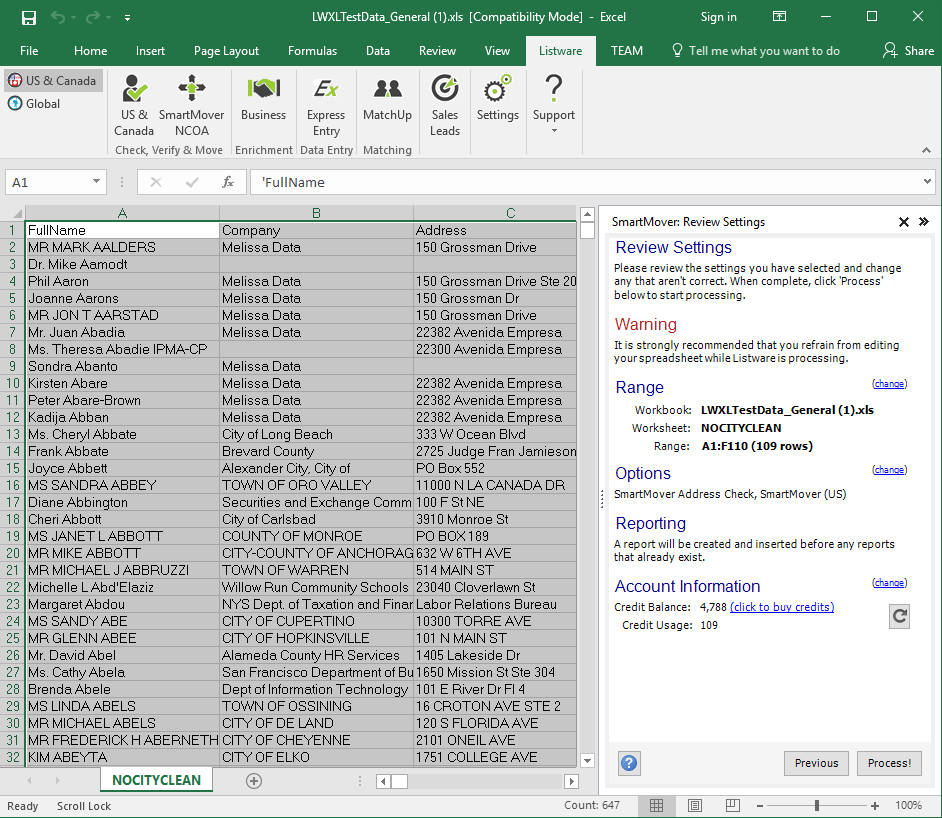
Click ‘Process!’ to begin processing your file. A progress bar will be displayed.
Note: It is strongly recommended that you refrain from editing your spreadsheet while Listware is processing.
Processing Complete#
Once processing is complete you can generate ‘NCOA Reports’, ‘CASS Reports’, ‘Restart’, or ‘Close’ the process.
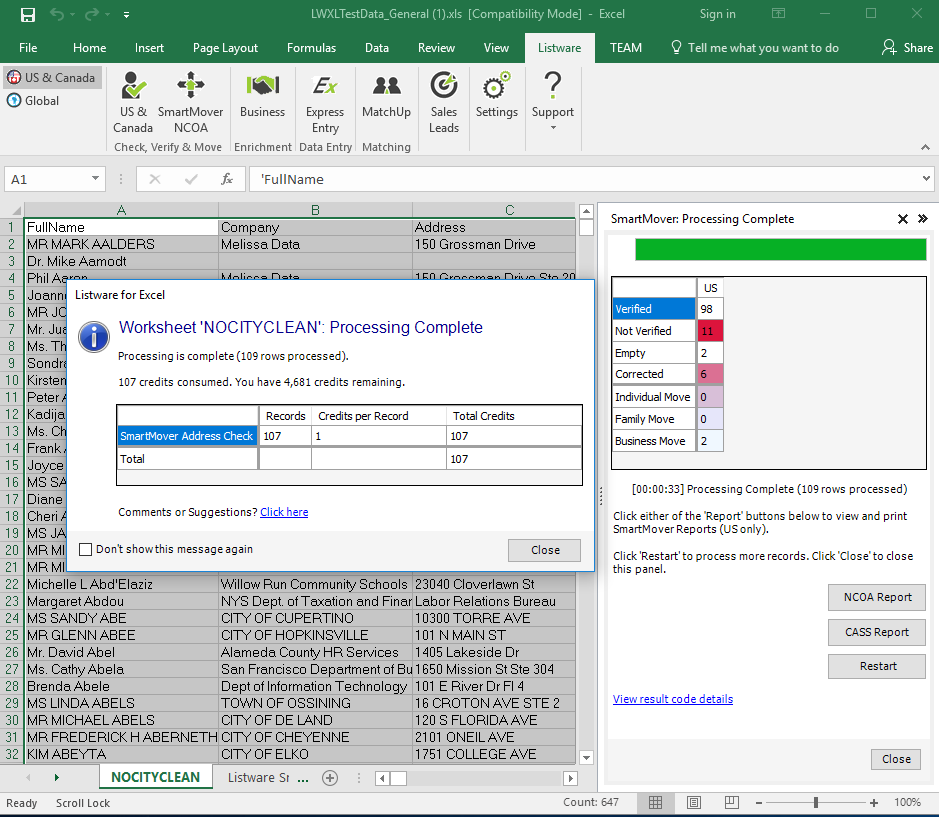
Restart will run the process again.
Close will close the side bar.
Save#
When you are satisfied with your data, use the Excel menu to save your spreadsheet.
Express Entry Tutorial#
Select Express Entry#
Select the Listware Ribbon followed by the Express Entry button.

The Express Entry panel will open.
Configure Settings#
Select settings to configure which fields you want the express entry interface to prompt you for data entry.
Unselected fields will be skipped over.
You’re ready to start entering data. If you’ve configured Express Entry Settings to include other data types like Name or Company, there will be only a single edit box to enter your data.
When the focus is moved to the Address input, you will see two edit boxes, one for the Primary Address, and another for Suite information, should Express Entry determine that the entered address has multiple delivery points.
Start Typing#
Start typing in the Express Entry Address 1 field.
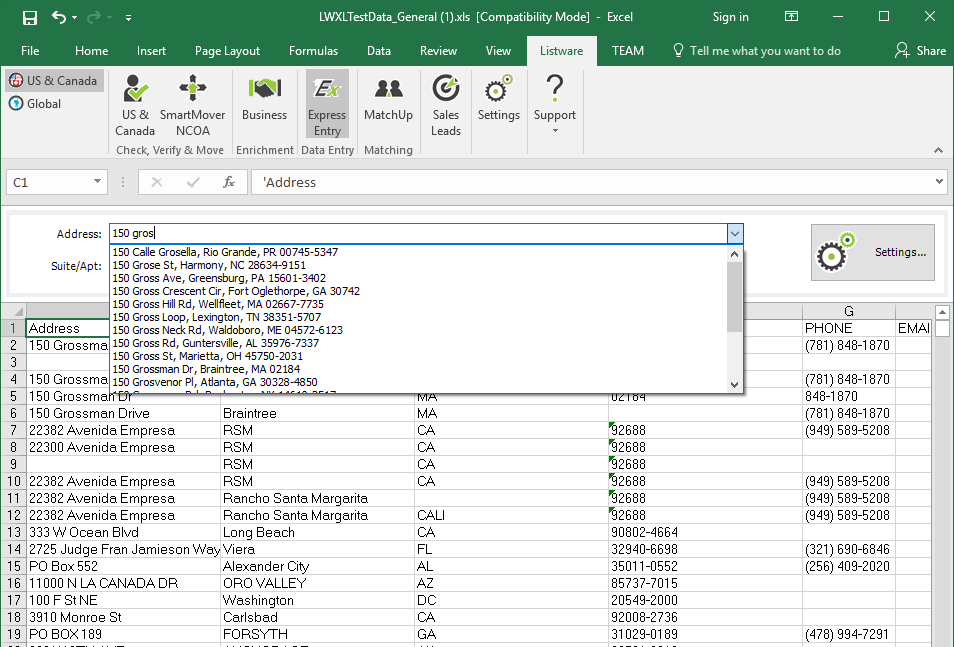
When you start typing, as little as two characters may start to give you valid possibilities, as a dropdown list.
Select Data#
Select the desired data.

When you’ve entered enough characters, to where the address you are looking for is present, select it. If your selection contains a Zip+4, <Enter>, <Tab> or Keyboard Mouse selection will insert the record into your sheet and consume a credit.
If Express Entry determines that there are available Suites, it will return a drop down list of validated options. If an unavailable option is typed in, it will be saved, but not verified with the plus4.
Credit Usage#
When you have exhausted all your credits, Express Entry will no longer give suggested addresses, and will give you direct access to purchase more credits.
