Mailers Online Tutorials#
Web Tutorials#
The Basics#
Get To Know Mailers Online#
Live streamed by Peter Handfield on February 16, 2018
Live streamed by Peter Handfield on June 29, 2017
Saturation Mailing#
Live streamed by Peter Handfield on January 15, 2019
Uploading Maildat#
Upload Mail.Dat files to the USPS® PostalOne!® and your Dashboard#
Before you can upload Mail.dat, or eDocs, to the USPS PostalOne! client, you must have access to the USPS Business Customer Gateway (BCG) with a Username and Password. If you do not, please see the “Creating your MID and CRID” instructions.
If you have a Mailer ID (MID) and Customer Registration ID (CRID) for your organization, be sure that you have your Username and Password secured as they are required for uploading to PostalOne!® using the MDRClient software. Please note that you will need to check back with the BCG periodically for any updates to the Maildat client.
The Mail.dat Windows Client Application can be downloaded from the USPS BCG - Electronic Data Exchange page under “Mail.dat Support for Production”.
Requirements for uploading to PostalOne!#
USPS Business Customer Gateway Username and Password approved for electronic upload to PostalOne!
Maildat Windows Client Application for Operating System
Learning Objectives#
How to download the USPS PostalOne! Maildat Client
How to upload Maildat files to the USPS Business Customer Gateway via PostalOne! Maildat Client.
Sign into the Business Customer Gateway (BCG) with User Name and Password#
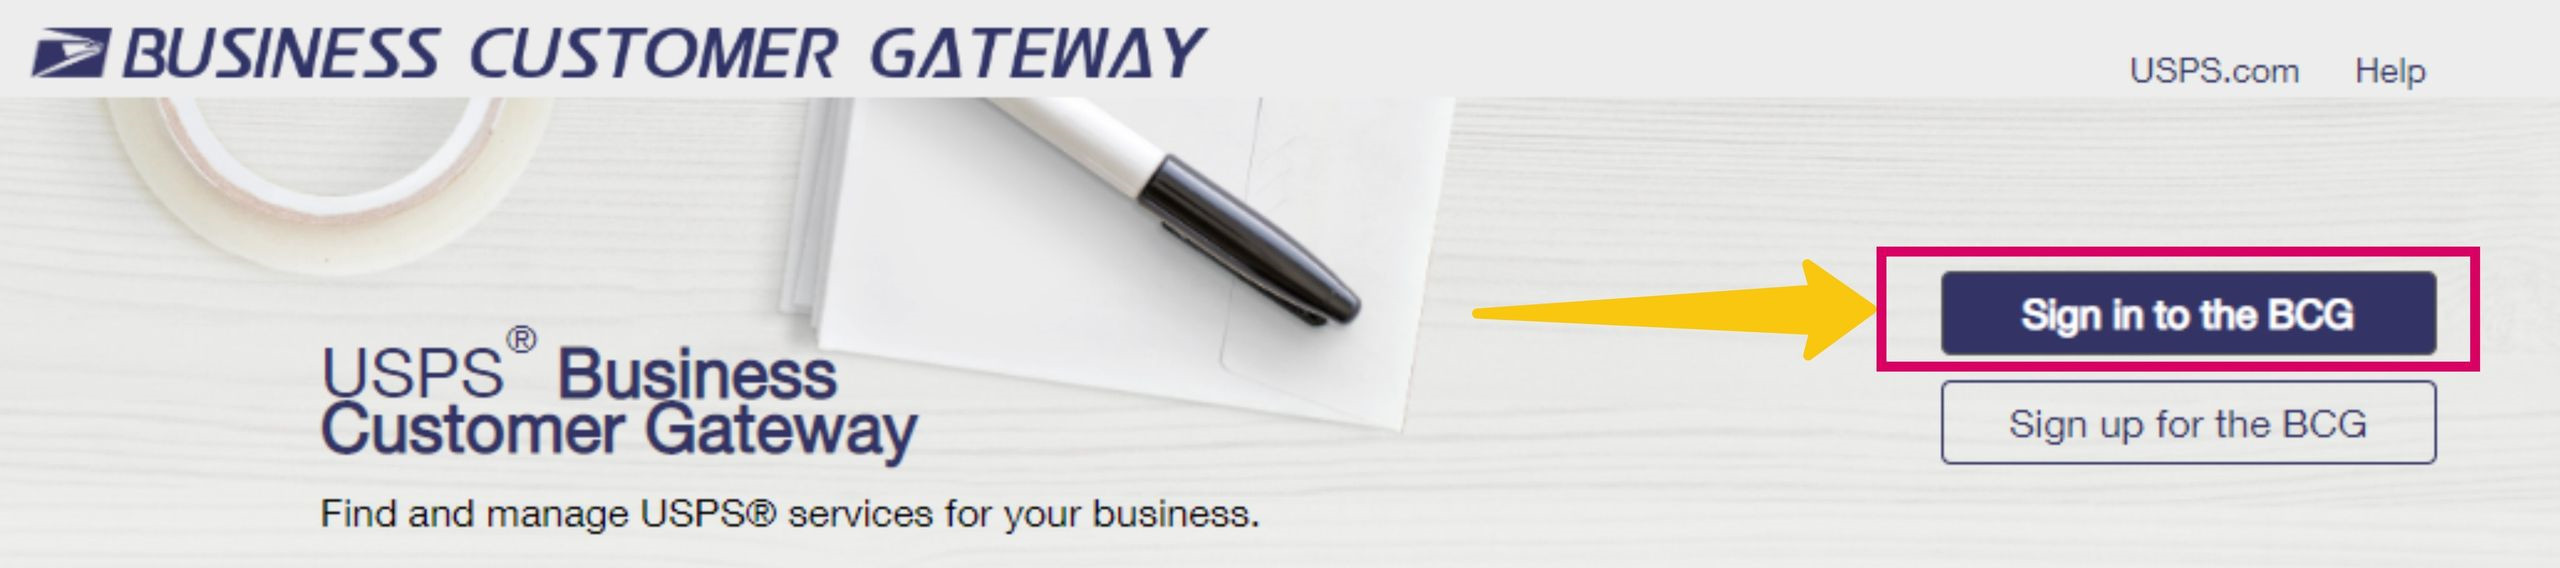
Go to the USPS Business Customer Gateway website: https://gateway.usps.com/eAdmin/view/signin
Click “Sign in to the BCG”.
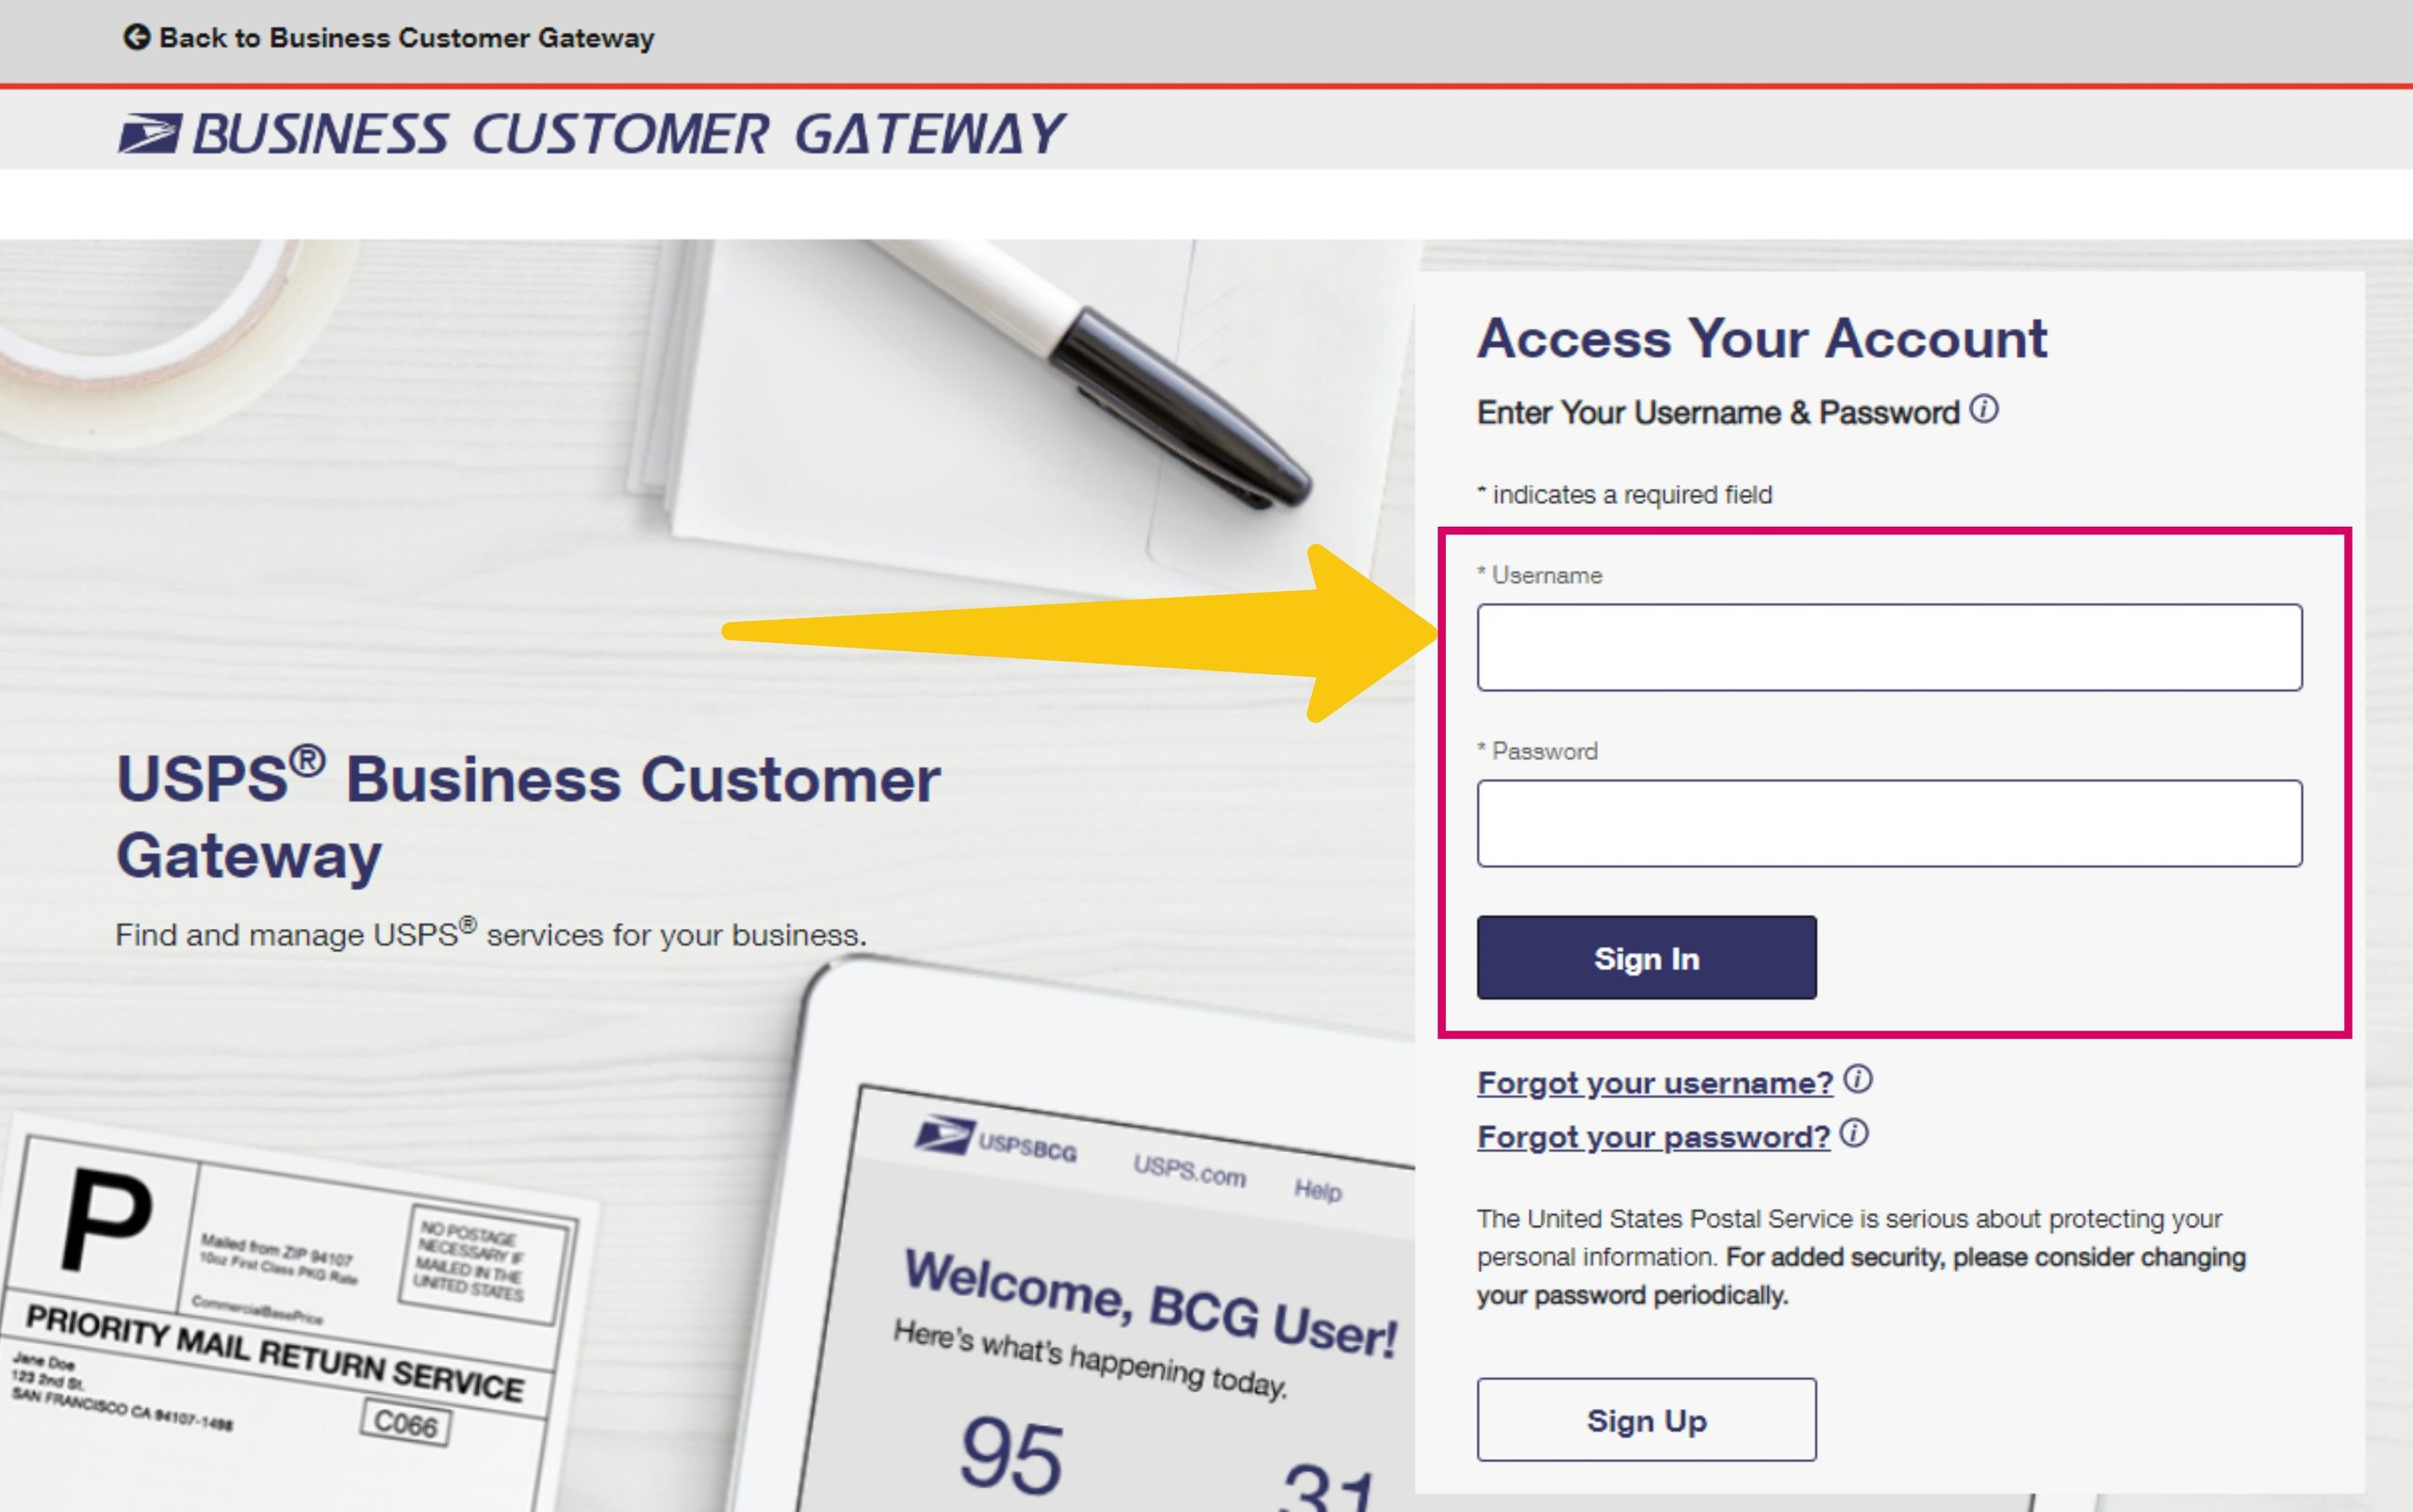
Enter User Name, Password and then click “Sign In”.
Download & Extract the Mail.dat client#
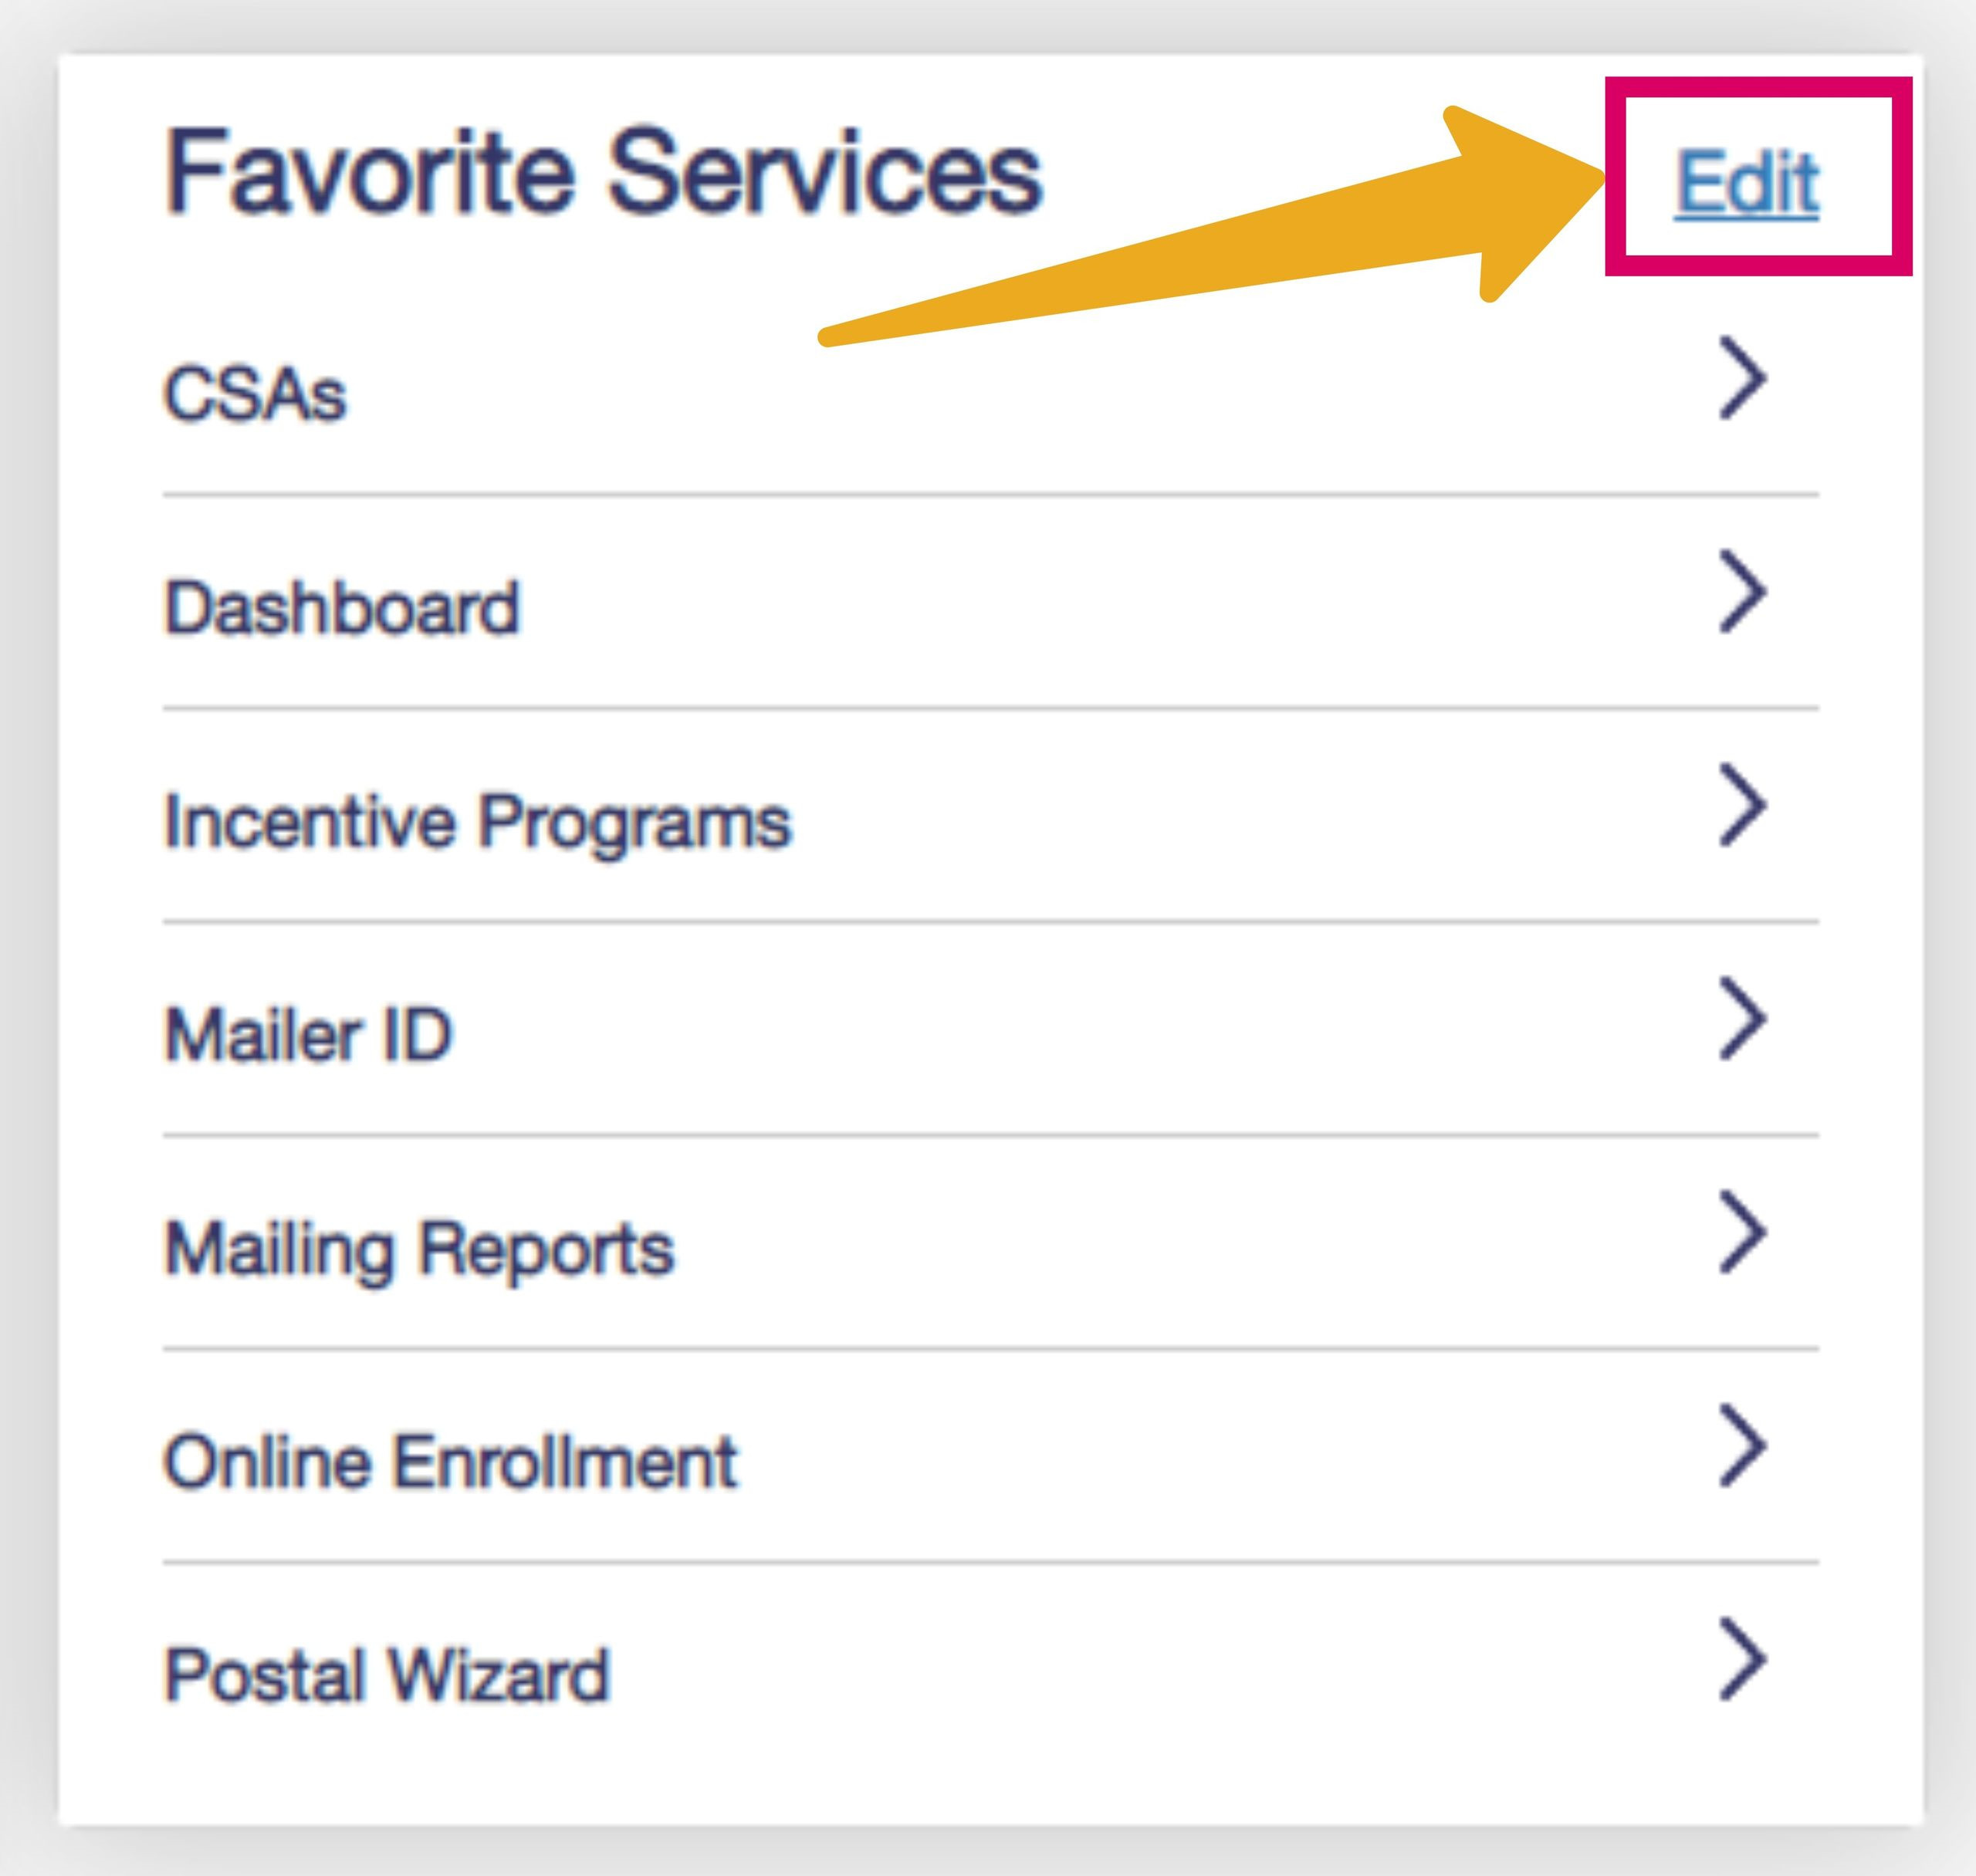
If you do not have the “Electronic Data Exchange” button set as one of your Favorite Services, click “Edit” to go to the Manage Favorites page.
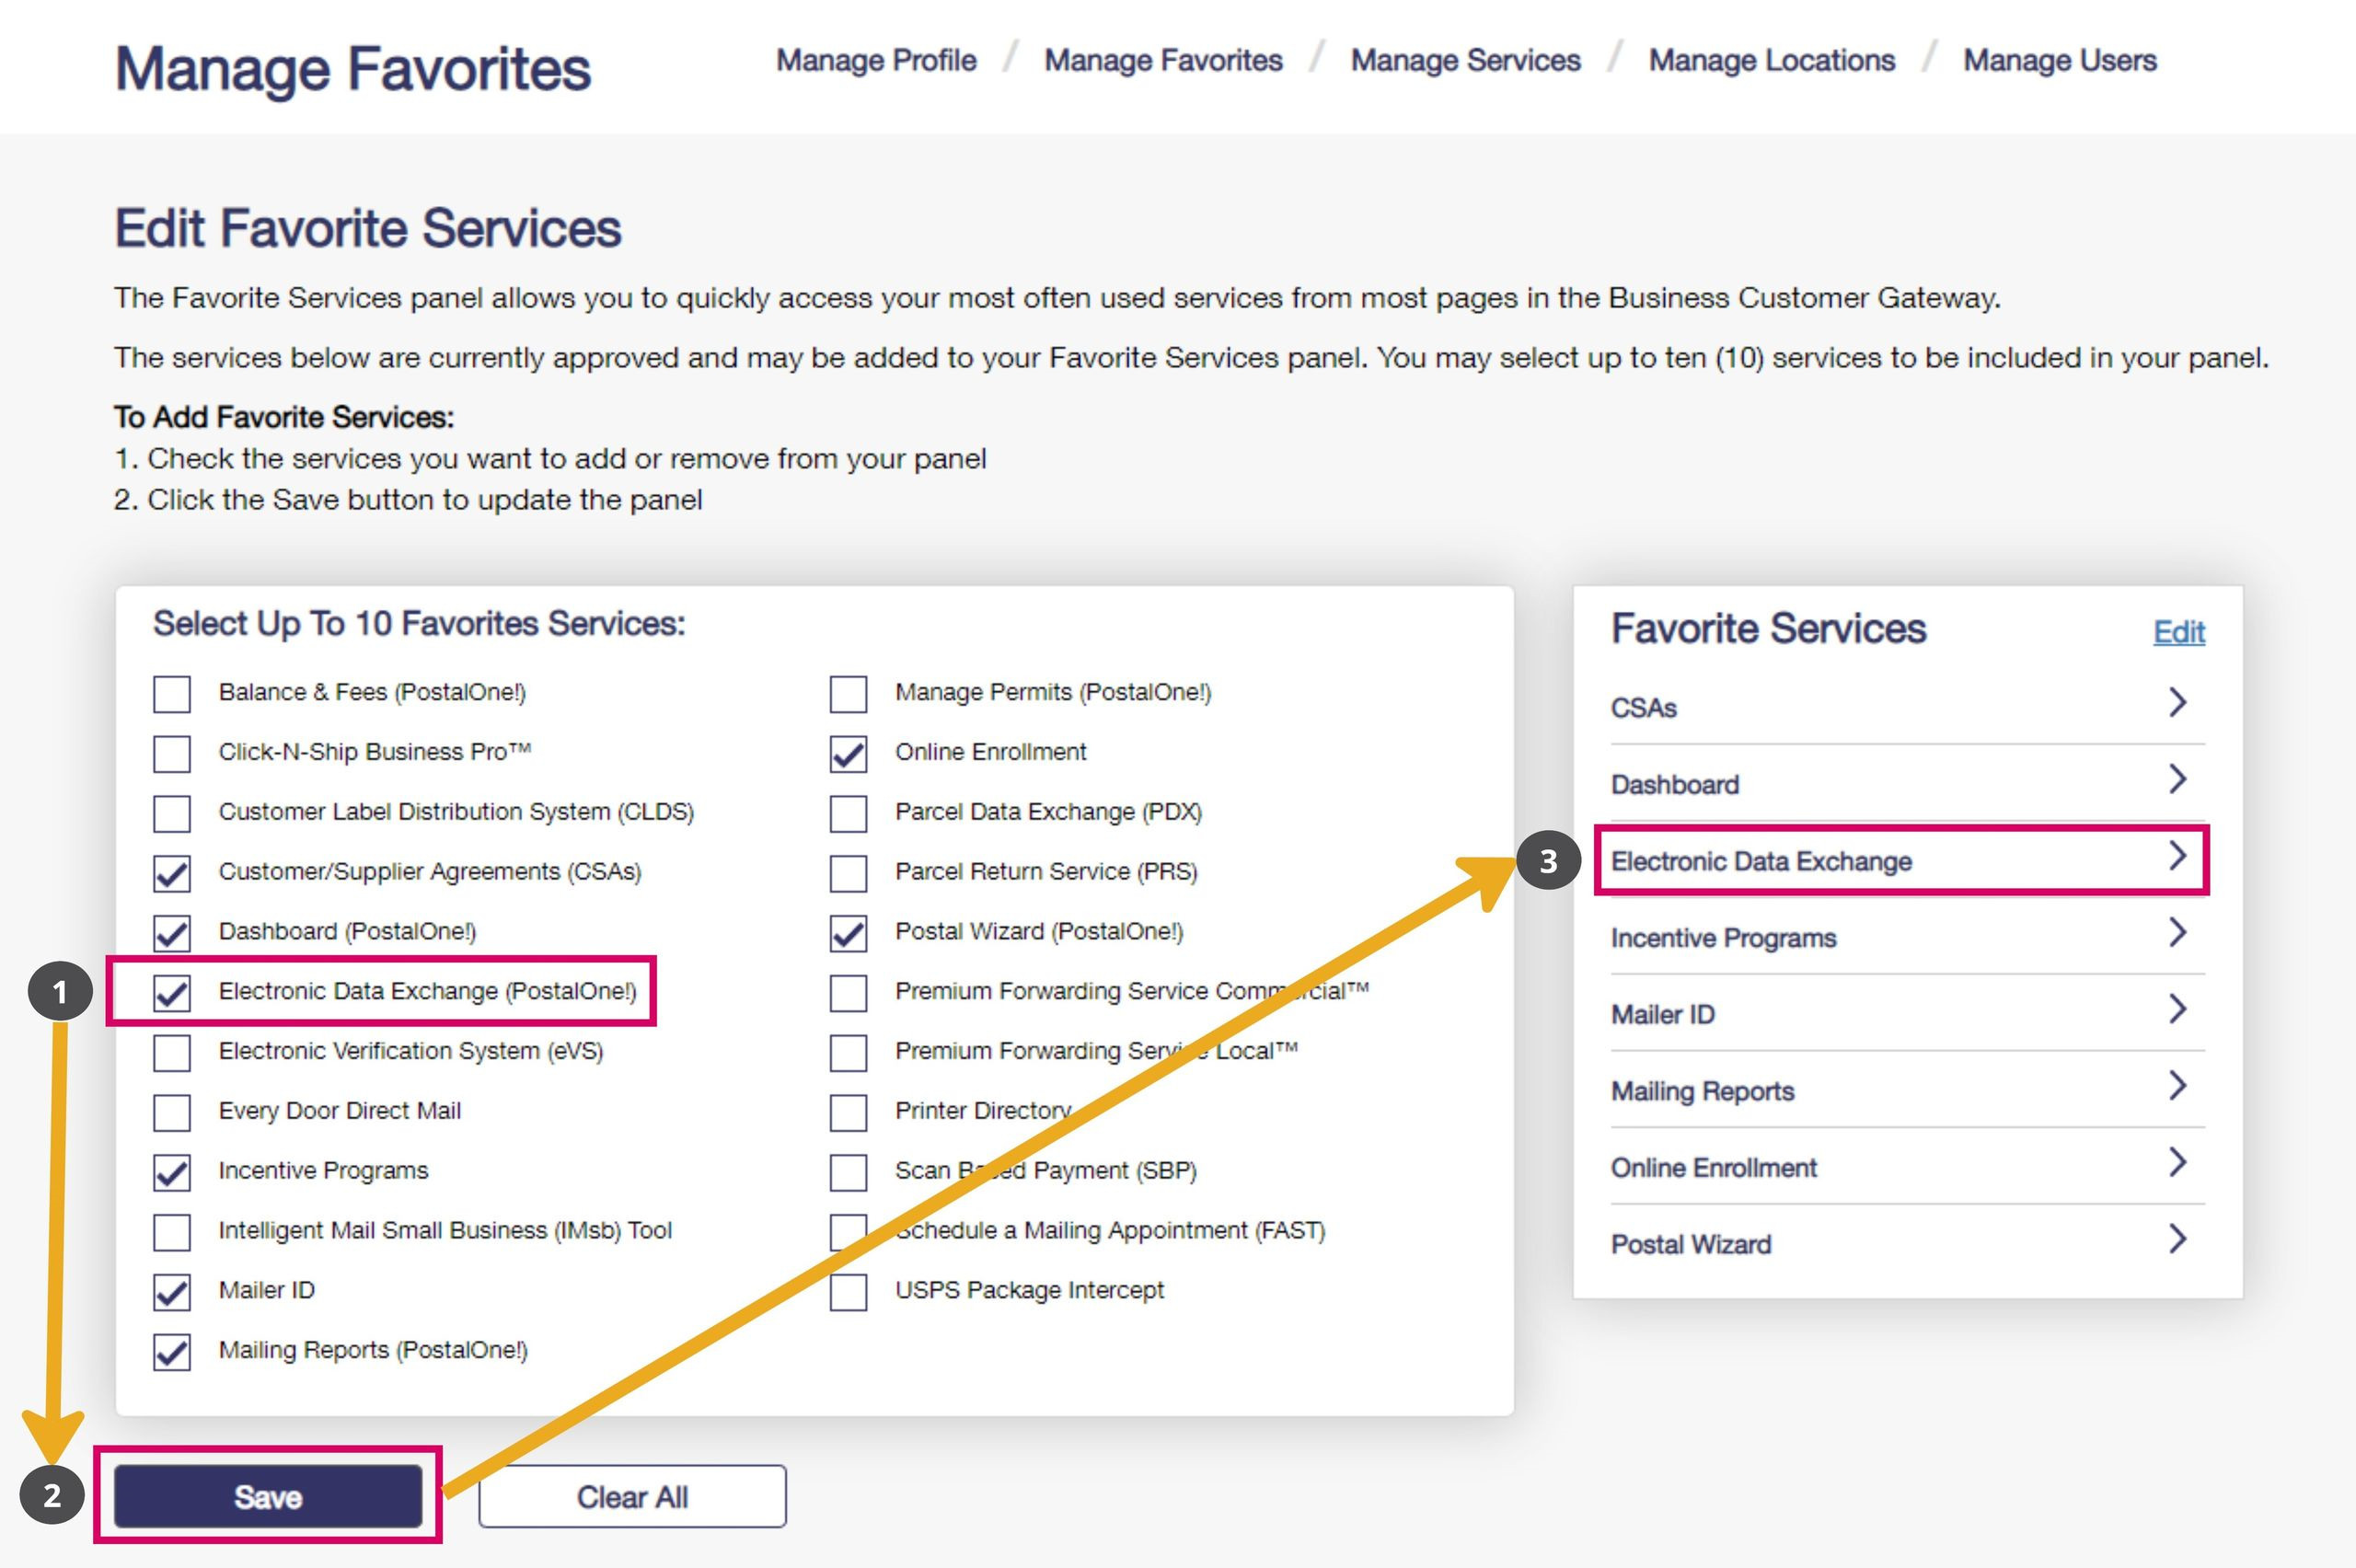
Check the box next to “Electronic Data Exchange (PostalOne!)” and click “Save”.
Click “Electronic Data Exchange” under Favorite Services.
Select which Client Application to download; Windows is the most common. In order to make the download easy to find, create a new desktop folder (example: “PostalOne”) and save the download here.
Click “Download Client Application” for your Operating System (Windows 32-bit or 64-bit).

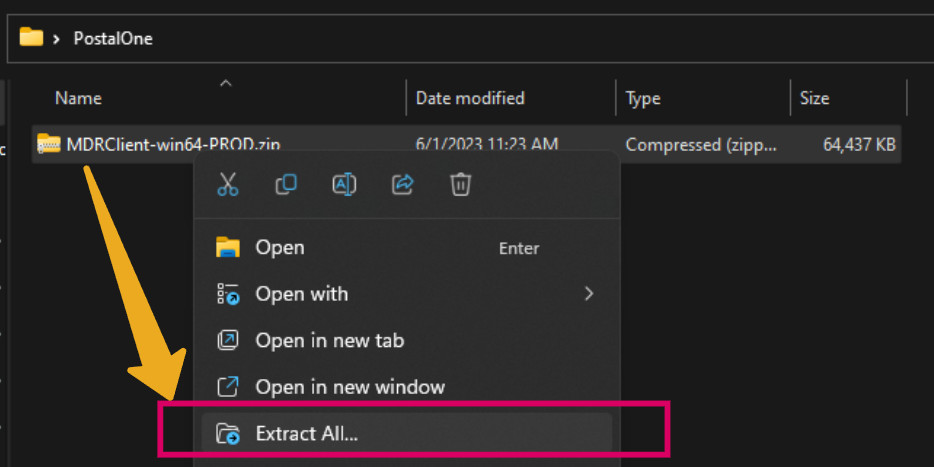
Right click the Maildat client zip folder (Example: “MDRClient-win64-PROD.zip”) and select “Extract All”.
Open the PostalOne! Maildat Client and Sign-In#
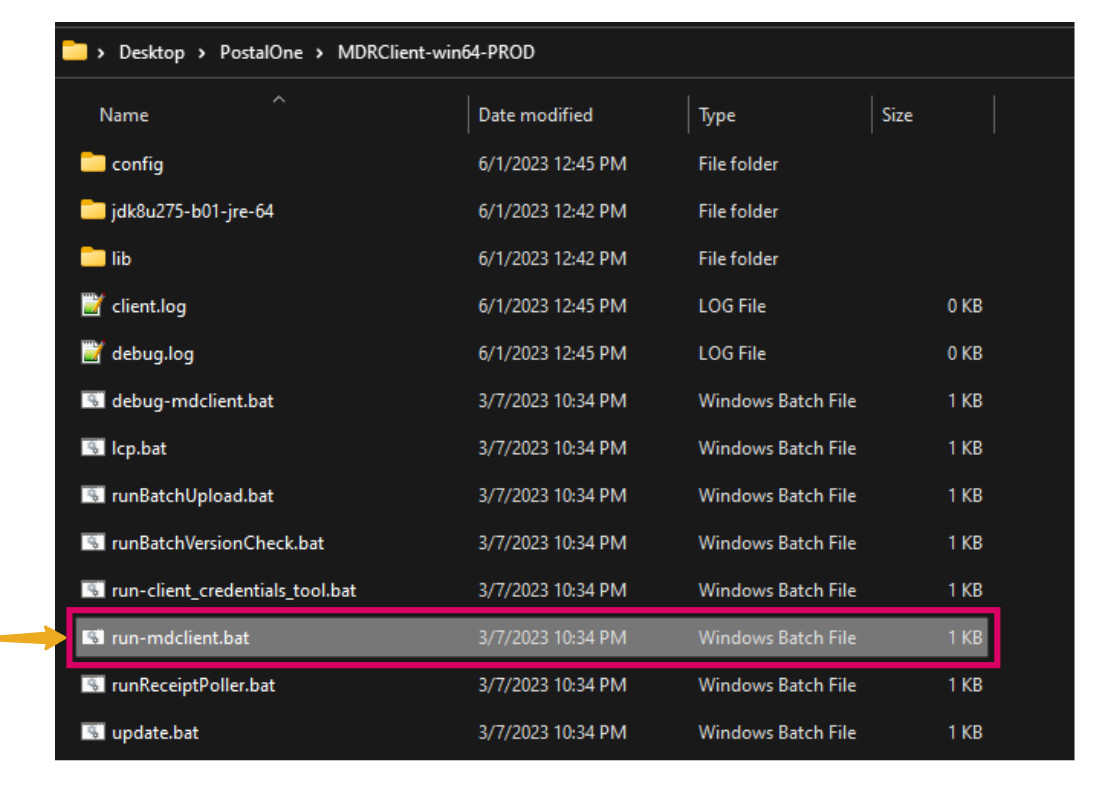
Open the extracted MDRClient folder and double-click “run-mdclient.bat” to launch the USPS PostalOne! Maildat client.
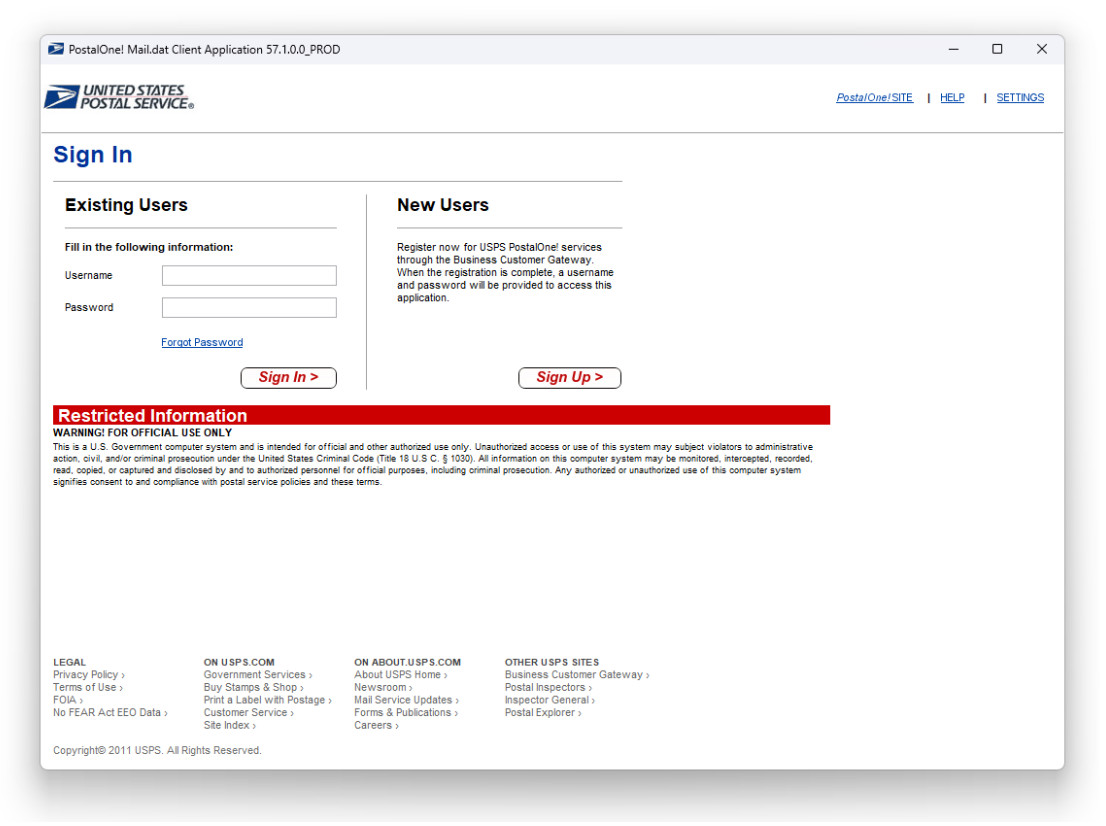
Sign in using the USPS Business Customer Gateway User Name & Password that has permission to upload Maildat files.
Upload Mail.dat Files to the USPS Business Customer Gateway#
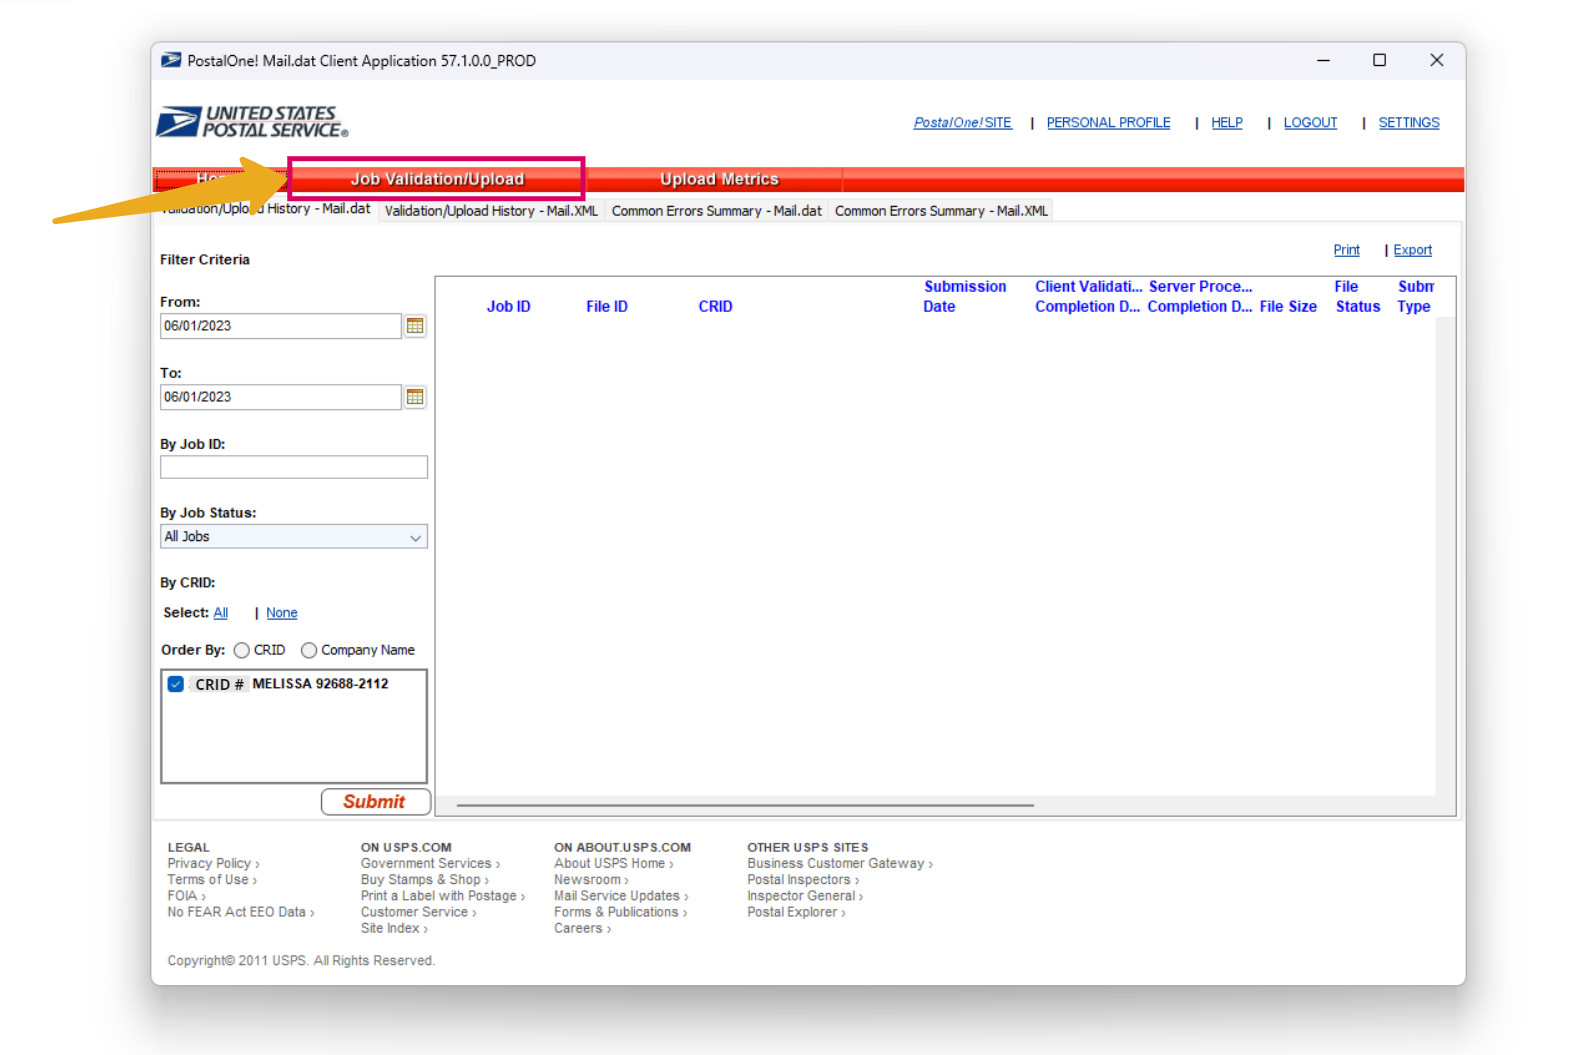
After you are signed in to PostalOne!, perform the following steps to upload Maildat files to the Business Customer Gateway:
Select “Job Validation/Upload” tab.
Click “Add Jobs” and select the directory of the saved Mail.dat files that need to be uploaded.
Select the Job’s Maildat “.hdr” file and click “Open”.
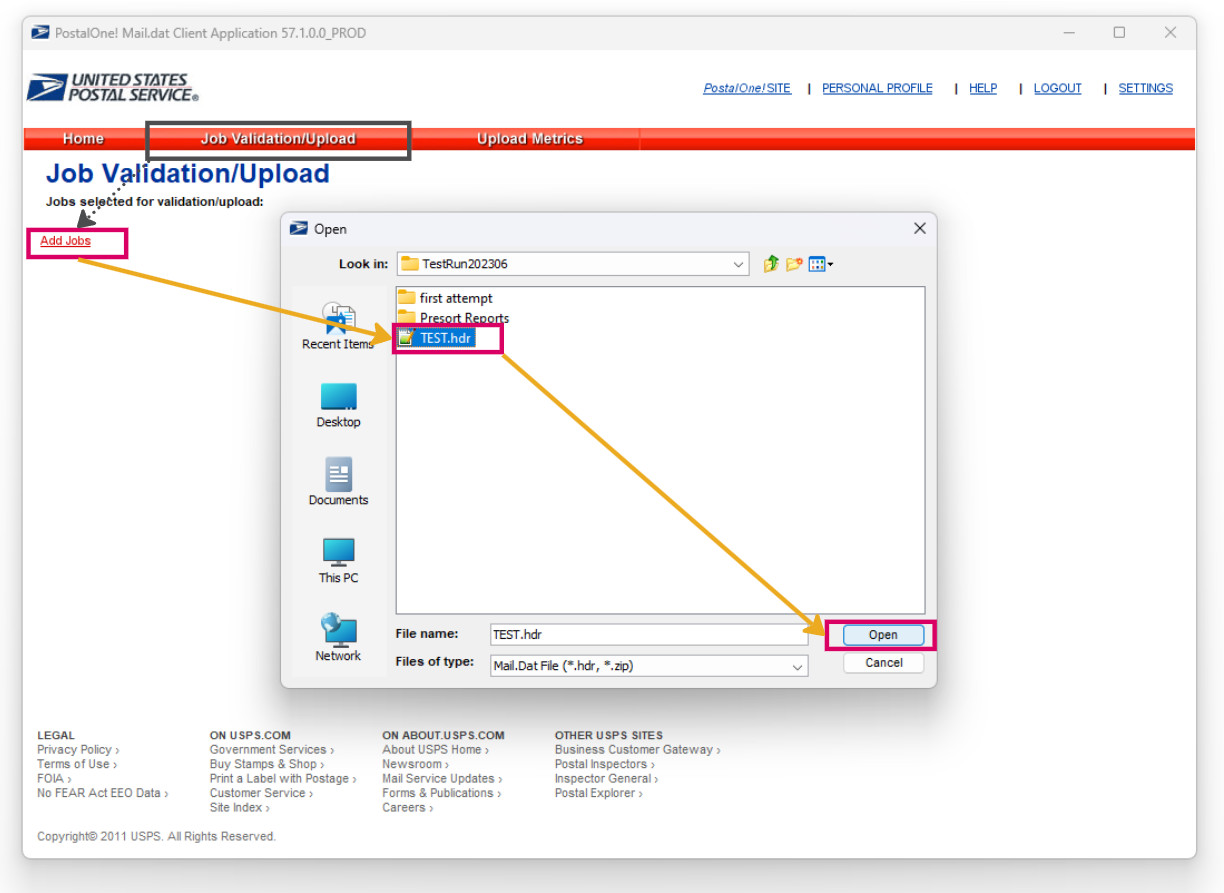
This screen shows the Job/Mail.dat attached and ready for processing.
Select “Just Validate Job(s)” and then click “Validate” to check Mail.dat files for any potential issues before officially uploading to the USPS Business Customer Gateway. This helps to prevent any errors that could occur and be fixed before officially uploading.
If Validate shows “VALIDATED COMPLETED” then that signals there were no errors found within the Maildat files. Click “View Details” to preview all of the files uploaded.
NOTE! - If there are any errors, please review and fix the presort before re-uploading. If you need help troubleshooting the error, please send a screenshot of the PostalOne! error along with the Maildat files to tech@melissa.com for assistance.
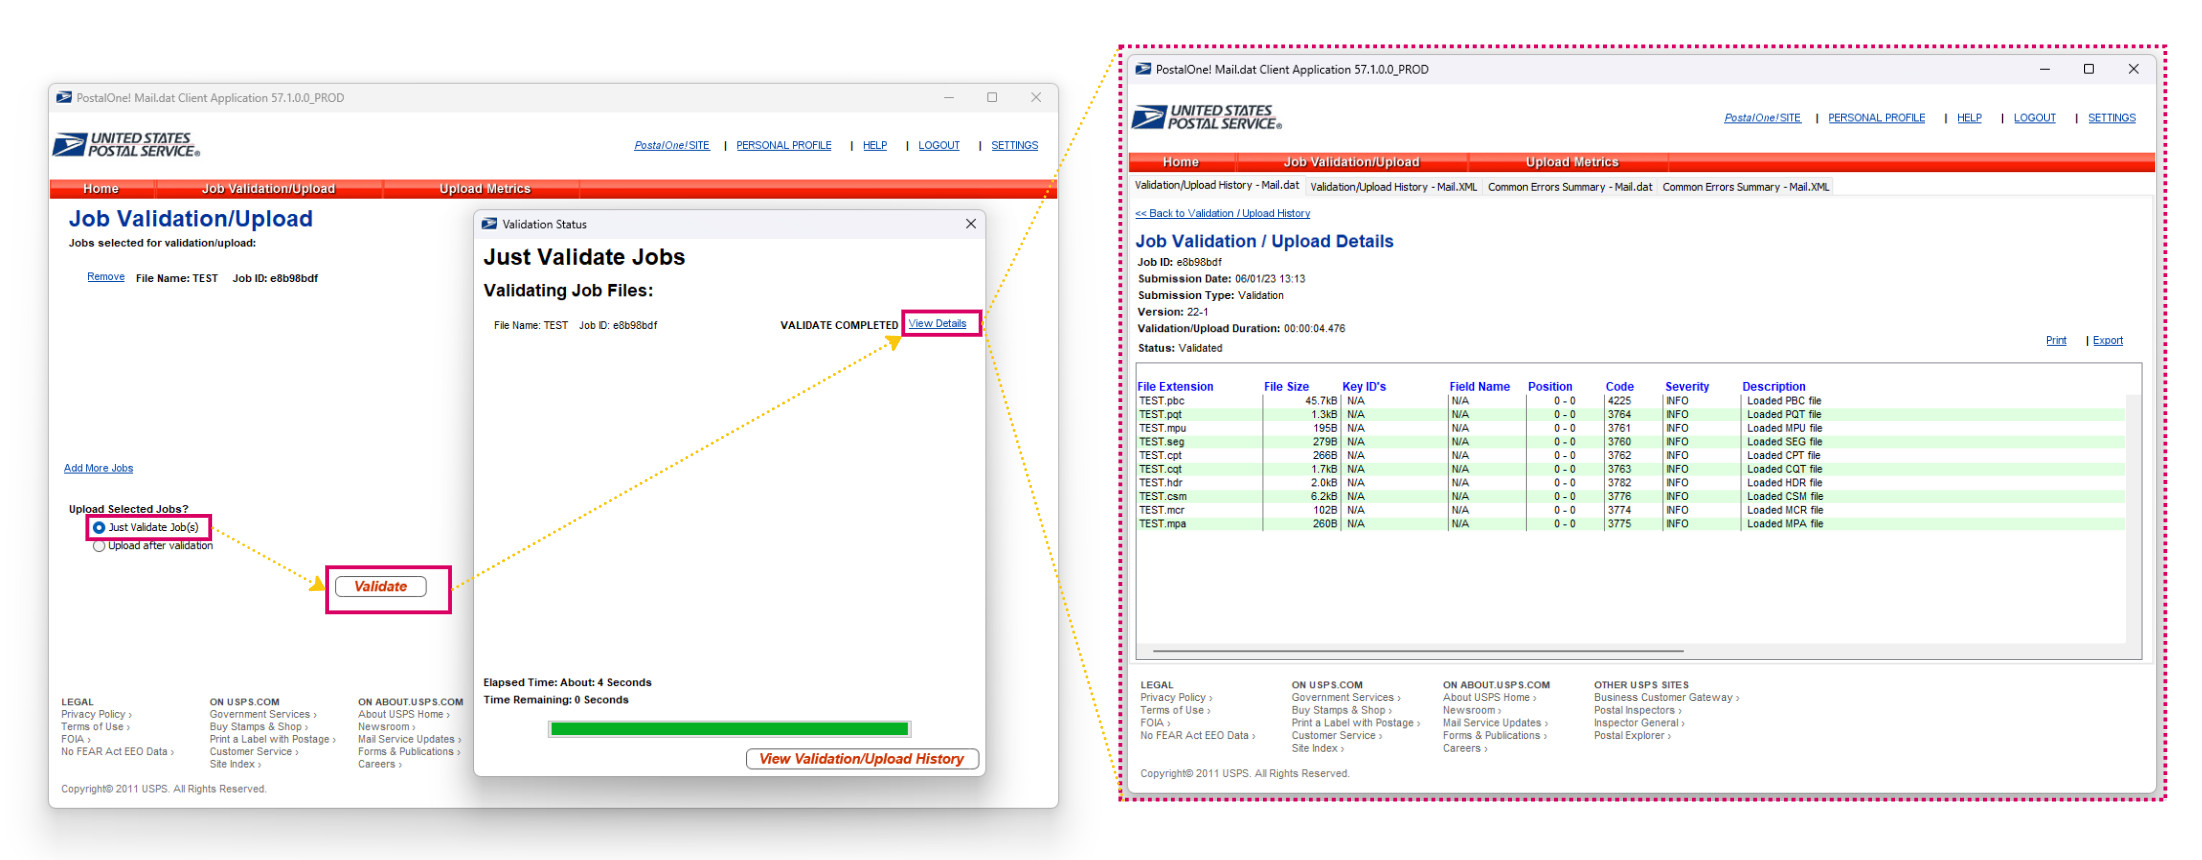
Click “Just Validate Job(s)” to preview before upload.
If the files validated without any issues, then repeat the steps and select “Upload after Validation” to officially upload to the USPS Business Customer Gateway.
Select “Job Validation/Upload” tab.
Click “Add Jobs” and select the directory of the saved Mail.dat files that need to be uploaded.
Select the Job’s Maildat “.hdr” file and click “Open”.
Select “Upload after Validation”” and then click “Validate and Upload” to officially upload.
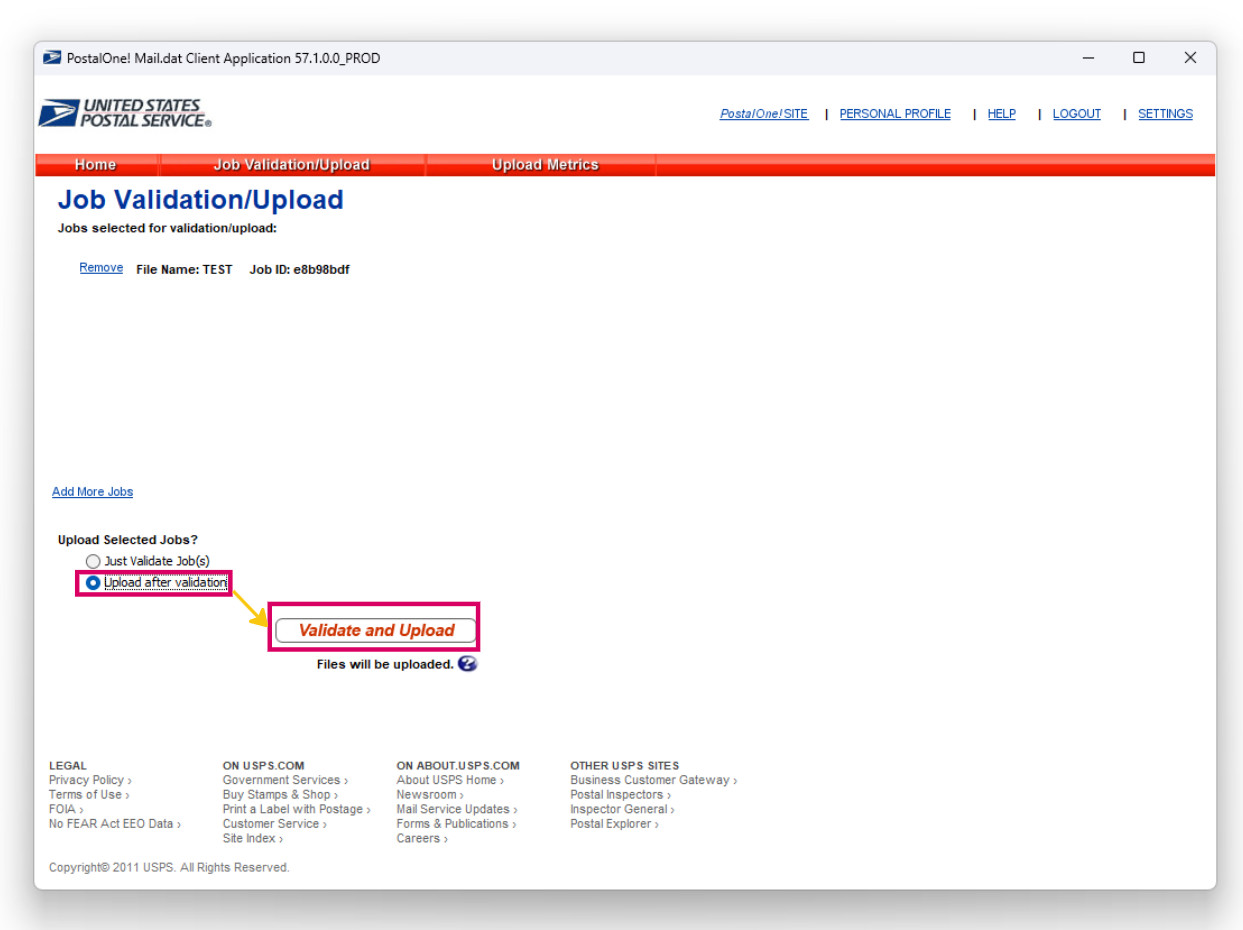
Click “Upload After Validation” to officially upload.