Reference Only
Melissa legacy products are for reference only. They are NOT recommended for new development.
If you have any questions about any of these features, please feel free to contact Melissa Support at Tech@Melissa.com or 800-MELISSA ext. 4 (800-635-4772 ext. 4).
Tutorials#
Workflow Tutorial#
This tutorial will show you how to use an efficient workflow. We will be using the Personator solution and its workflows in this tutorial.
Note: You must first complete the configuration of the Personator solution to use this tutorial. The workflows you learn here will also only be present in the Dynamics CRM 2016 version of our solutions.
Access Default Solution#
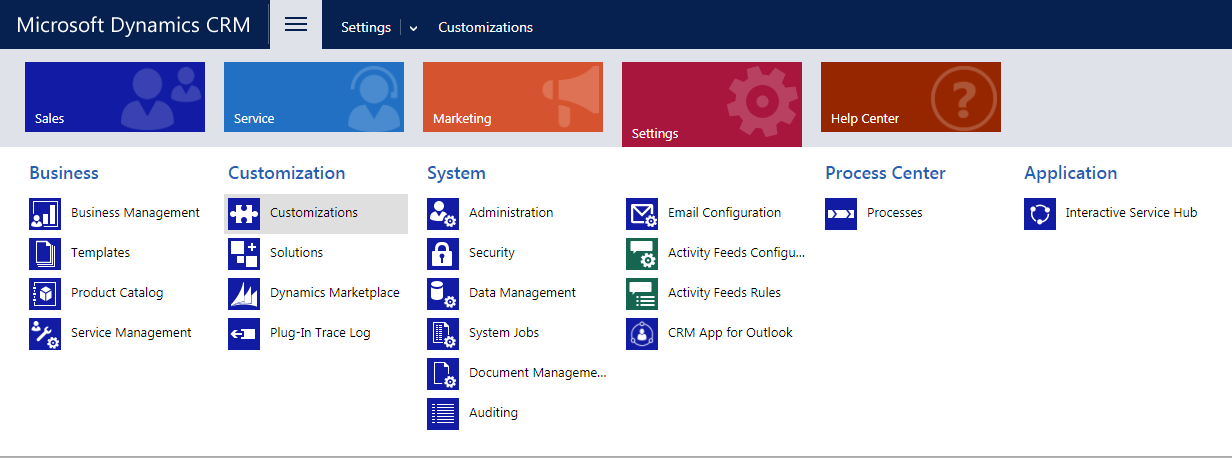
Begin by accessing the default solution of the Dynamics CRM or Dynamics 365 instance. Open the Dynamics CRM menu, click the Settings button, then Customizations.
Customizations#
Customize the Solution#
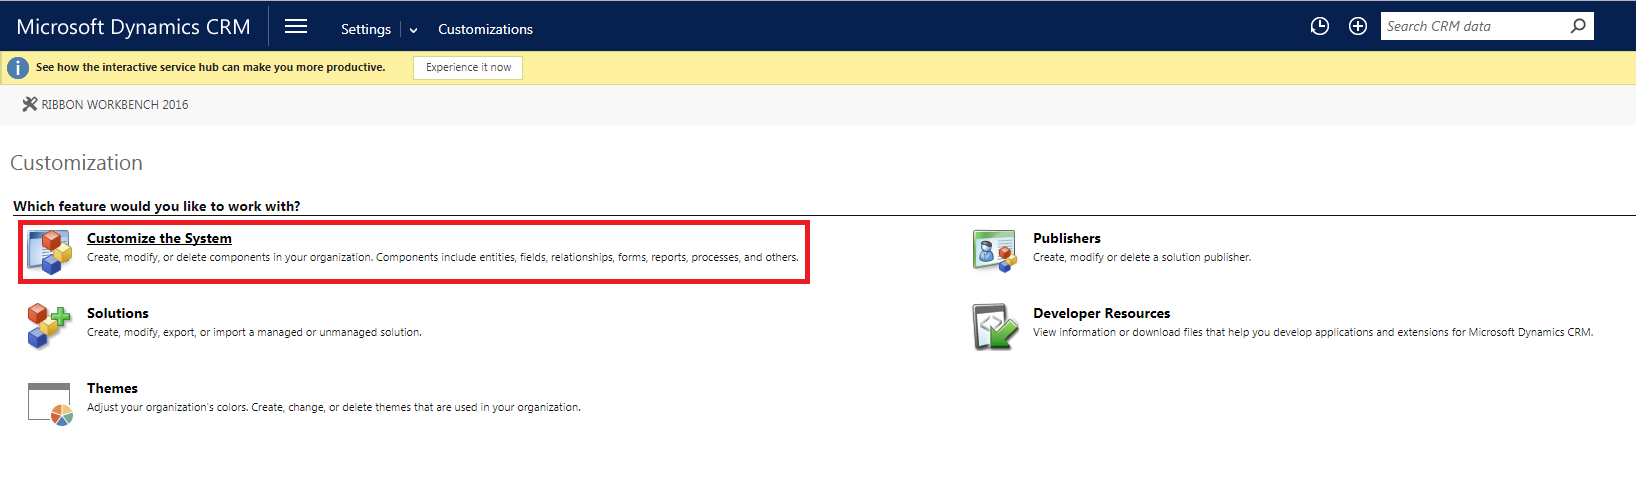
In the Customizations area click Customize the System. This will open a new window that contains the solution explorer for your default solution.
Customize the System#
Processes#
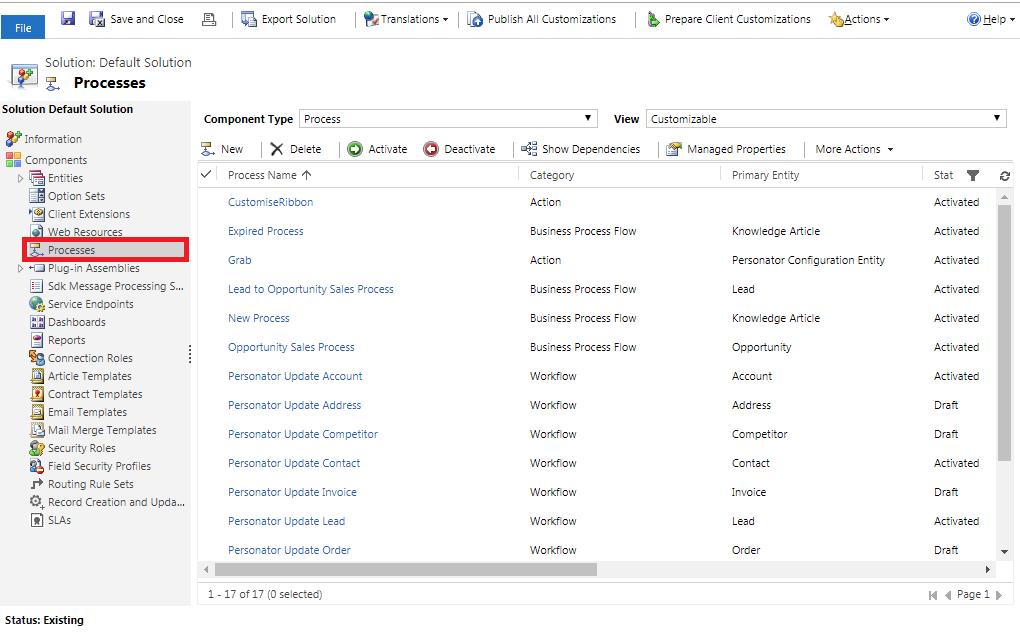
In the solution explorer, click Processes in the left navigation pane.
Processes#
Select Workflow#
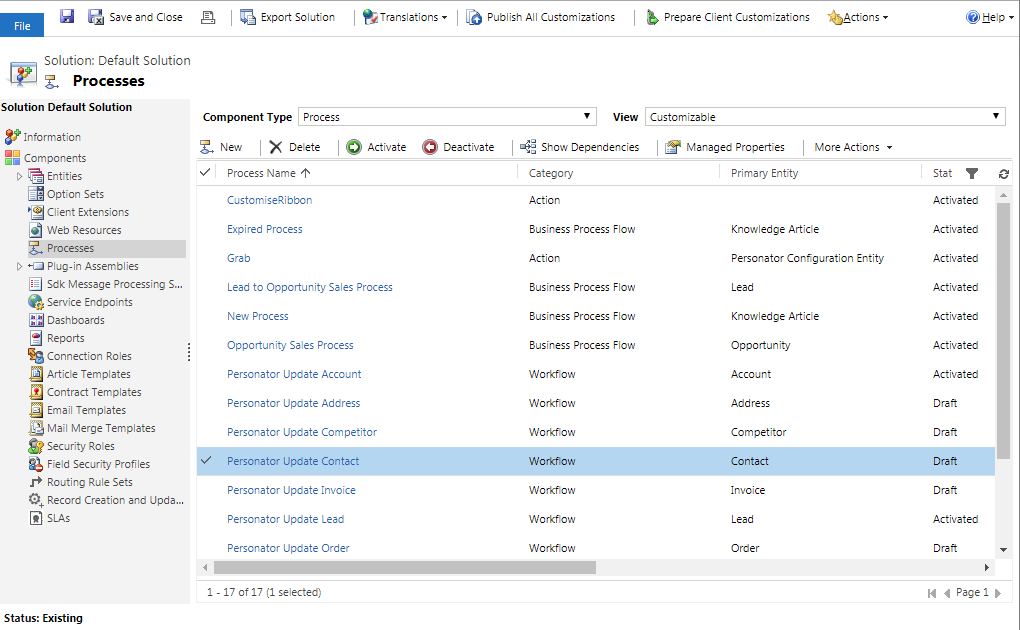
Select the workflow that begins with Personator (this may be different depending on the solution) and corresponds with the entity you are using. For this tutorial we are using the Personator Update Contact workflow to update the Contact entity.
Double-click to open the workflow.
Open the Workflow#
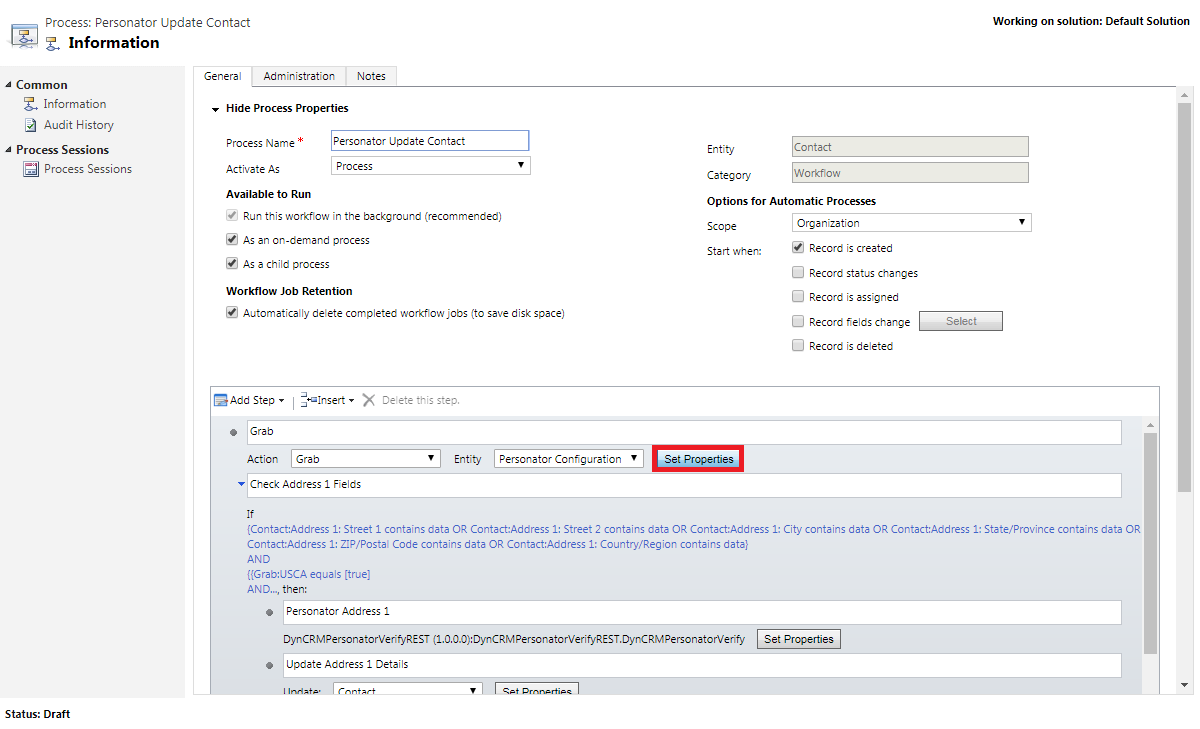
Set Properties#
Now we need to set the configuration entity for this workflow.
If you have not set the configuration for the solution, follow the Dynamics Personator Configuration tutorial from the previous step.
Once this window has opened, click the Set Properties button under the Grab step. This will grab the instance of the configuration entity to set the options for the workflow.
Set Properties#
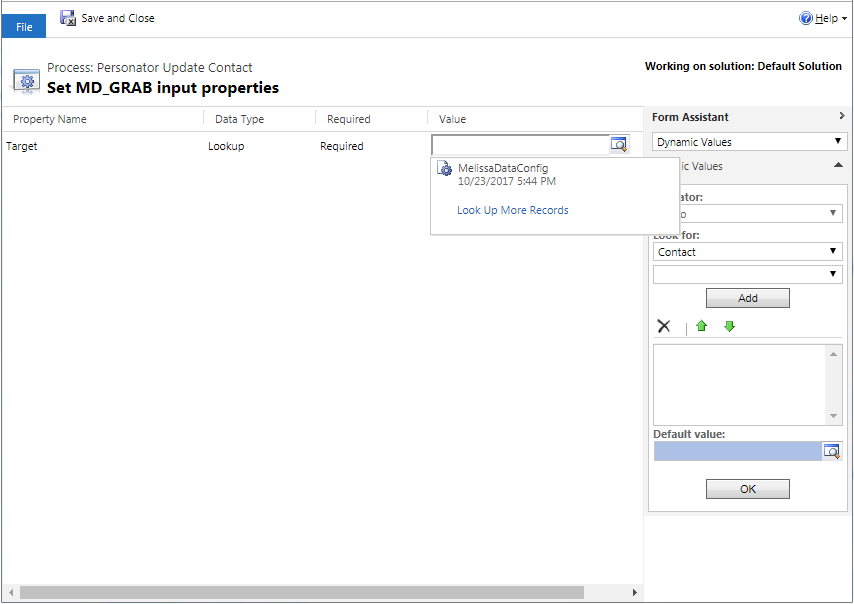
Configuration Entity#
In this window, please click the magnifying glass in order to search for the instance of your configuration entity. Once the record is found, please click the record in order to fill the value column. Please click Save and Close once you have selected the configuration entity record.
Configuration Entity#
Activate Workflow#
Ensure the workflow is available to run as an on-demand process to use this workflow on the form. If you want to have this workflow run on different triggers, such as running this workflow whenever a record is created, you can set that here.
Once you have finished selecting your settings, save the workflow and click Activate.
Note: You can set the returned fields to populate specific fields on the form in the workflow by accessing the Update Address 1 Details by clicking Set Properties. This requires some development knowledge. If you want to customize this workflow, note that future updates of the solutions may undo your customizations.
The workflow should be active now and can be used to utilize the Personator service on the respective entity.
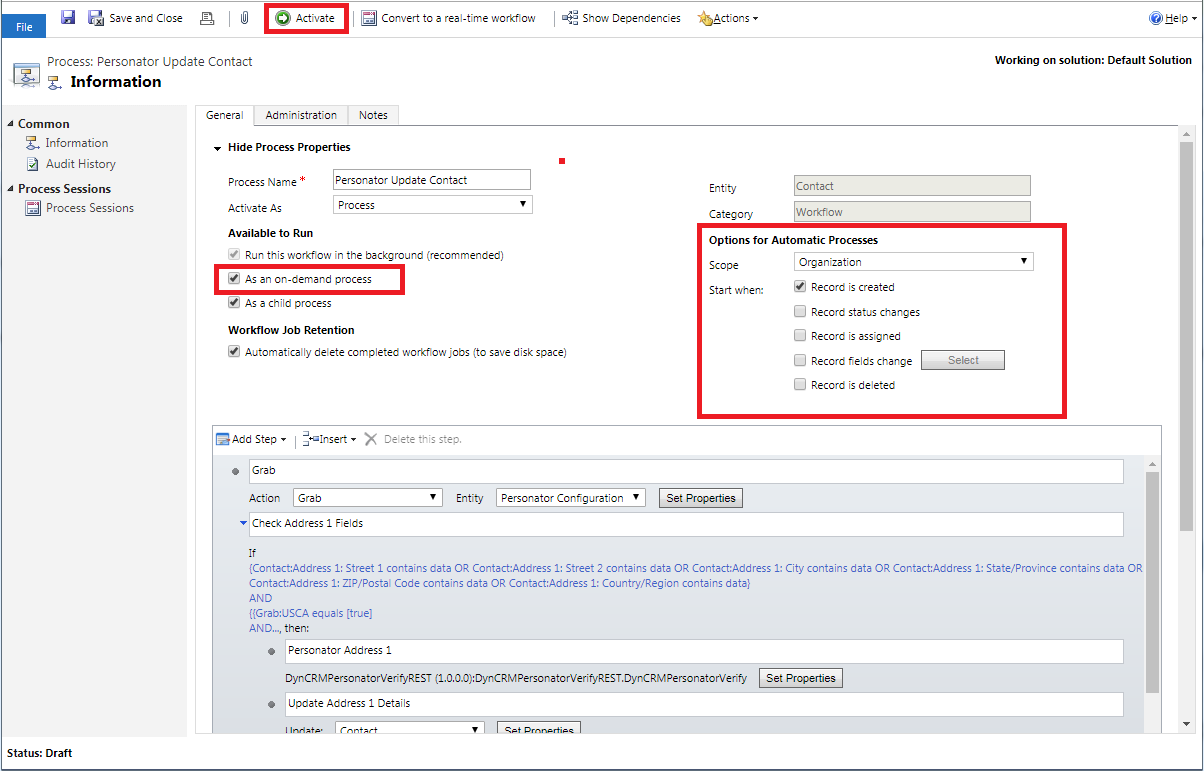
Activate the workflow#
Business Coder Tutorial#
Note: In order to use the Business Coder service, you must first configure the License Key and options.
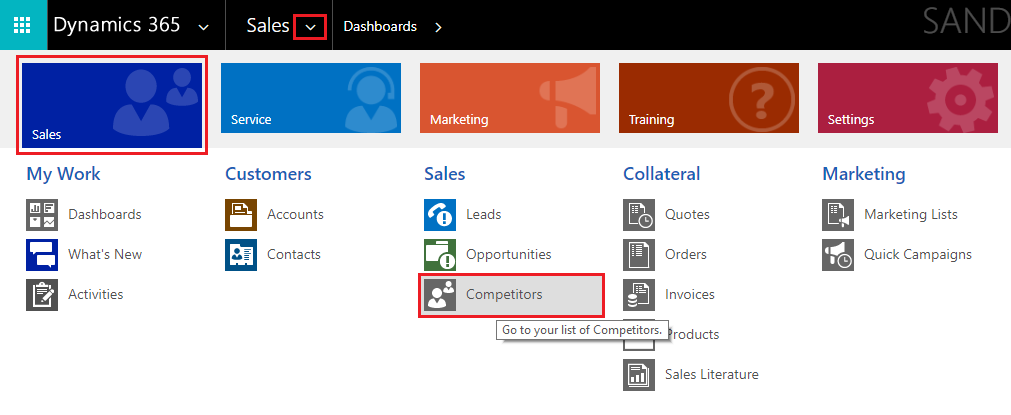
This tutorial will teach you how to use the Business Coder solution in Microsoft Dynamics CRM in the Competitor entity.
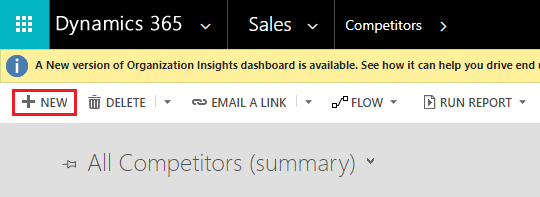
Begin by navigating to Competitors. To do this, click the Sales button on the top ribbon, then click Competitors.
View Business Coder Details#
Click New to create a new Competitor.
View Business Coder Details#
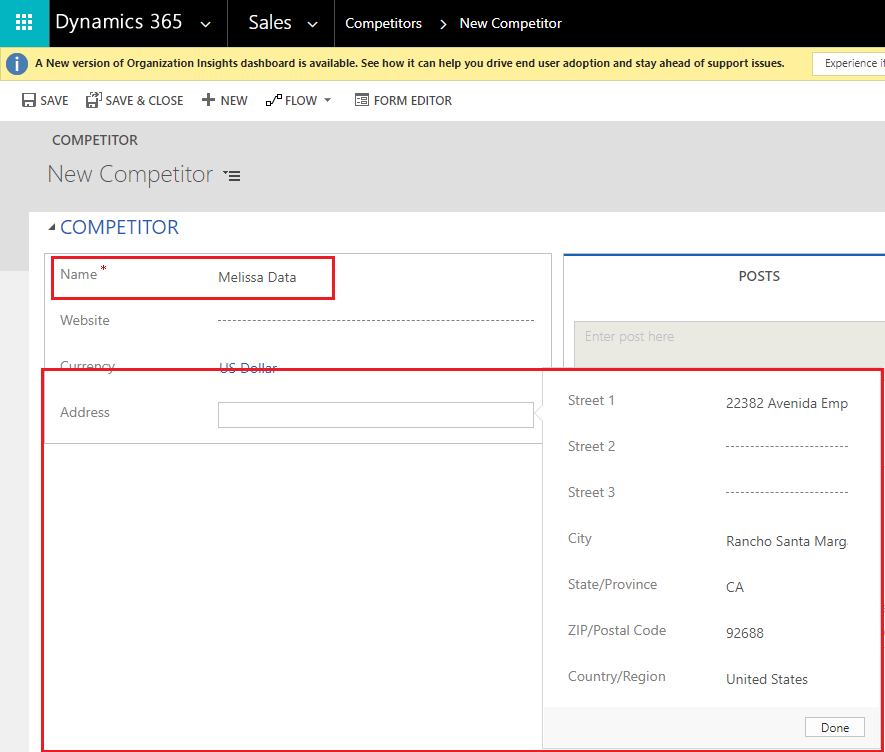
Enter the new competitor information. Click Done when finished.
View Business Coder Details#
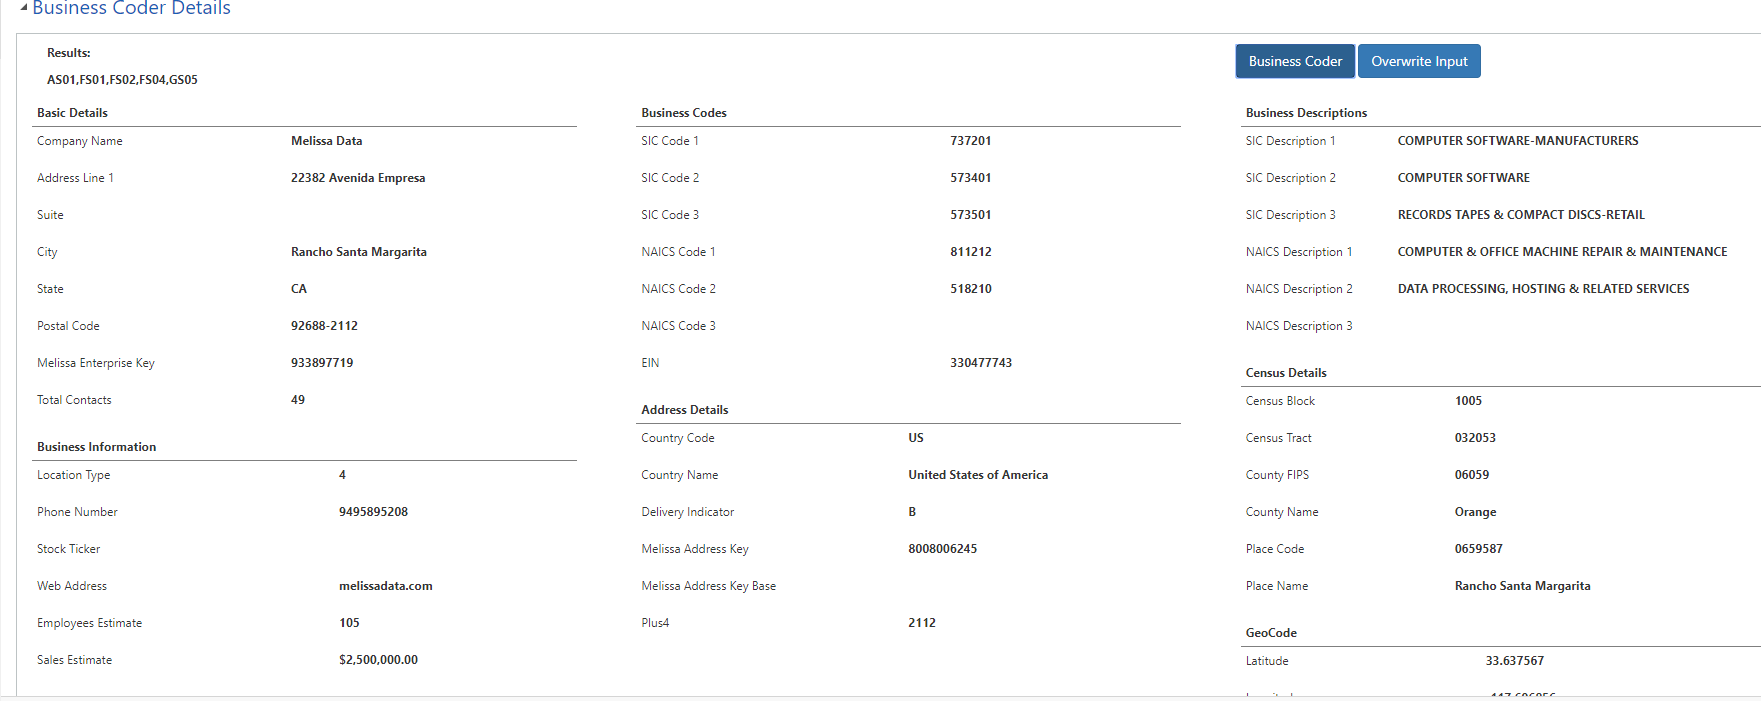
Once you add a new competitor the Business Coder Details section will be added. Click Business Coder to populate the fields.

View Business Coder Details#
View the Business Coder Details section.
View Business Coder Details#
Express Entry Tutorial#
Note: In order to use the Express Entry service, you must first configure the License Key and settings.
This tutorial will teach you how to use the Express Entry solution in Microsoft Dynamics CRM in the Contact entity.
Begin by navigating to the Contacts section. To do this, click the down arrow next to Sales, then click Sales, and then click Contacts under the Customers category.

Click Contacts#
Click New* to create a new Contact.

Click New#
In the contact entity, if you have not already, our Express Entry plugin will add the out-of-the-box fields for Address 1 and Address 2. Express Entry auto-complete will appear when you type a certain amount of characters into the
Address 1: Street 1orAddress 2: Street 1fields. By default, this is set to three characters.
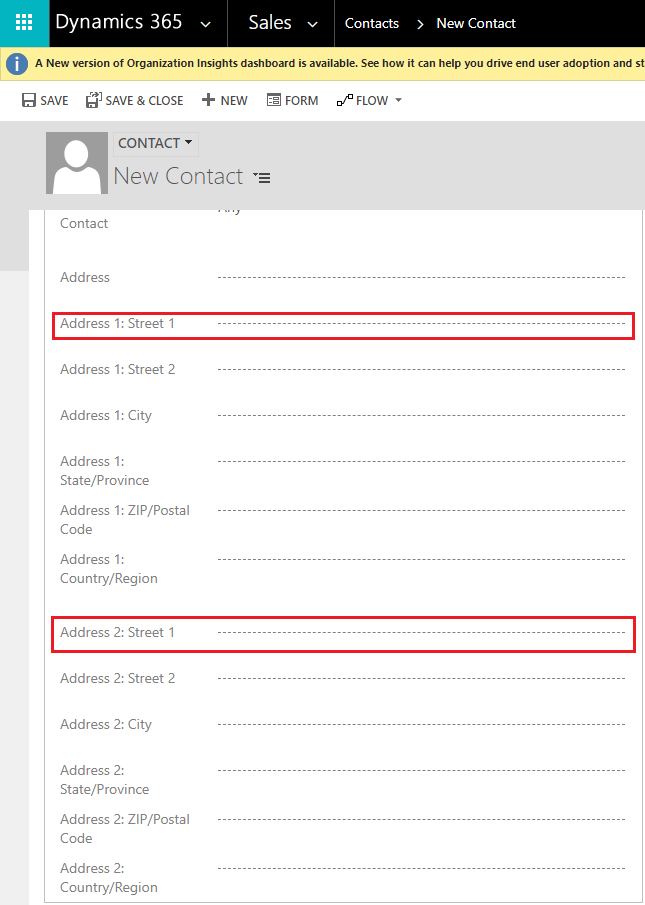
Address Fields#
Auto-complete Example#
As an example for auto-complete: If you start typing 238 into the Address 1: Street 1 field, auto-complete will appear and give multiple entry suggestions.
The number of suggestions appearing is based on your configuration settings.
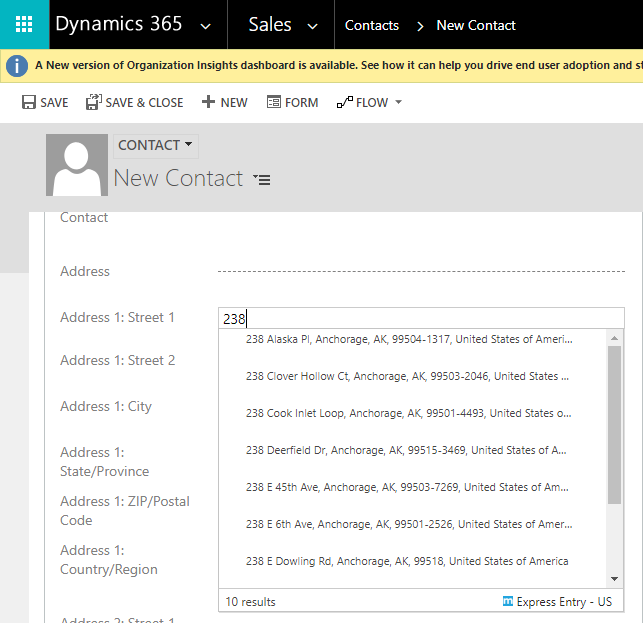
AutoComplete Example#
Selecting 238 Clover Hollow Ct from the suggestions will automatically fill in the appropriate fields for the contact.
The same behavior applies for Address 2.
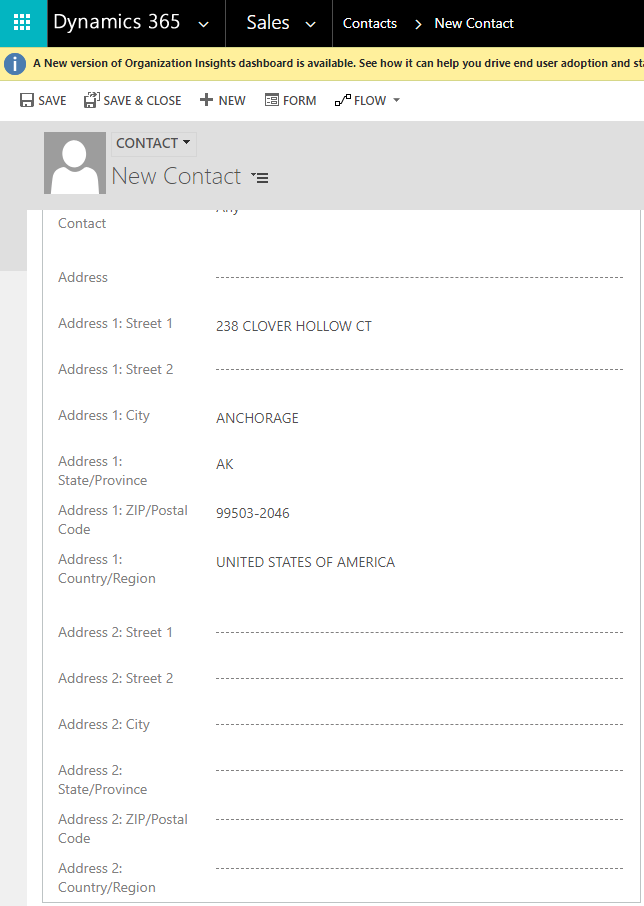
Filled Fields Example#
Search Limit Example#
You can also limit where you would like to search based on City, State, Postal Code, and/or County.
For example: In State, type CA for California.
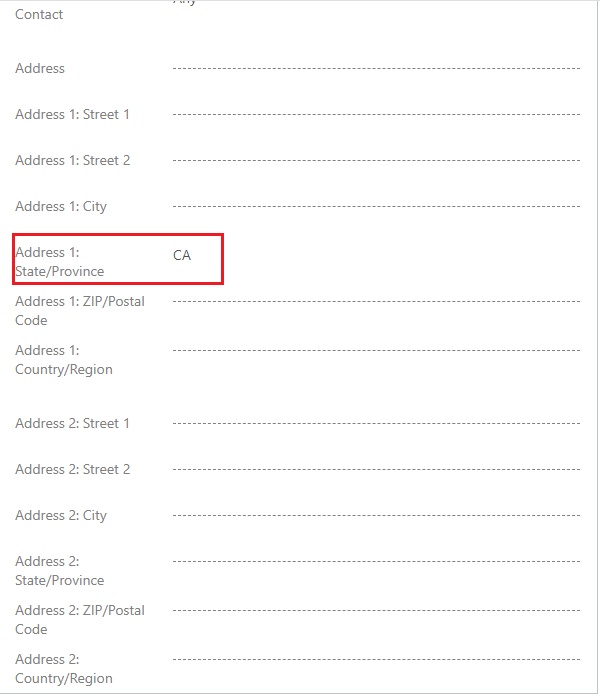
Search Limit Example#
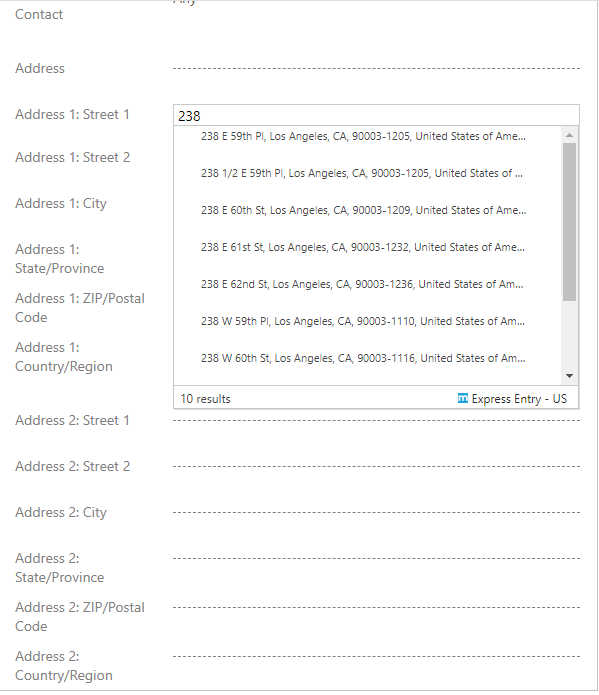
Now type 238 into the Address 1: Street 1 field.
Results will pop up with addresses based on California.
You can narrow down your results more by specifying the city, postal code, and country.
Example#
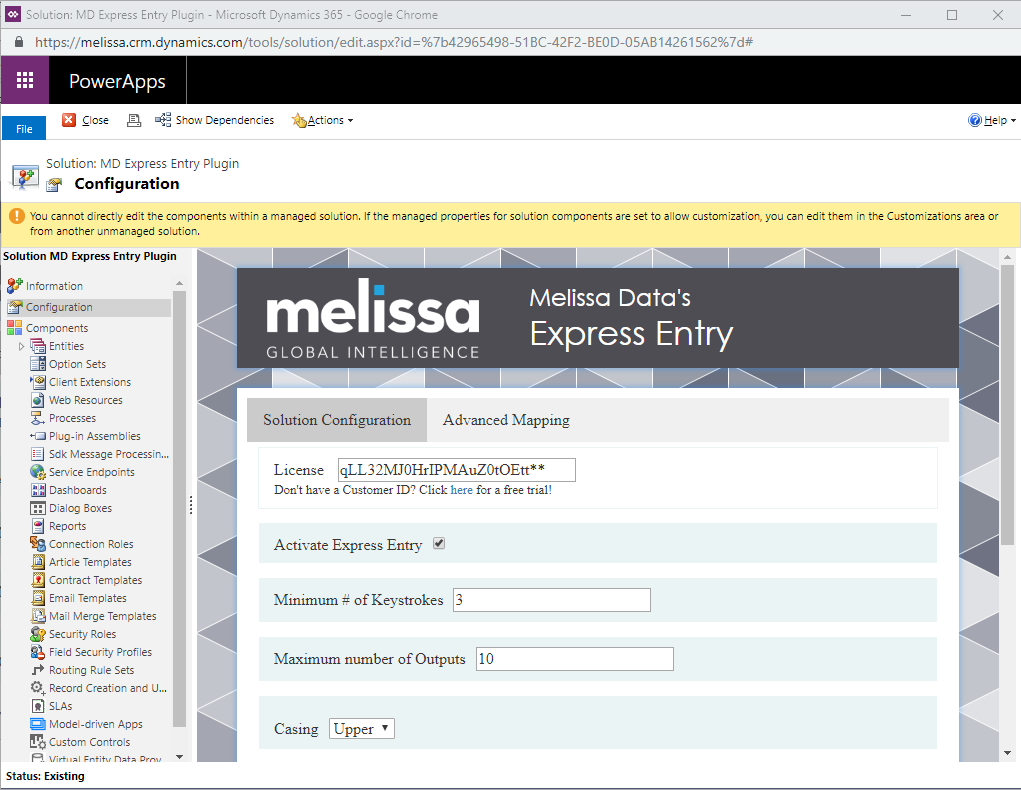
Express Entry Custom Mapping Tutorial#
Custom Mapping Express Entry#
Navigate to the configuration screen. If you need more details on locating the configuration screen, see Configuring Express Entry.
Navigate to Configuration#
Click the Advanced Mapping tab.
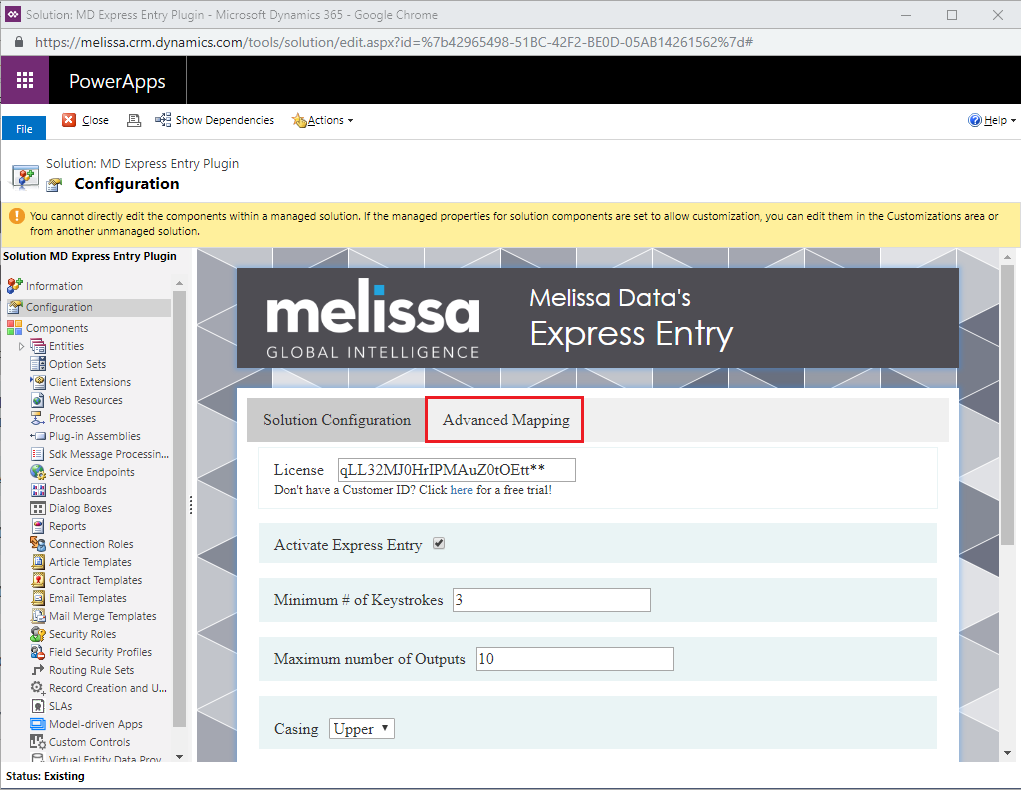
Click Advanced Mapping#
Click the Load Entities button. This queries the Dynamics organization for a full list of the entities that exist within your system and populates the list of attributes that are associated with the entity.
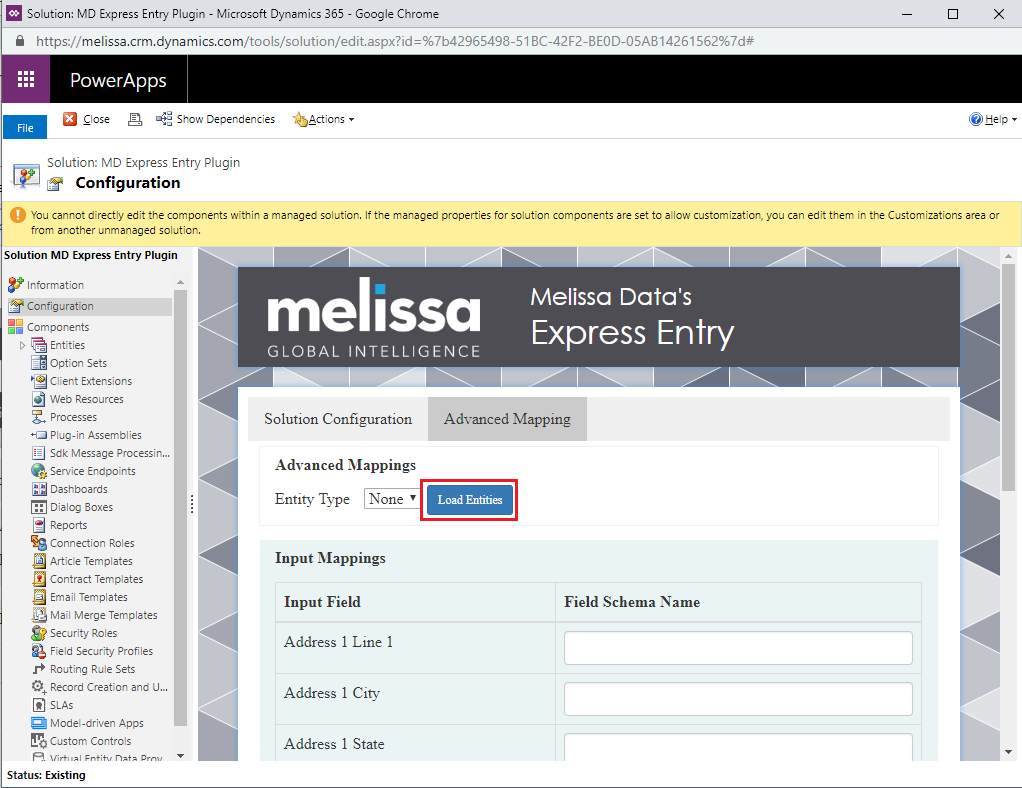
Click Load Entities#
Select an entity from the dropdown list. If a mapping has already been established for a particular entity, the fields should automatically be populated.
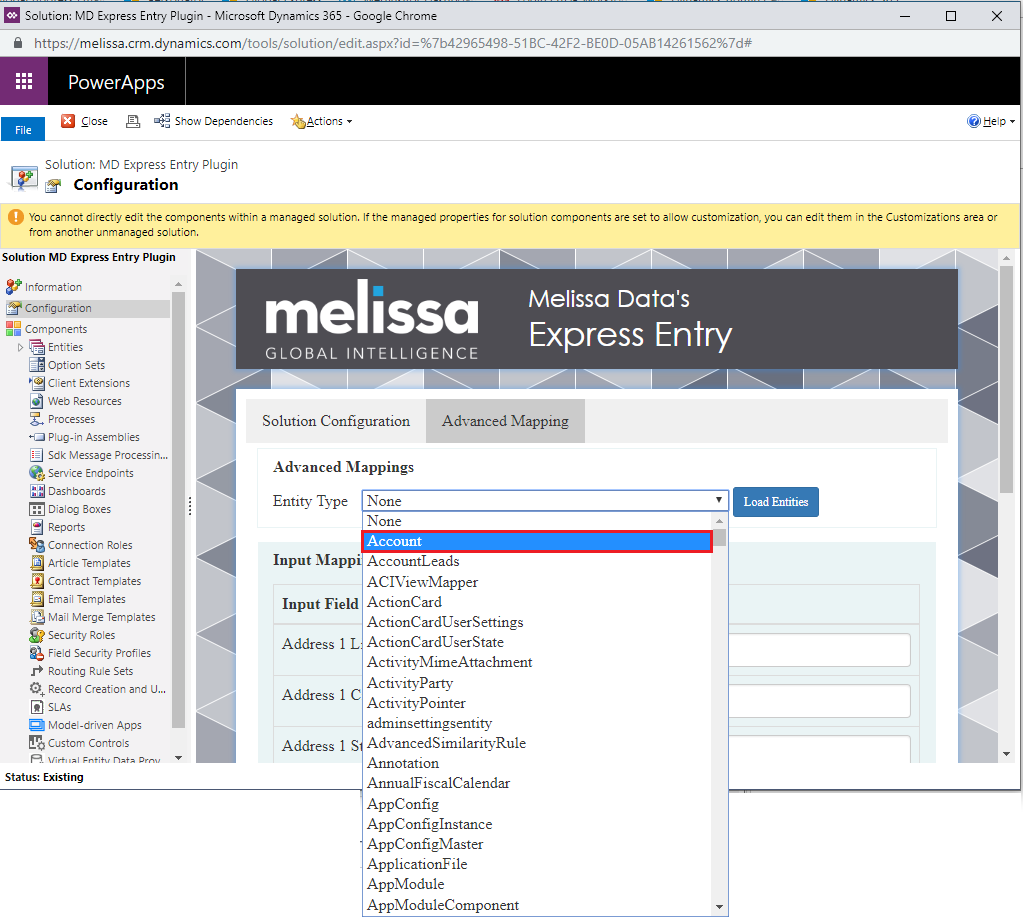
Select Entity#
Type the name of the desired custom or out of box field. In order to assist the field entry process, the field names should be auto-completed with only the correct field names for that entity. The names should be the exact names that are assigned in Dynamics. These names can be viewed in the Fields section for that particular entity.
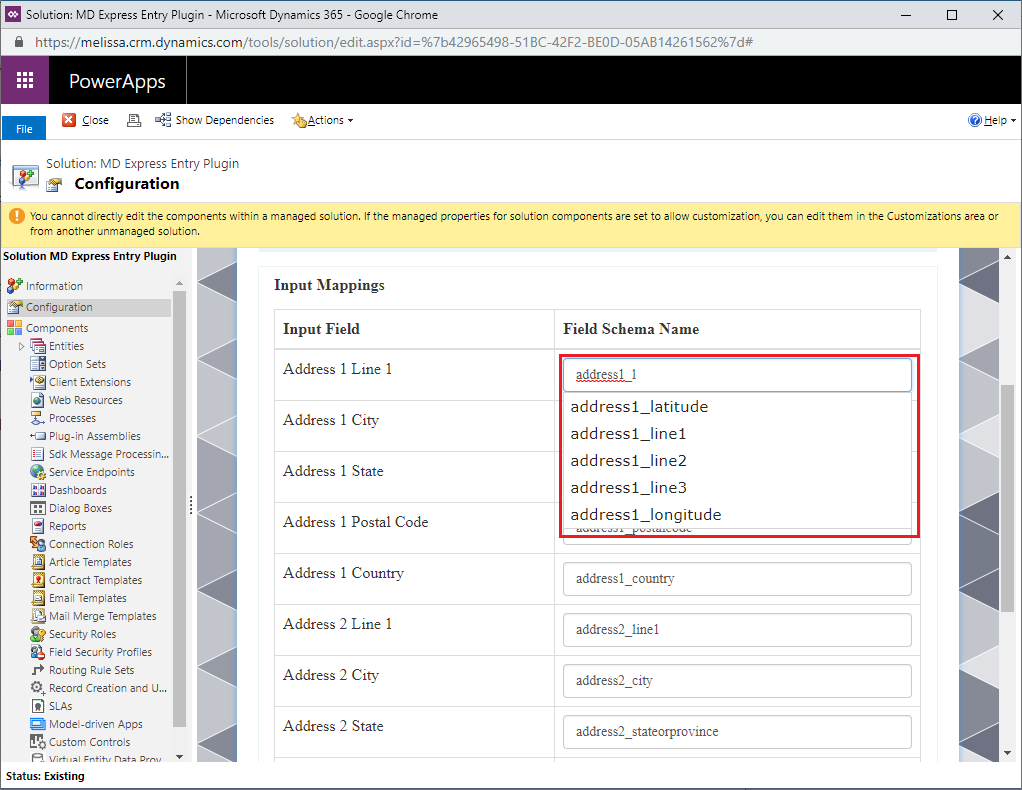
Type Field Name#
After the field names have been filled in, click the Save Mapping button to save your settings.
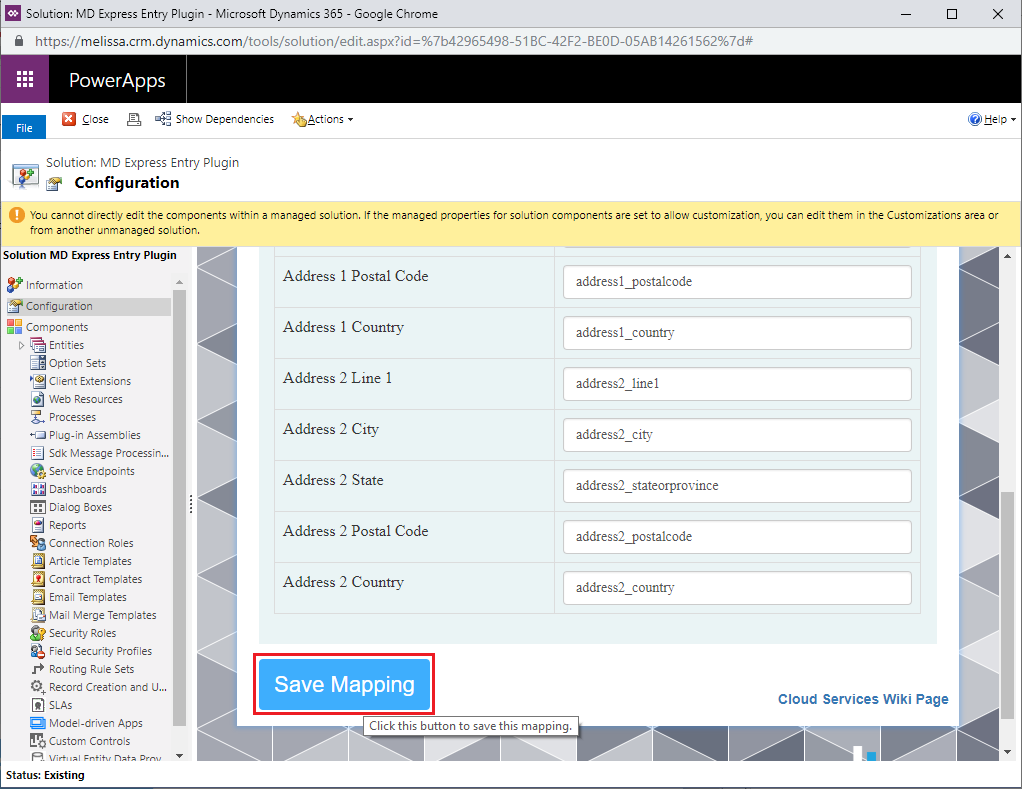
Click Save Mapping#
Adding Express Entry to a Custom Entity#
Navigate to the Forms option for the entity you want to add Express Entry to.
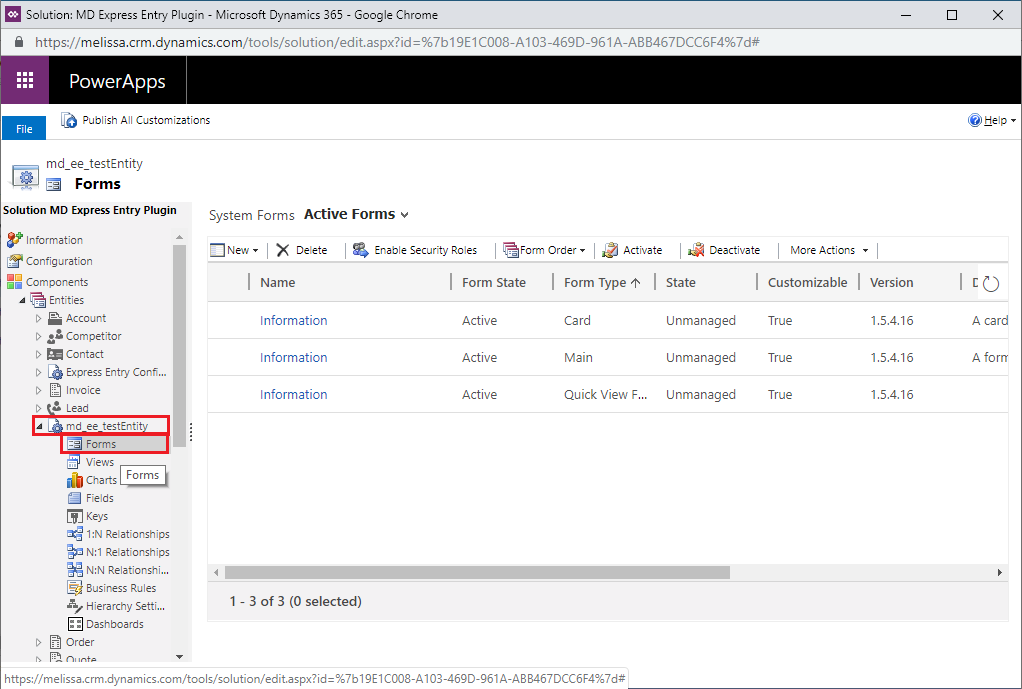
Navigate to entity’s Form#
Select the form with the Main form type.
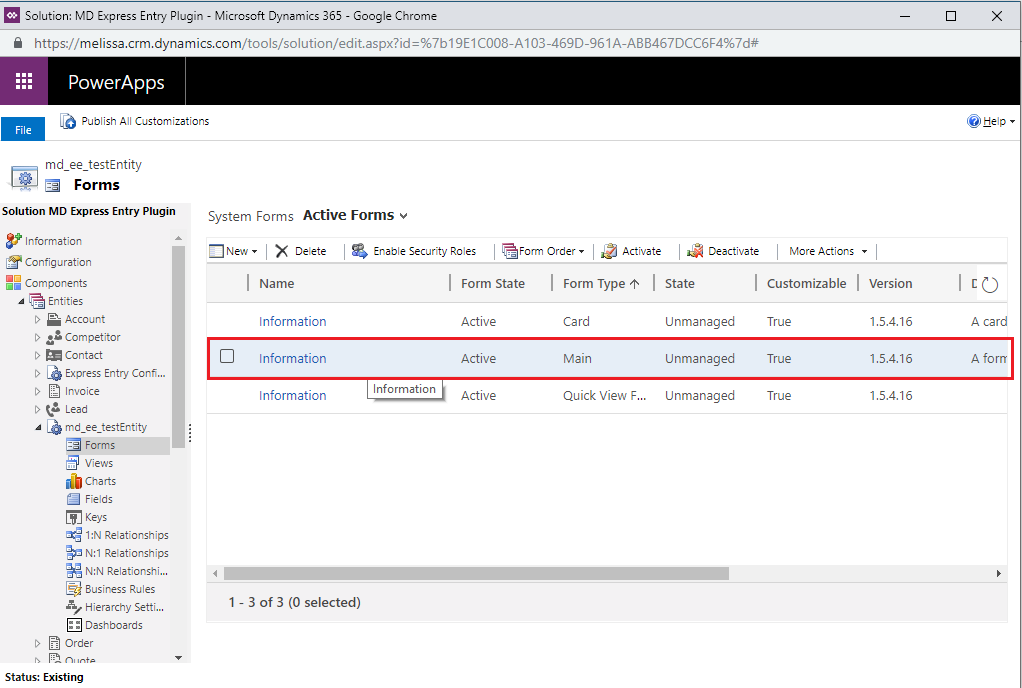
Select Main form#
Click the Form Properties button at the top of the new pop-up.
Click the Add button under Form Libraries.
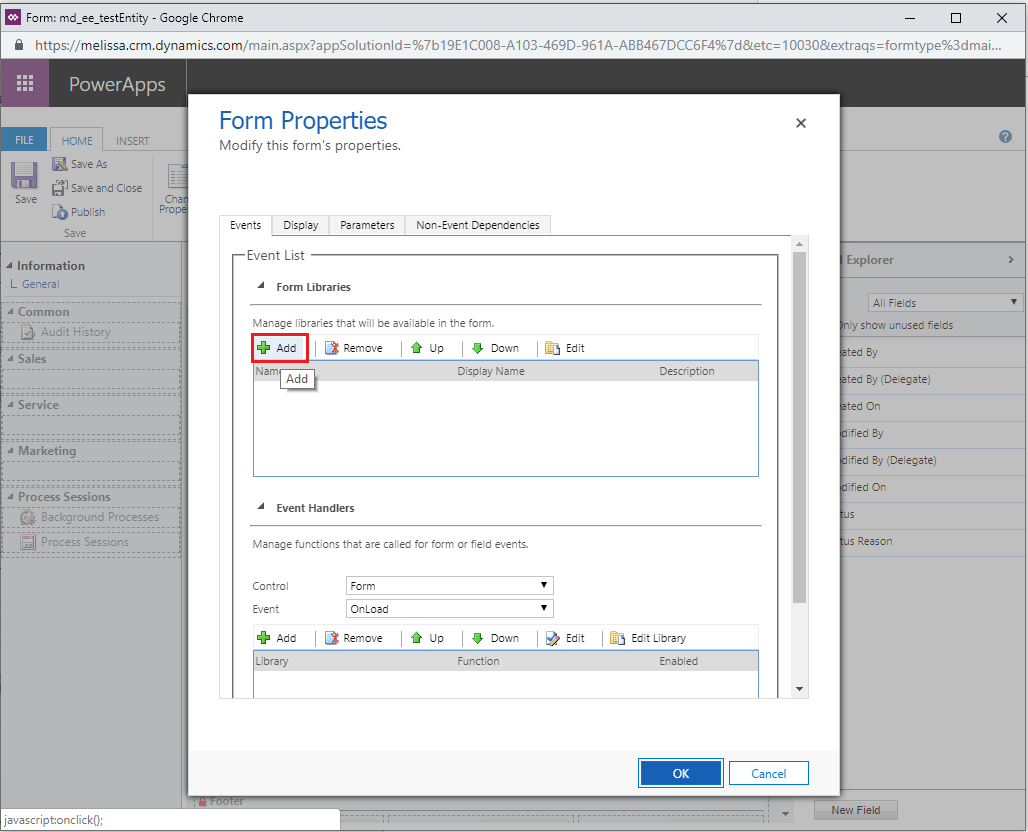
Click Add#
Search for
md_ee_autocomplete. There should be two options available:md_ee_autocomplete1andmd_ee_autocomplete2. Add both of these resources to the form properties. Dynamics requires these resources to be added one at a time.
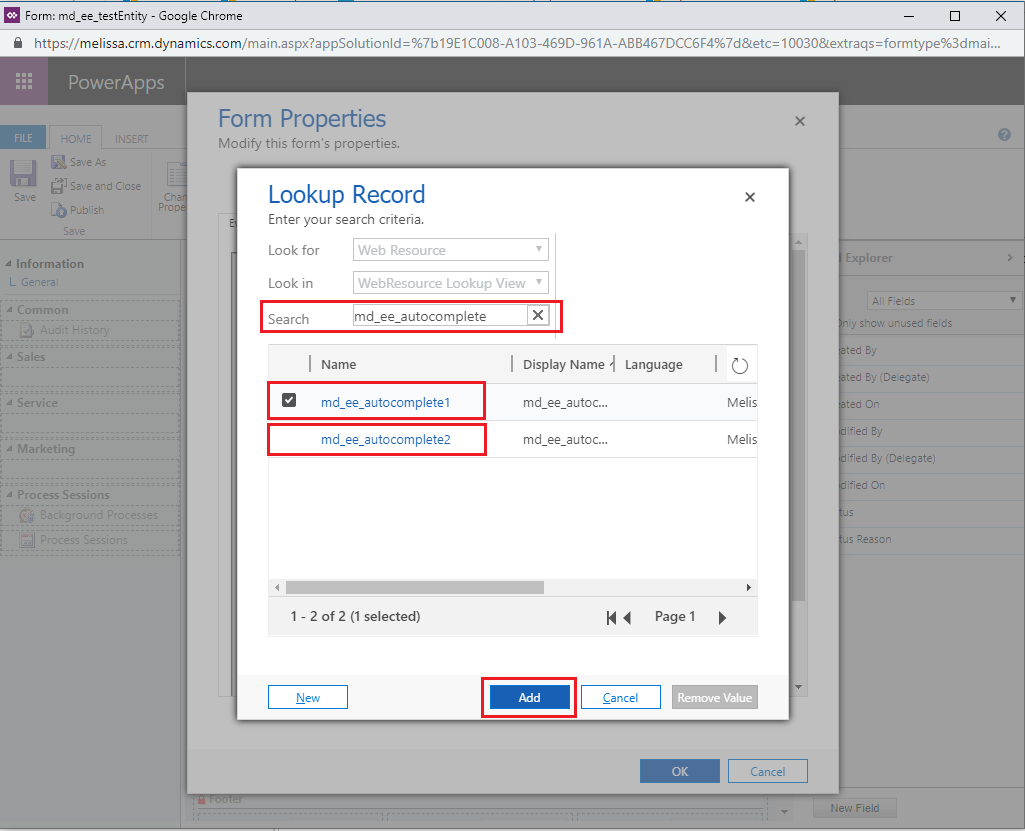
Search for md_ee_autocomplete#
Once the libraries are added, click the Add button under the Event Handlers section of Form Properties.
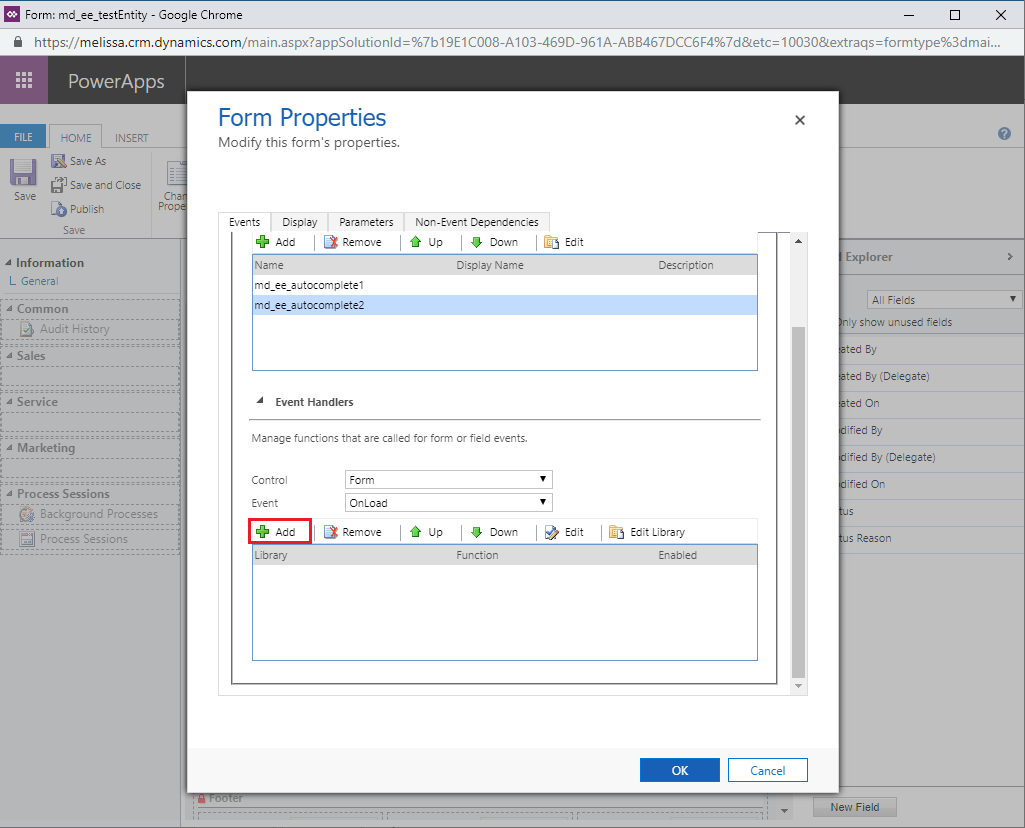
Click Add#
In the Handler Properties window pop-up, add the following functions:
- Library: md_ee_autcomplete1
ExpressEntry
ExpressEntryCity
ExpressEntryZip
ExpressEntryCountry
- Library: md_ee_autocomplete2
ExpressEntry2
ExpressEntryCity2
ExpressEntryZip2
ExpressEntryCountry2
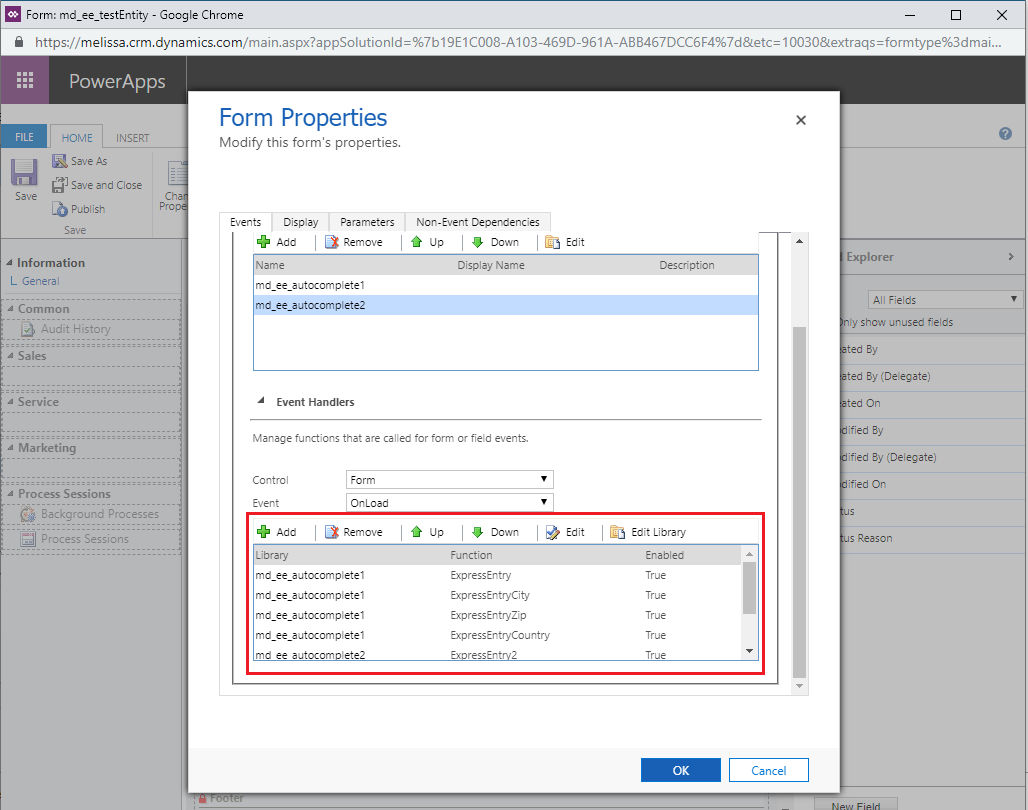
Event Handler List#
Save then Publish these customizations.

Auto-complete#
Make sure the entity has the correct mappings and Express Entry should be working on the new entity.
Global Verify Tutorial#
Note: In order to use the Global Verify service, you must first configure the License Key and options.
This tutorial will teach you how to use the Global Verify solution in Microsoft Dynamics CRM in the Contact entity.
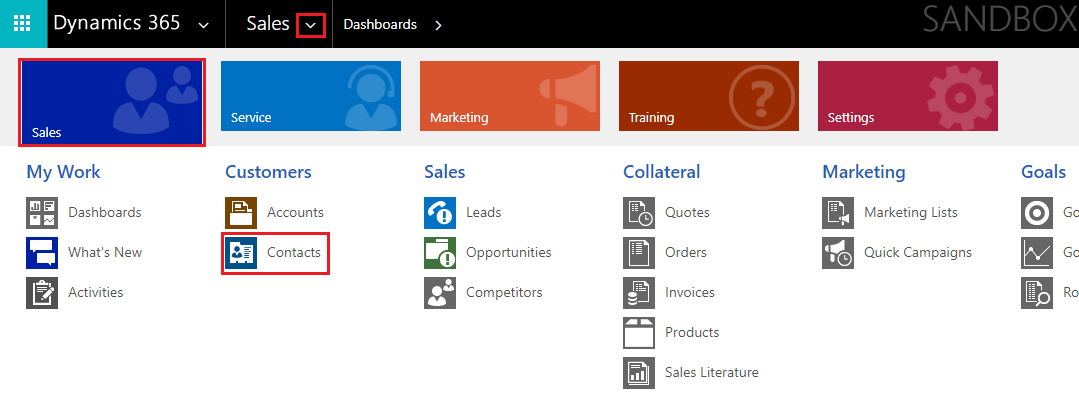
Begin by navigating to the Contacts section. To do this, click the down arrow next to Sales, then click Sales, and then click Contacts under the Customers category.
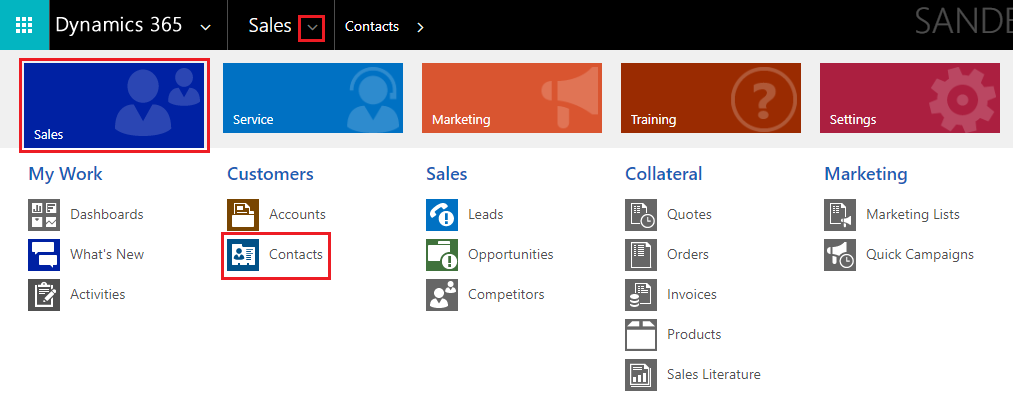
Click Contacts#
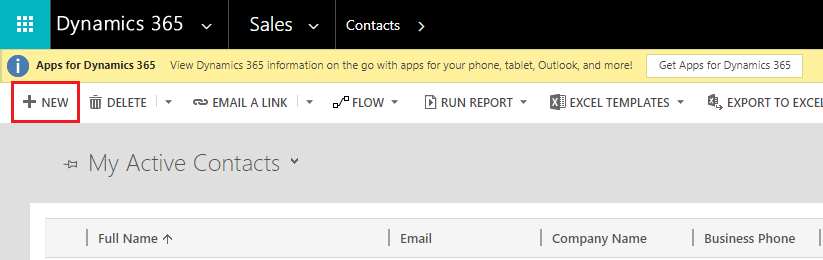
Click New to create a new Contact.
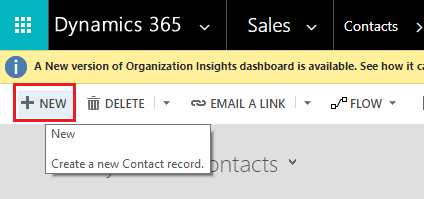
Click New#
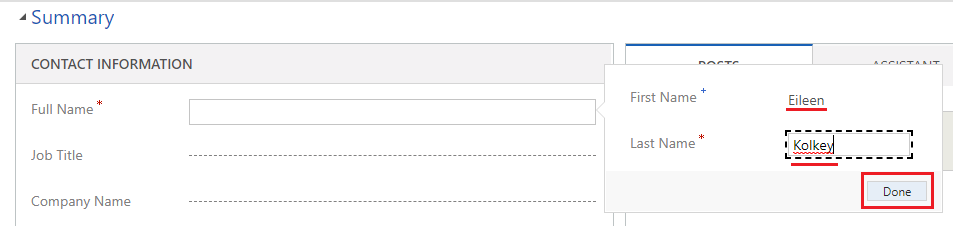
Enter the necessary input information. This includes Full Name, Email, Mobile Phone, and Address.

Enter input information#
Click the Global Verify button.
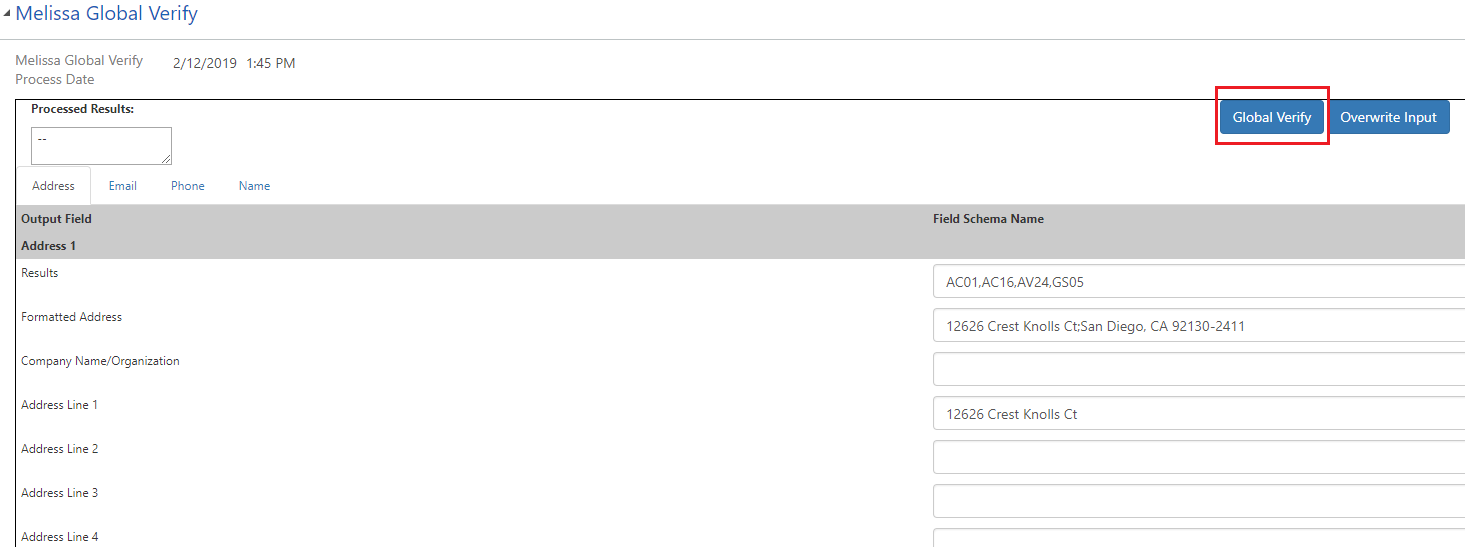
Click the Global Verify button#
Ensure the Process Date field reflects the current date and time.
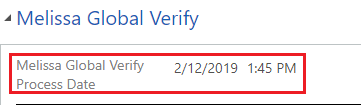
Verify Process Date#
Now you can review the processed input details.
Melissa Global Address Tab:
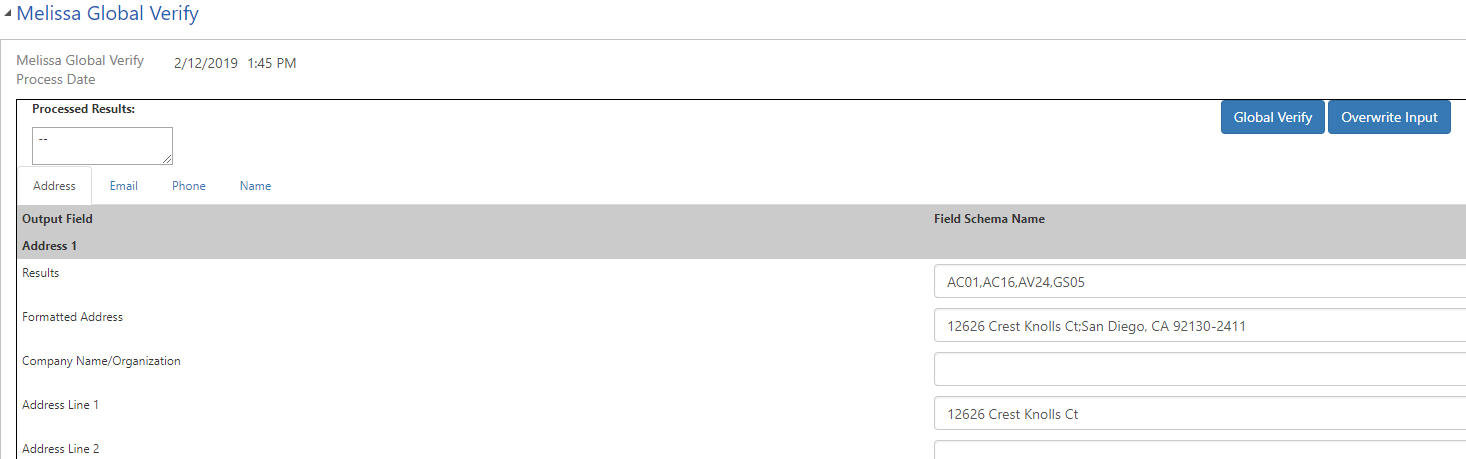
Global Address Tab#
Melissa Global Email Tab:
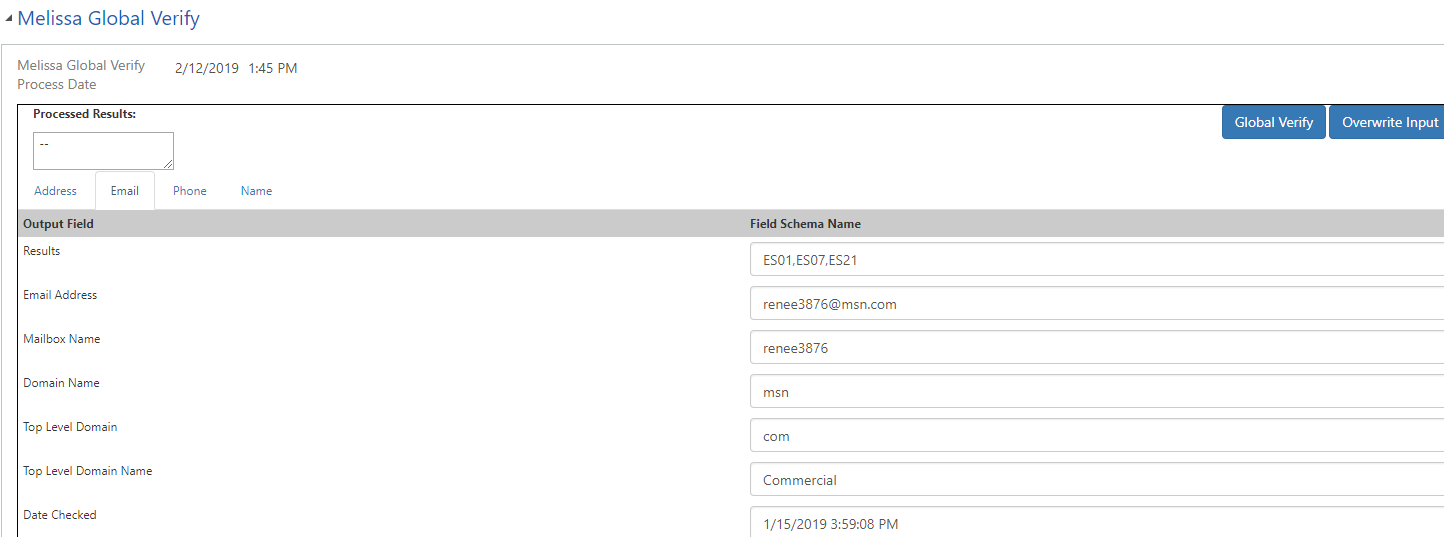
Global Email Tab#
Melissa Global Phone Tab:
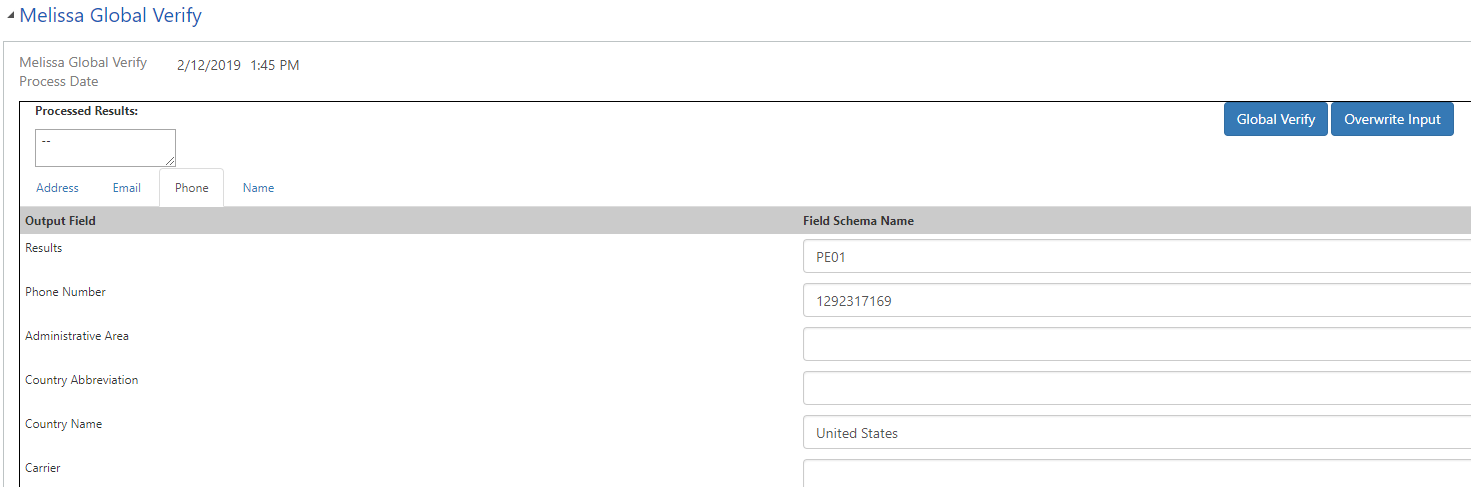
Global Phone Tab#
Melissa Global Name Tab:
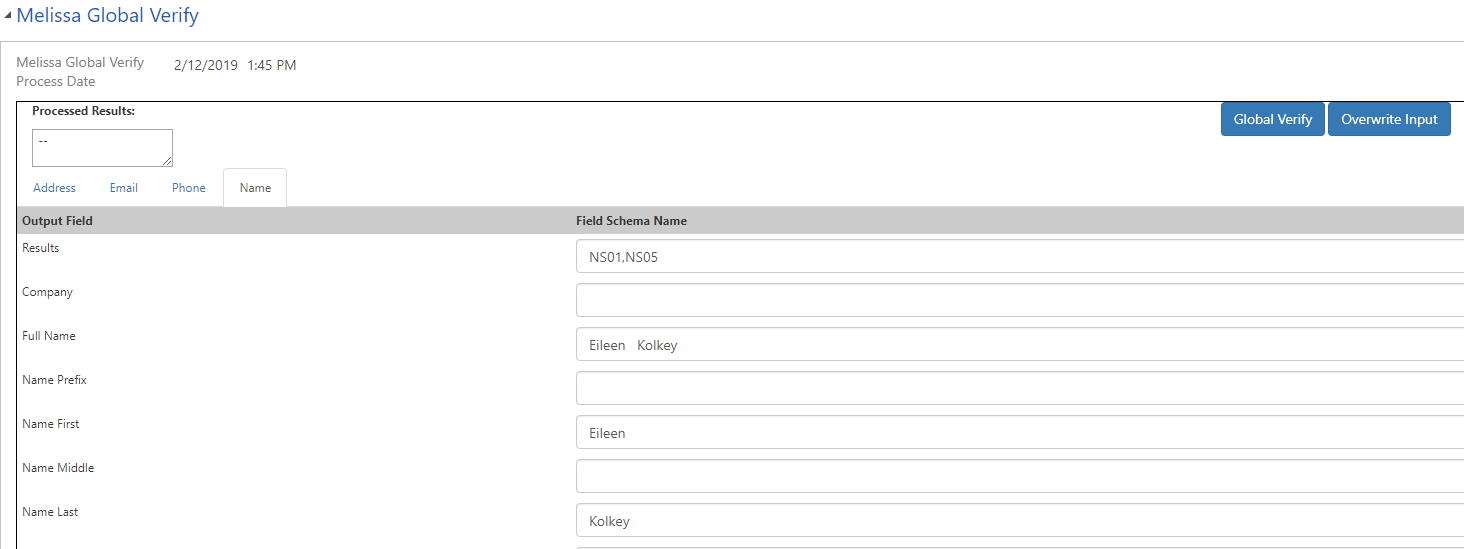
Global Name Tab#
Note: If a second address was entered in the input fields above, it would be processed below in a Melissa Data Address 2 Details section.
Click Overwrite Input button to view possible input value replacements. Select which fields you want to overwrite, and click Confirm to finalize the changes.
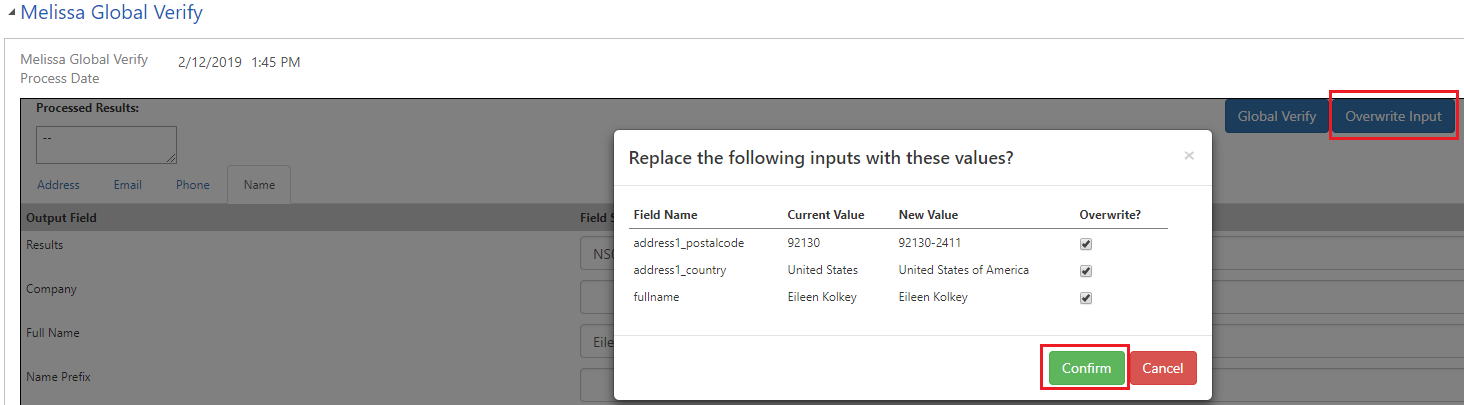
Click Overwrite Input then Confirm#
Personator Tutorial#
Note: In order to use the Personator service, you must first configure the License Key and options.
This tutorial will teach you how to use the Personator service in Microsoft Dynamics CRM in the Contact entity.
Begin by navigating to Contacts. To do this, click Sales along the top, then click Sales in the menu that drops down. Then click Contacts under the Customers category.
Click Contacts#
Click New to create a new Contact.
Click New to create a new Contact#
Enter a first name and last name into the appropriate fields, then click Done.
Enter information and click Done#
Enter the input information. Address will be entered in this example. Click Done when you finish.
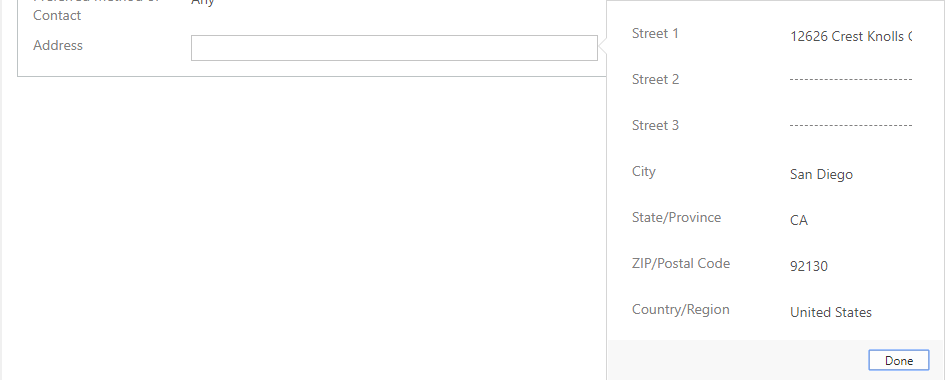
Enter input information#
Click the Personator button.

Click Personator button#
Verify that the Process Date field reflects the current date and time.

Verify Process Date#
The Results field will show a list of result codes for your records. This is the first place you will look to determine what has happened with your data.
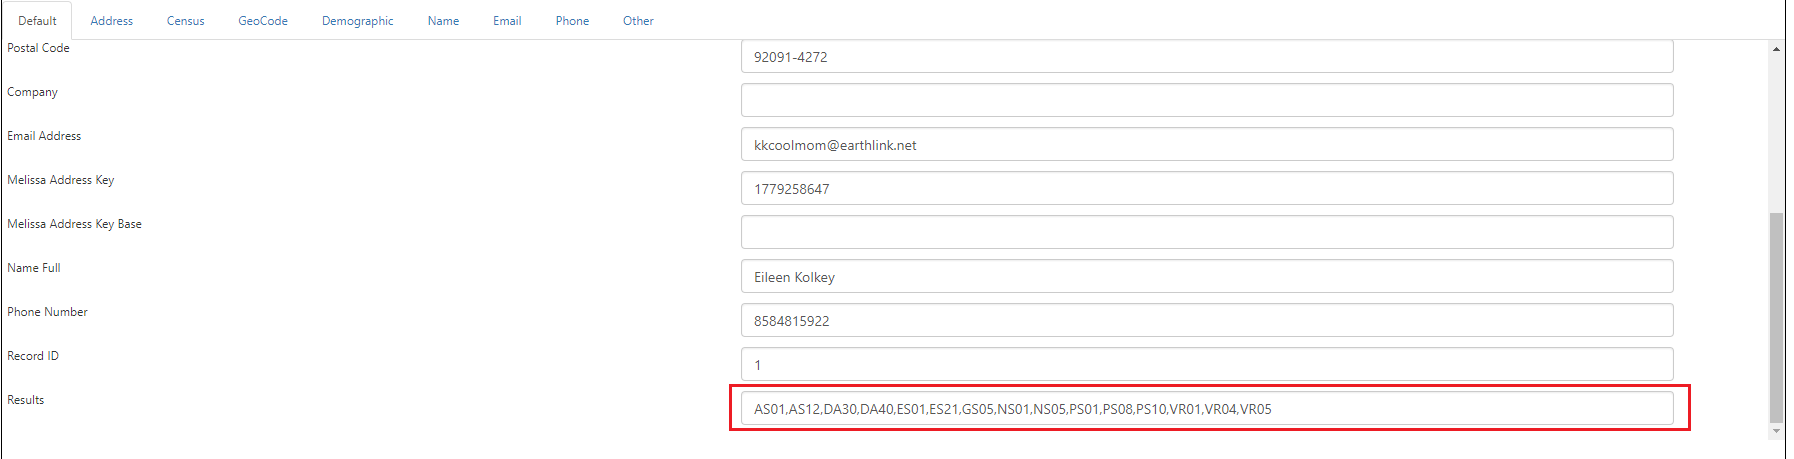
View Results#
To see more field details, click any of the output tabs to see their respective fields.
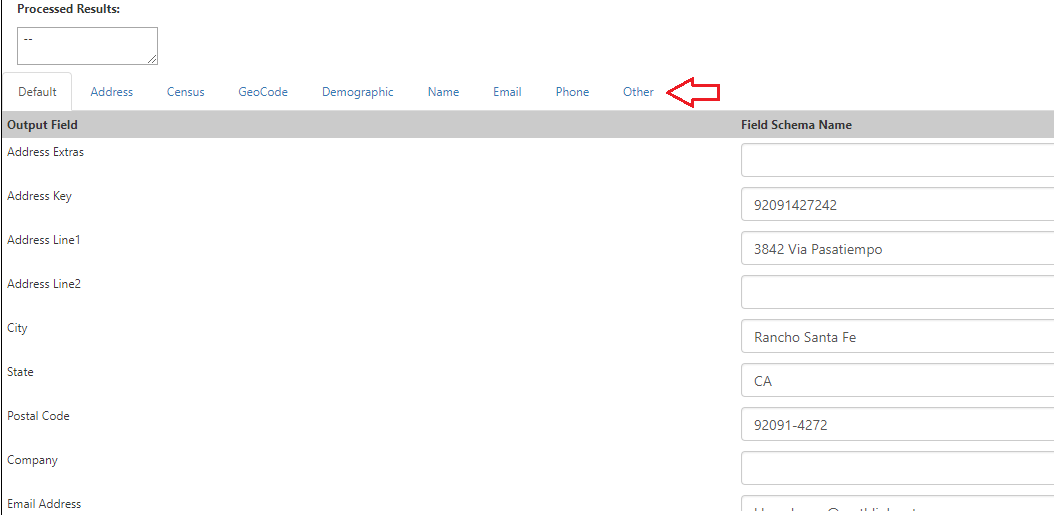
Select tabs to view output#
Click Overwrite Input button to view possible input value replacements. Select which fields you want to overwrite, and click Confirm to finalize the changes.
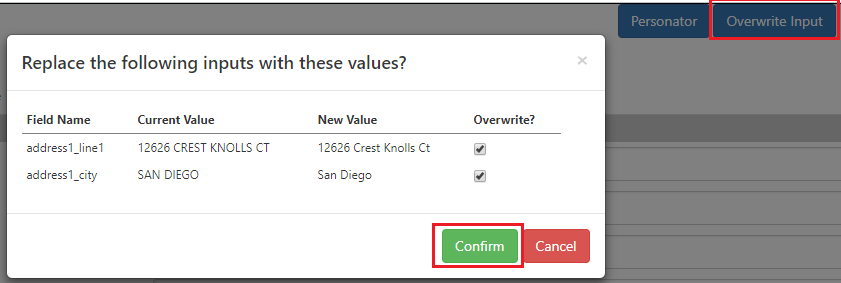
Select what input to overwrite#